

Step-by-Step Guide for Creating a Windows VM on Azure and Installing Windows Server on it
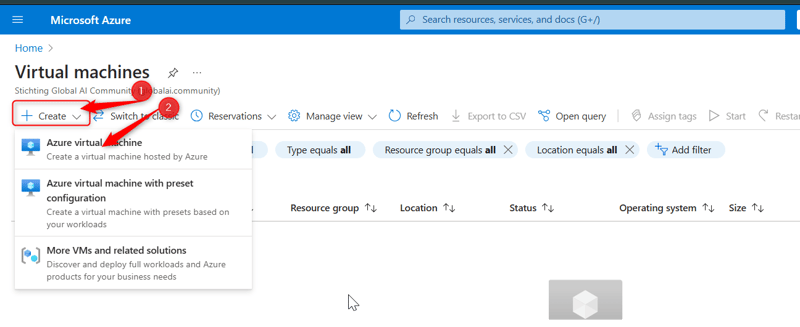
Step 1: Create a new virtual machine (VM).
- Go to the search bar and type Virtual Machine.
- Click the Create button to start the virtual machine creation process.
Choose Create a virtual machine hosted by Azure.
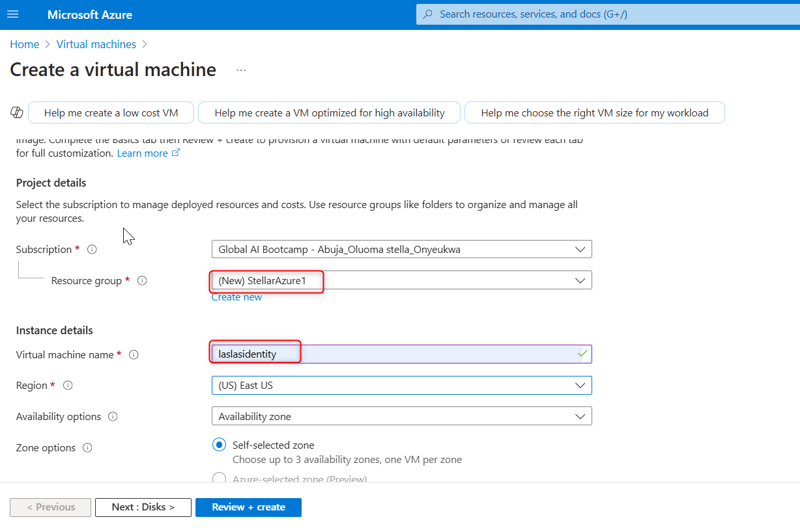
Select the appropriate subscription and create a resource group by clicking the Create resource group button. Give both the resource group and the VM a name.
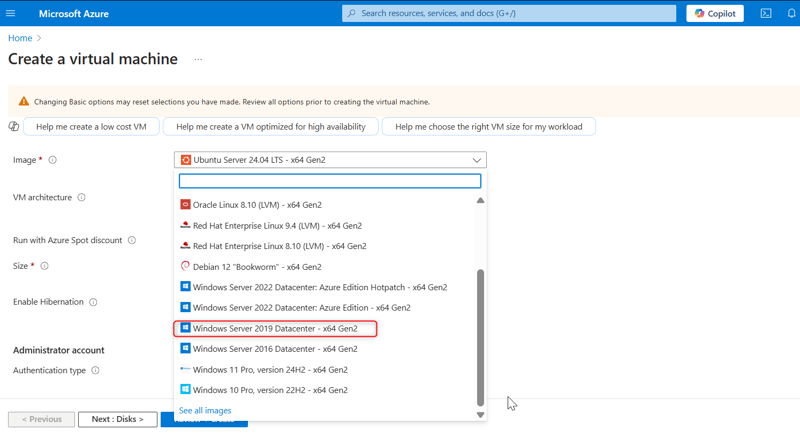
Step 2: Configure the Virtual machine (VM)
- Provide other information about your virtual machine, such as the operating system (Windows Server Datacenter-x64 G2), size, and other configuration settings. Leave other options as default.
-
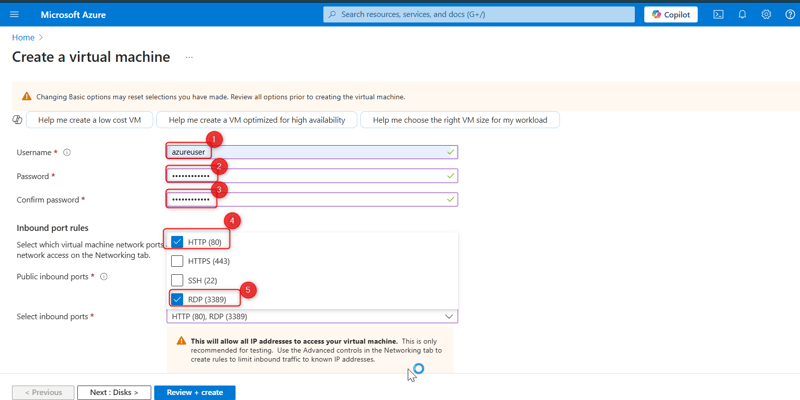
Create an Administrator Account. Use
Azureuserfor the username andpassword123for the password. -
Select Inbound Port Rules. Select RDP for a Windows VM. This allows IP addresses to connect to the VM. Also select HTTP, which would help connect your virtual machine to the web.
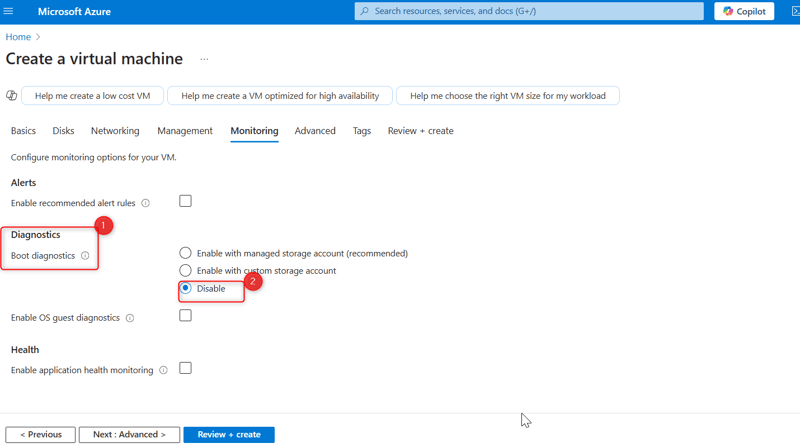
- Click Next until you reach the Boot Diagnostics in the Monitoring tab, then click on Disable.
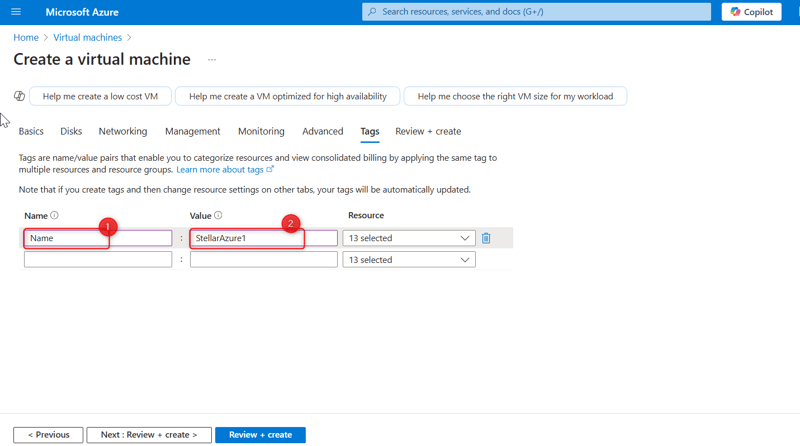
- Click Next to the tags tab and then give the VM a tag name, then click Review + Create.
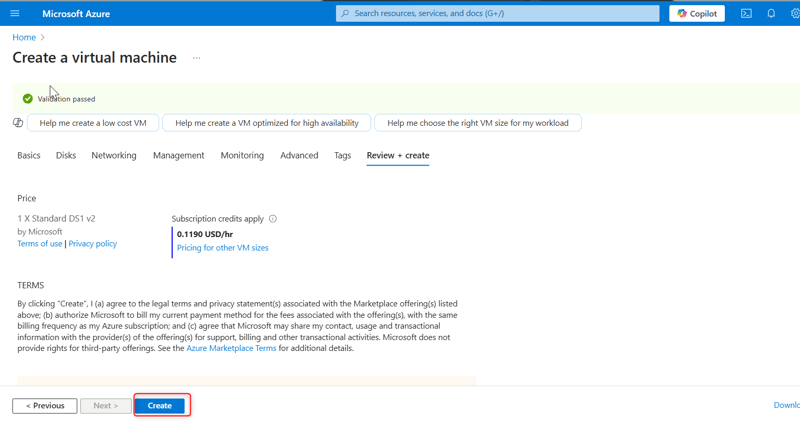
- Click on the Create button. If the validation passes, the deployment will proceed. If not, note any recommendations, fix them, and try again. Deployment might take 3-5 minutes.
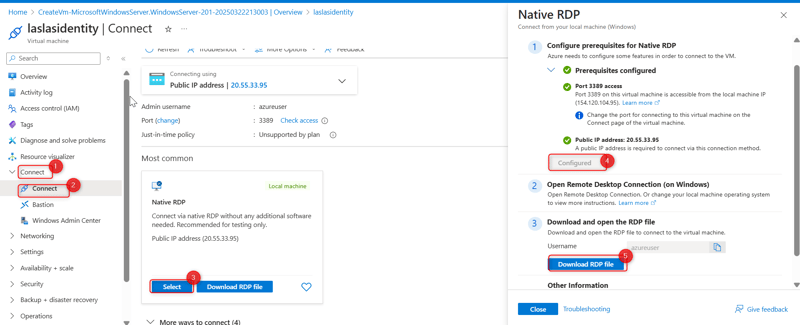
Step 3: Access the Windows Virtual machine
-
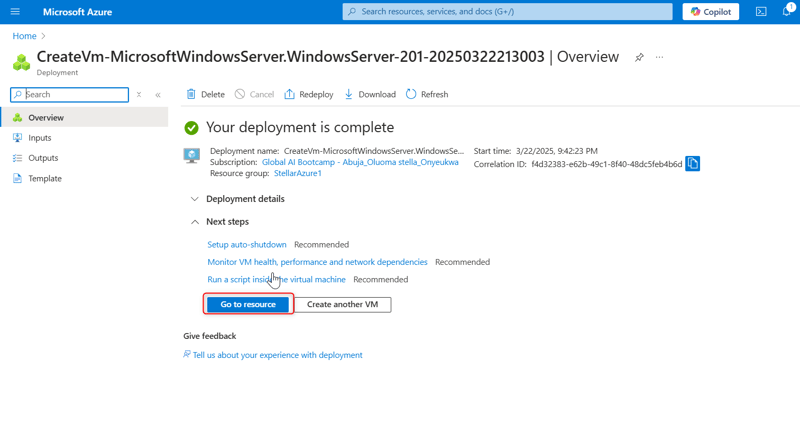
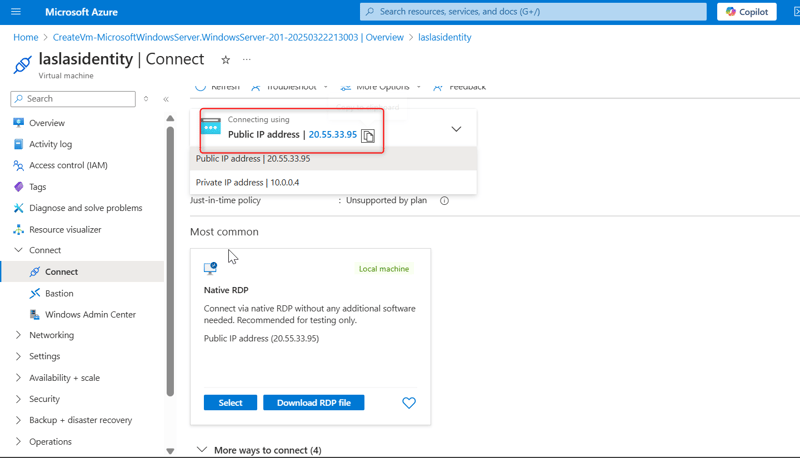
Once the virtual machine is deployed, click on the Connect button in the Overview of the virtual machine blade in the Azure portal.
-
Click Native RDP, select, and wait for the configured sign to be displayed on the right-hand side. Download the RDP file.
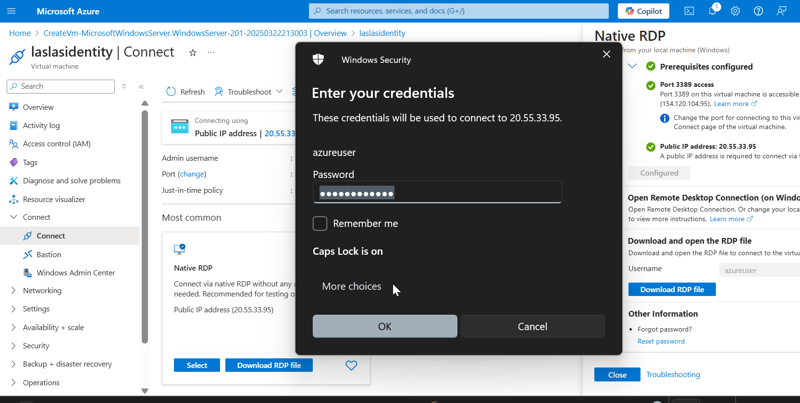
- Open the RDP file from your local computer and click on Connect. Enter the Admin Details created during the VM setup.
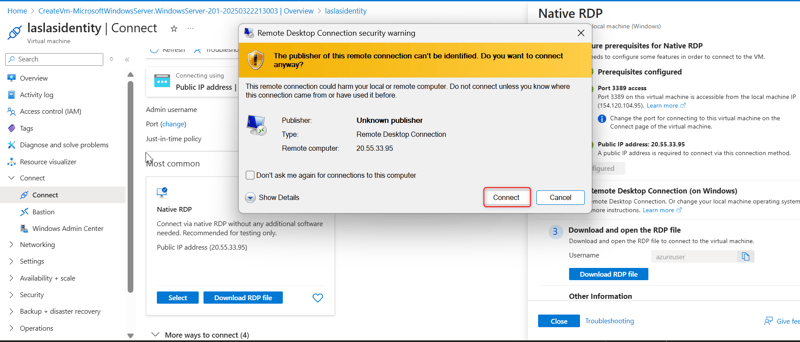
- Follow the prompt and click Continue. Use the username and password created for the admin section.
-
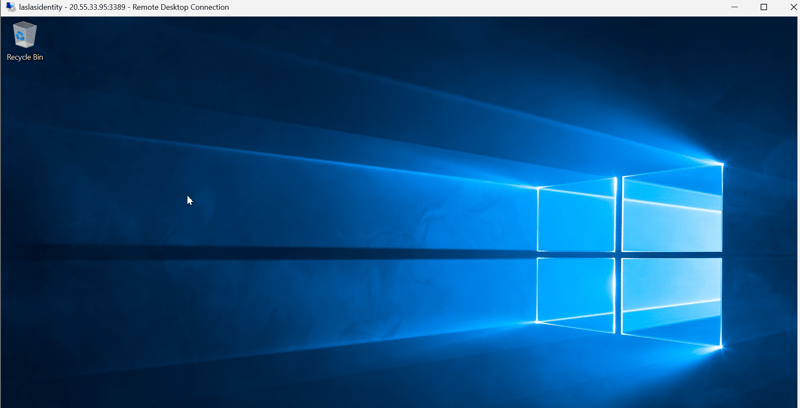
Once the connection is successful, start using your virtual machine!
Step 4: Install Additional Windows Server Roles (IIS) -
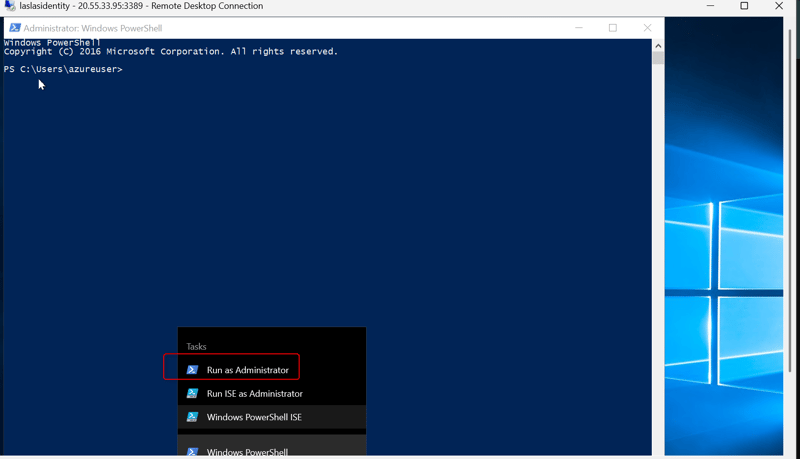
Click on the Start menu.
-
Type PowerShell and open Windows PowerShell as an administrator (right-click and select Run as administrator).
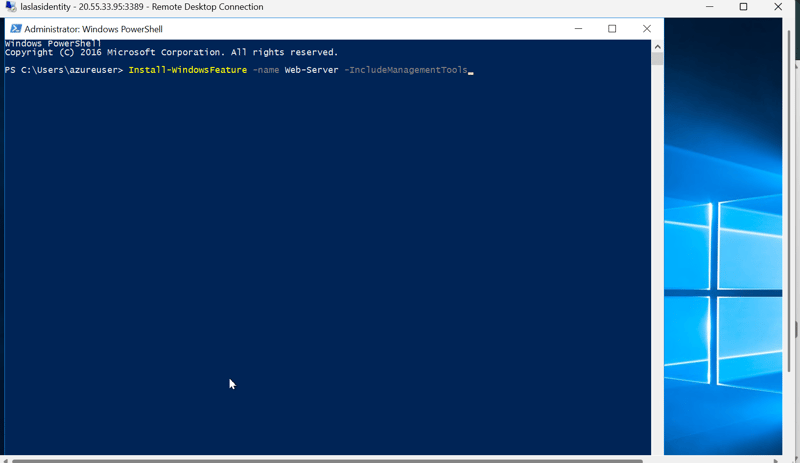
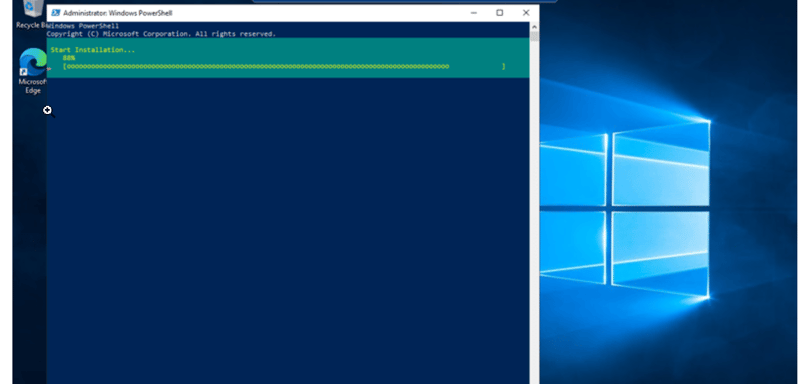
- Run the following command to install the IIS role and management tools:
Install-WindowsFeature -name Web-Server -IncludeManagementTools
-
If you need specific role services, you can specify them using their feature names.
-
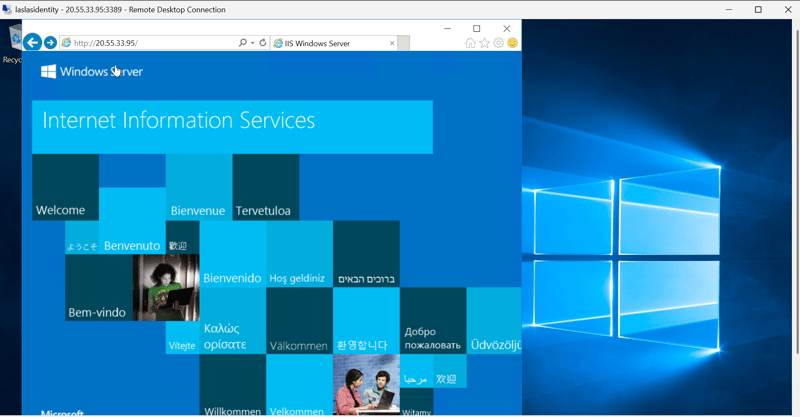
You can verify that IIS has been installed by opening a web browser and navigating to http://localhost. You should see the default IIS welcome page.
-
Or just paste the IP address of the VM in a browser and verify that you installed the webserver.
- Following these guidelines will have you installed Windows Server and effectively built a Windows Virtual Machine on Azure.
Back to top