

This is a tutorial on how I turned delightful Christina Ricci into an anime-style character for my entry Kawaii!.
STEP 1
The first thing to do is to find a high-res image. The larger, the better. I like mine to be over 2272×1704.
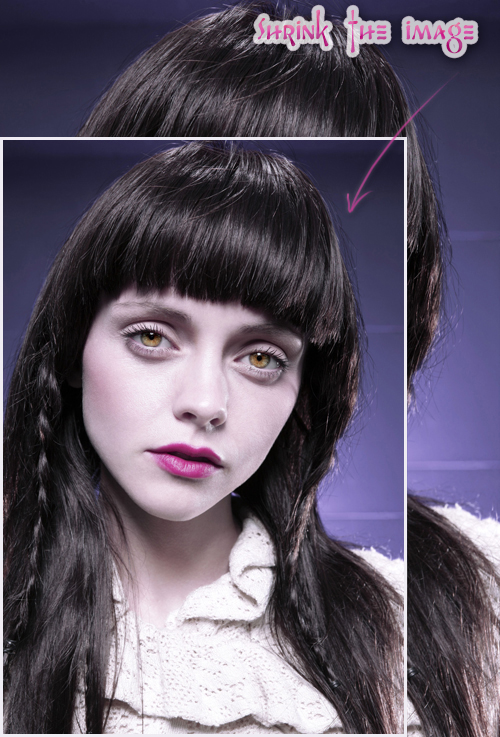
STEP 2
Duplicate your source, and shrink it, that’ll be the base for the image. Do not discard the original as we’ll be cutting out bits and pieces out of it in the next steps.
STEP 3
Now cut the eyes from the original and place them on the smaller image, adjust the positioning. I usually drop the opacity of the eyes layer and join the inner eye corners together. Blend the eyes well. I use a speckled brush with opacity set to pressure, then apply a lower value Gaussian Blur. It can take a lot of time, so you’d better stock up on patience.

Looks like I lost a part of her eyebrow due to the size difference. So I’ll just copy that part from the original, scale it down and blend it, change the layer blending mode to Darken.

STEP 4
Next, duplicate the nose area and shrink it. Place this layer under the eyes layer and adjust the positioning – I usually use the philtrum for guides. Because of the new size, the nose has to be rotated clockwise just a little (for this particular image), which caused the nostrils to look a bit uneven. I used Liquify to correct that.

STEP 5
Time to adjust the chin.
First, duplicate the lower part of the face with the neck and move it up.
Second, duplicate the base image (from Step 2) and use Liquify on the cheekbones to fit the layer with the chin.
Third, duplicate the mouth area, scale it down and blend all the layers together.

STEP 6
Now, her face looks too wide, we need to address that.
Make a stamp layer (Shift+Ctrl+Alt+E).
Duplicate the left side of her face and chin and move it to the right and slightly up. Blend.

And now we have to fix the neck. Again, duplicate the affected area from the stamp layer, use Distort to match the edges. Blend.

Finally, make another stamp layer, then soften the angles of the chin, and make the mouth a little more pouty with Liquify.

STEP 7
Now I don’t really like those deep shadows under her eyes and on the side of the nose, so I’m going to lighten them with Levels, Lighten blending mode. I use a tiny brush (2-3px) to carefully lighten the pixels while zoomed in extremely.

STEP 8
Next, I want to give her shiny lips.
Create a Curves layer, Screen blending mode, and paint glitter with a scattered brush of your choice, then paint gloss with a plain semi-transparent brush.
Next, duplicate the latest stamp layer, apply lower value Surface Blur, and desaturate the layer. Apply Plastic Wrap (Filters – Artistic). Play with the sliders until wet look is achieved. Change the blending mode of the layer to Vivid Light, reduce the opacity to your liking. Make a Hide All layer mask, and reveal the lips.

STEP 9
Let’s enhance the eyes.
I usually start with Exposure adjustment layer (irises only, naturally, so use a mask), Overlay blending mode. Then I add Color Balance (as a clipping mask), Color blending mode. And to top it off, let’s add some flecks with opaque white brush on a new layer, Overlay mode.

STEP 10
Time to paint some colourful make-up on a new Color layer.

STEP 11
And now we’re going to change hair colour to something more interesting than black.
First, I painted new colour on a Color layer, added colour variations for shadows and highlights.
Looks a bit dull, so I enhanced the highlights with a Levels layer, and to spice it up I added some really bright tiny highlights for that “wispy” look.
To achieve that, I created a new Screen layer, with 75% opacity, then painted with a brush with following settings: spacing 60%, Size Jitter 100%, Pen Pressure. Add Outer Glow to the layer, my settings were: Opacity 75%, colour white, Size 5 px, Spread 0%, Range 31%, Anti-aliased.

STEP 12
I could stop here with metamorphosis, but I thought I’d give her kitty ears.
So I found a suitable source, used a mask to cut the ears out. I don’t bother keeping fur when masking, I just add it later. I won’t go into detail here, I’ll just say that I used a combination of Smudge Tool and painting, both with a hair brush. Check out this hair tutorial which might help for a few tips.
Now, that her ears are nice and fluffy, I need to adjust the colour. Exposure make the ears nice and bright, Color Balance (Normal blending mode) took care of general colouring. I didn’t like the colour of the skin inside the ears, so I used Levels, Screen mode to lighten it up, and make it soft pink. Finally, I painted some colour variations on a separate Color layer with a hair brush.

STEP 13
Accessorizing – YAY! I decided to go with some face and hair decorations. I used a bunch of rhinestones for the face and plastic flowers for the hair. Of course, they need some shading, slightly increased Exposure, and glow on a separate layer. I also added a little colour to her eyebrows and eyelashes to match the hair (Color layer). And, of course, I couldn’t resist the urge to sprinkle some glitter around the eyes and on the lips.

STEP 14
Almost done. Some final tweaks left.
Use Levels to darken her right human ear, so it’s not visible.
Her left eyebrow has a weird angular shadow closer to the nose bridge, so I used Levels and a tiny (about 2 px) brush, pressure opacity, to lighten the area and fix that.
And shrink her left shoulder to make the body look much smaller.

STEP 15
Finally, I want to enhance her eyes, lips and hair. Make a stamp layer, then go to Filter – Other – High Pass, choose a low value, just when you can see fine embossed lines. Turn the High Pass layer to Vivid Light, decrease opacity to about 75%. Add mask to hide all, paint to reveal the eyes and lips, sparingly reveal some hair.
All done!

Photoshop tutorial by NilliNeuf originally posted on Worth1000.
Looking for more tutorials? Try this clown one or visit blog.designcrowd.com/tag/tutorial for more helpful hints and tips to boost your designer skills.
Looking for logo design? Check out BrandCrowd’s anime logo design maker!

Looking to earn from your graphic design skills?
Check out the design jobs board and start earning today!
Written by DesignCrowd on Tuesday, April 11, 2017
DesignCrowd is an online marketplace providing logo, website, print and graphic design services by providing access to freelance graphic designers and design studios around the world.