

Firstly when chopping for a specific theme such as “werewolves”, “vampires” etc. I cannot stress the importance of doing a bit of research first.
After I had an entry that did not do so well, it made me determined to put my heart and soul into my next entry. I thought I just have to try create a convincing werewolf entry so my research began…
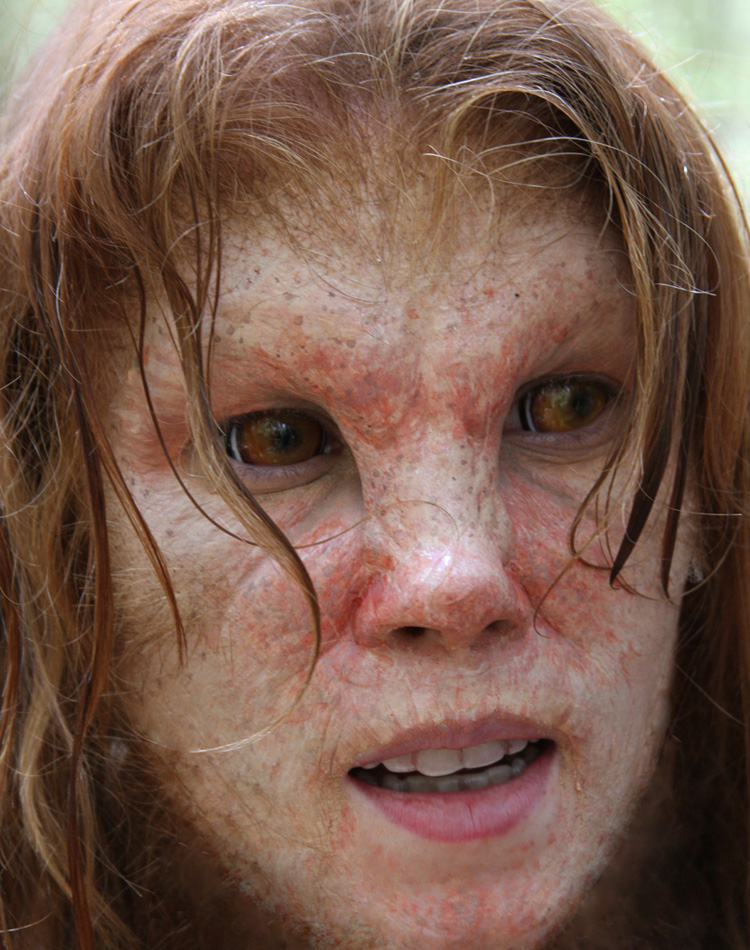
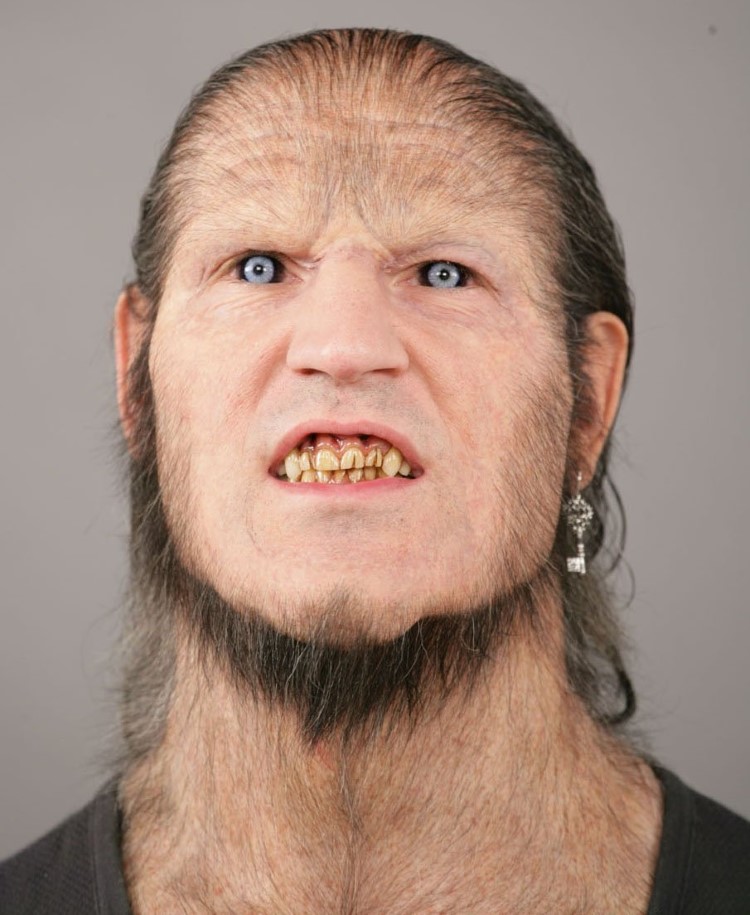
These four pictures below were what inspired me to create the entry:
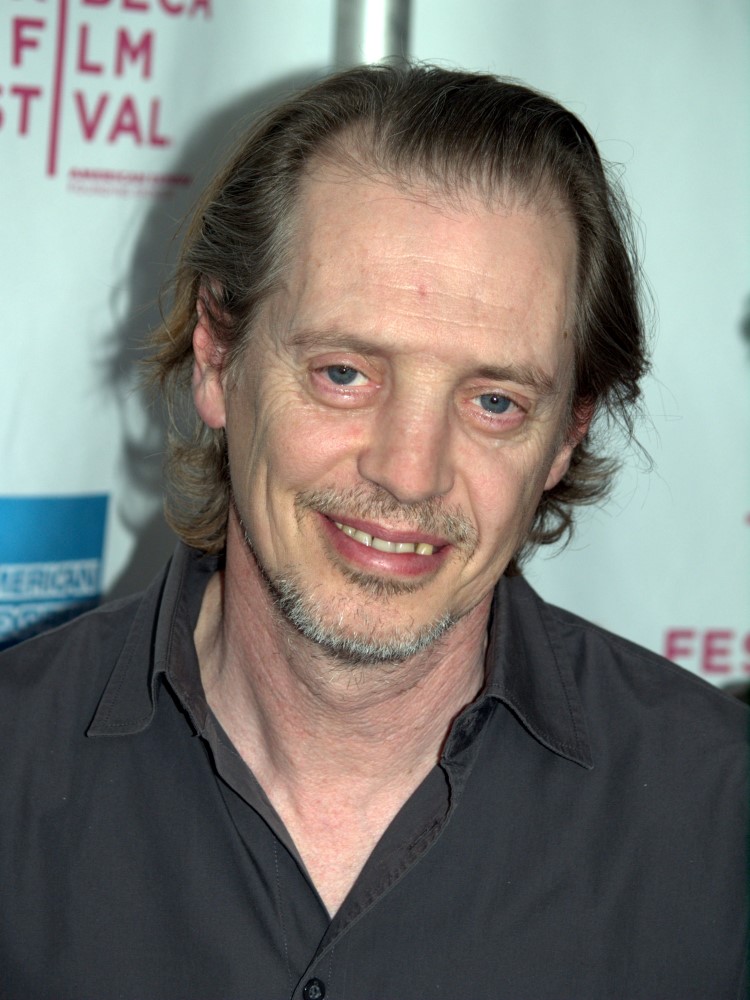
Secondly, be original! While Obama, Mr Bean & Angelina Jolie are not cliche, try something new. There are plenty of high res sources of celebrities out there that have never been used and with the right choice it can help make a huge impact on the originality.
Here were just some of my source considerations (all found on Google, specifying “large images” and “face”)
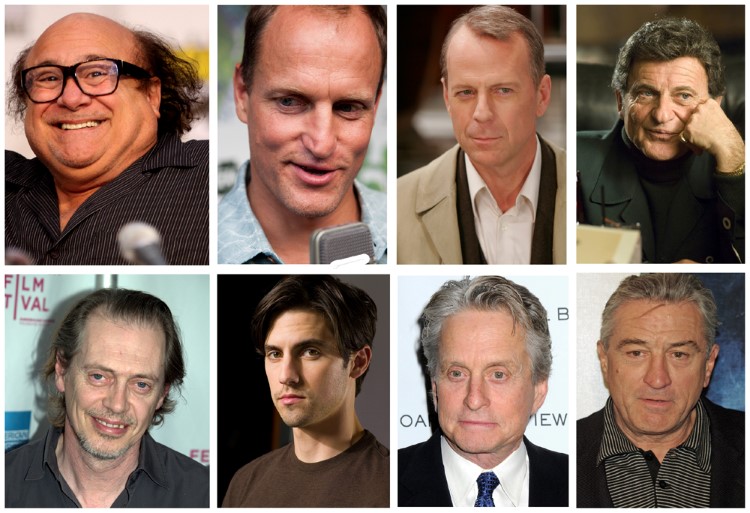
Ok maybe not Devito, LOL.
And thirdly, get a second pair of eyes…I can’t thank my critiquer enough! You can bet your bottom dollar that even if you have been staring at the same entry for the last few hours you are bound to have missed something and it’s always good to get a second opinion on something.
Ok so the image that really inspired me and got me thinking was this one:
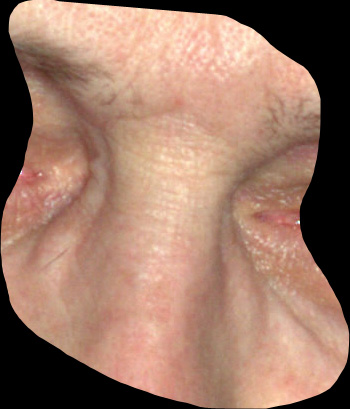
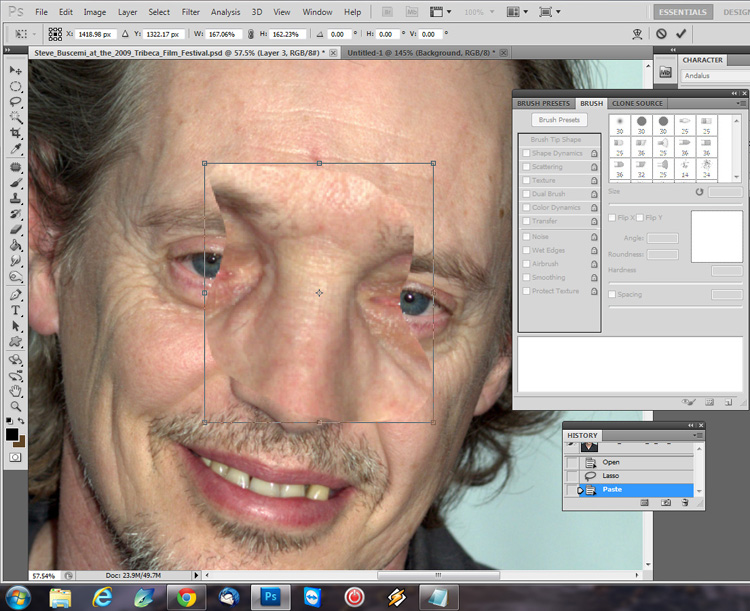
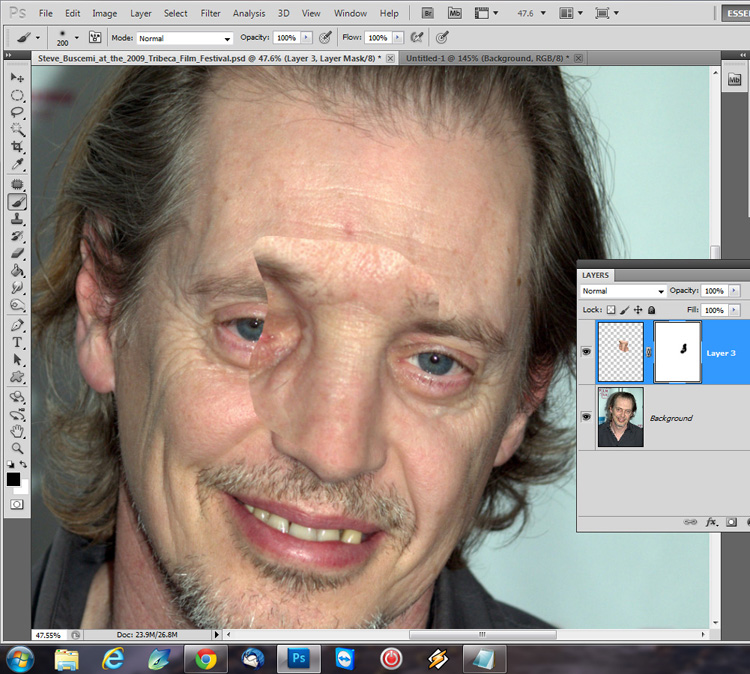
The wide nose bridge is a great werewolf characterstic I’m sure you’ll agree. To recreate this effect I copied the nose on Stevey B and pasted it as a new layer, then I enlarged it and altered the shape slightly using the transform and then warp tool so although it was now bigger at the top it still gradually became smaller lower down to blend in with actual size of the nose.
As you can see here I just moved it into place and into the correct shape using the transform tool.
Next I masked the nose and blended round the edges with a soft brush.
Here it is completely masked round the edges:
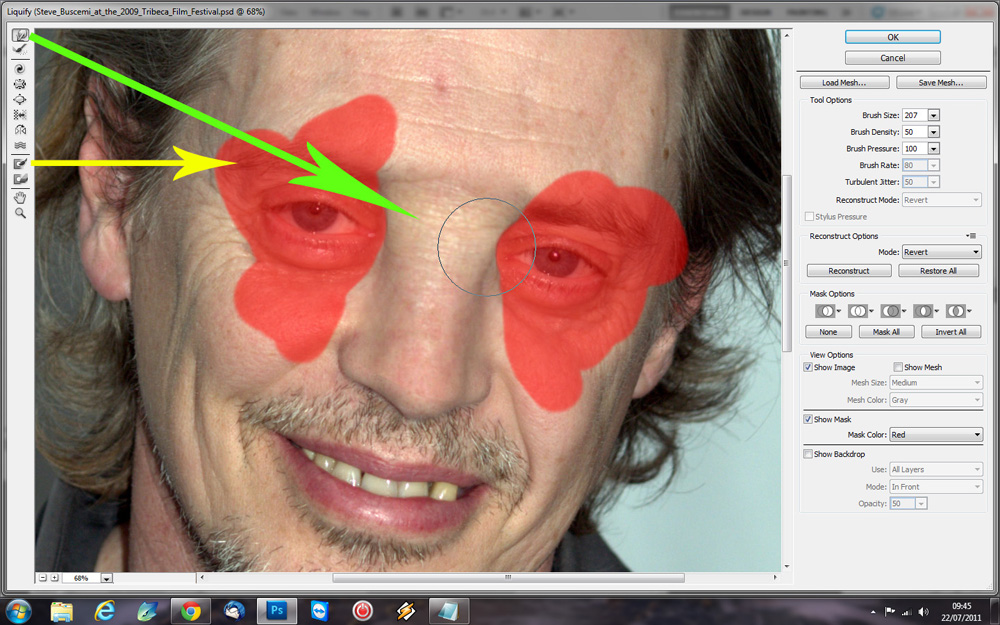
So once the nose is blended in, we are going to enhance it even more using the liquify “push” tool to pull the sides of the nose out even more. The red parts mean that these areas are protected and wont be effected by the push tool, very handy to preserve parts of the image, you can just paint in areas like this that you want to preserve using the tool lower down (yellow arrow). I literally just used the push tool to push both sides of the nose away from each other.
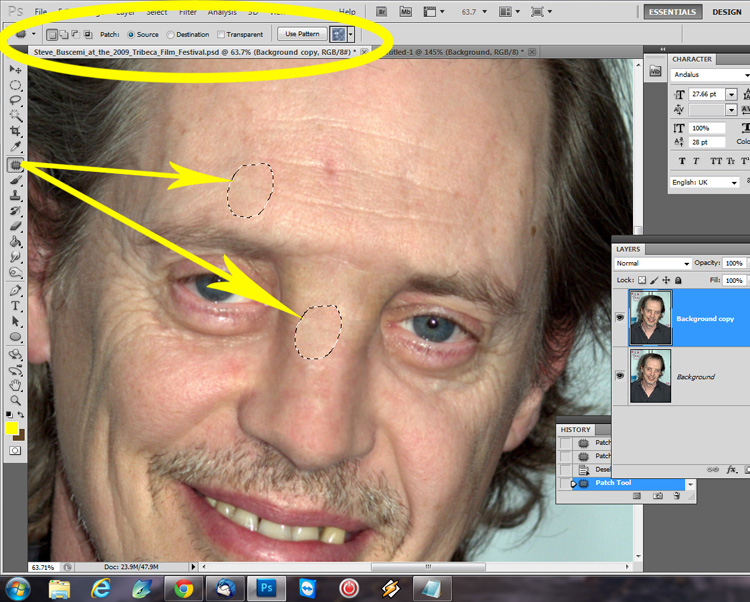
Then I used the patch tool to tidy it up because enlarged liquified images can look blocky and far from natural.
OK now for the eye reds which are surprisingly easy. Just create a new layer, select the eye whites and fill with red.
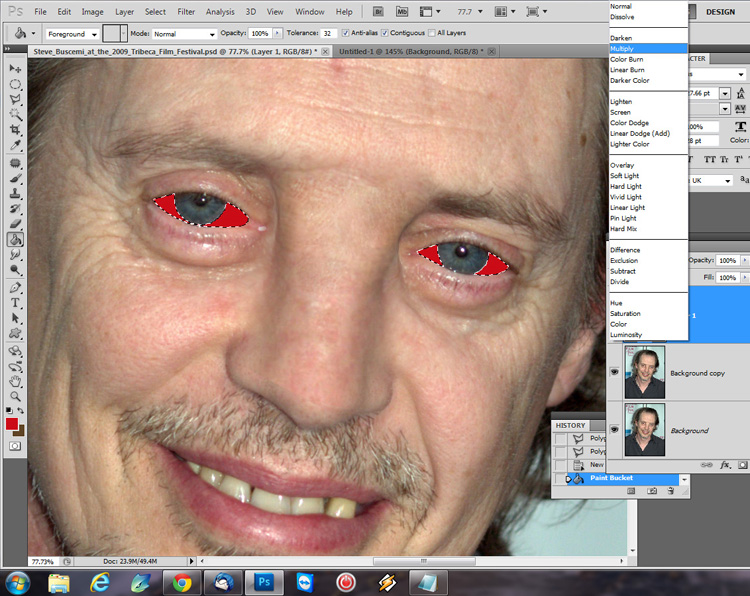
Next set this layer to multiply.
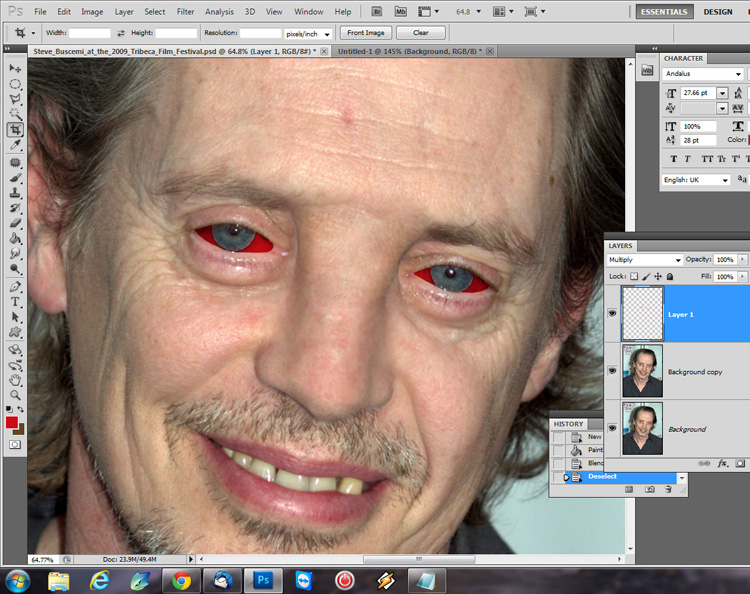
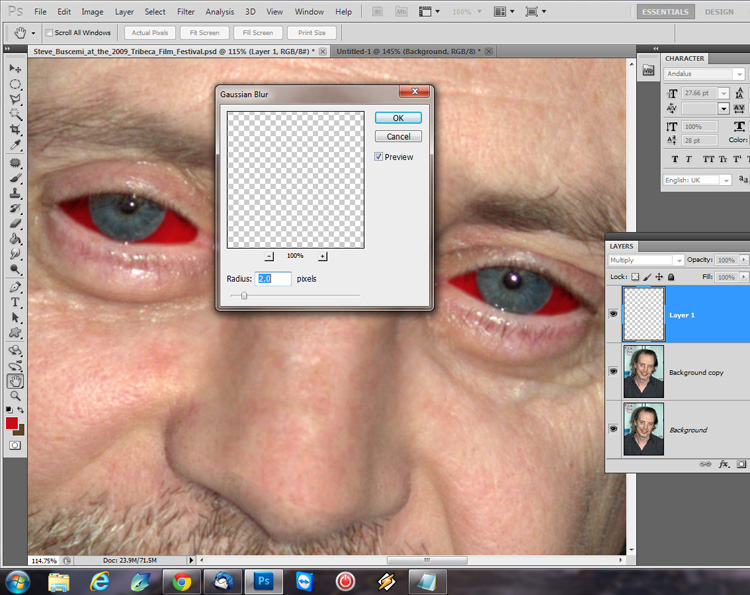
Then add a slight gaussian blur (I used a radius of 2.0) Later on I did reduce the opacity of the layer slightly as well.
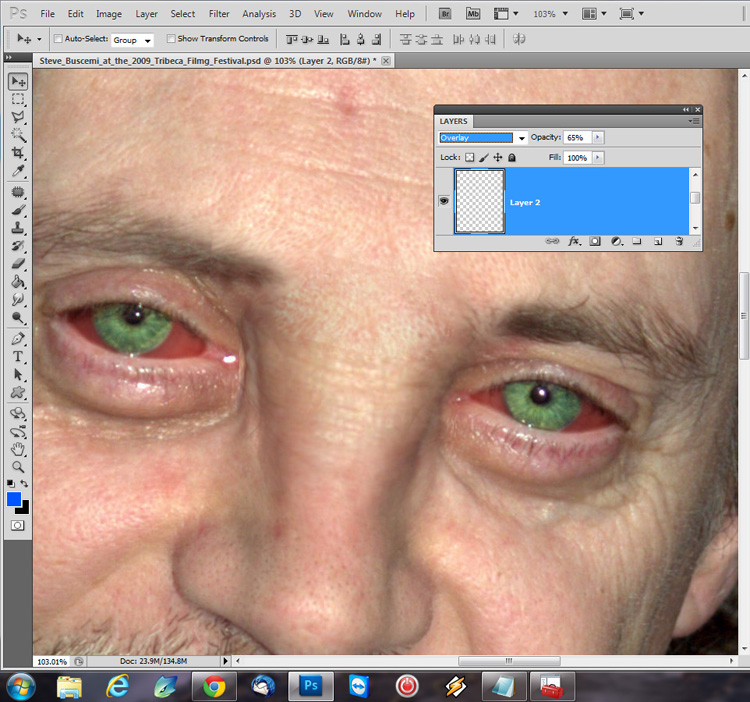
OK now for the iris color. Get a vibrant color, add a new layer and just slap it on like so:
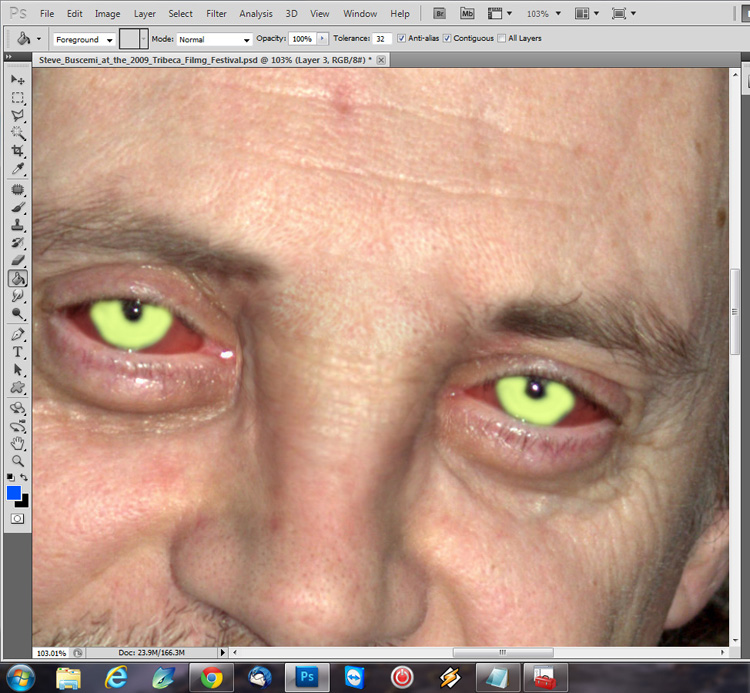
Then set this layer to overlay (I reduced the opacity to about 65%).
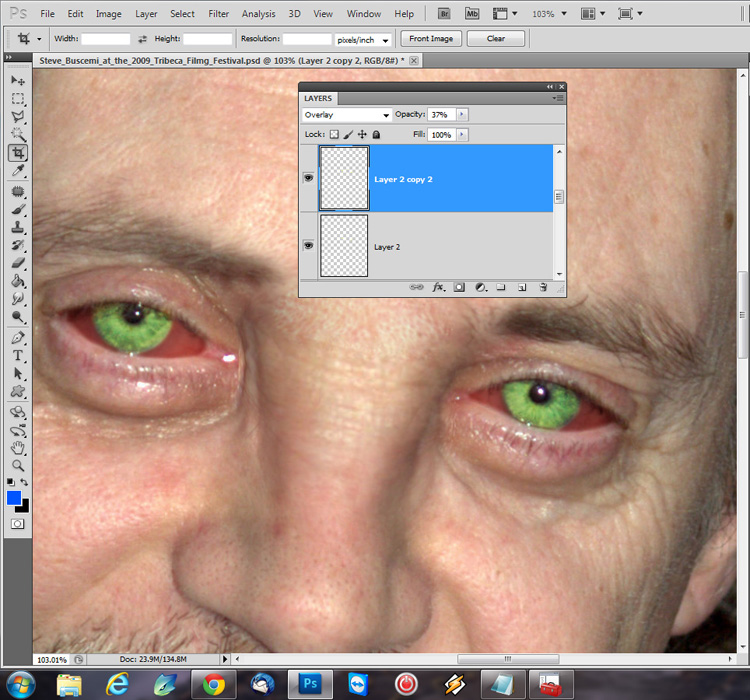
Then duplicate this layer and set the opacity to about 35% (still set at overlay).
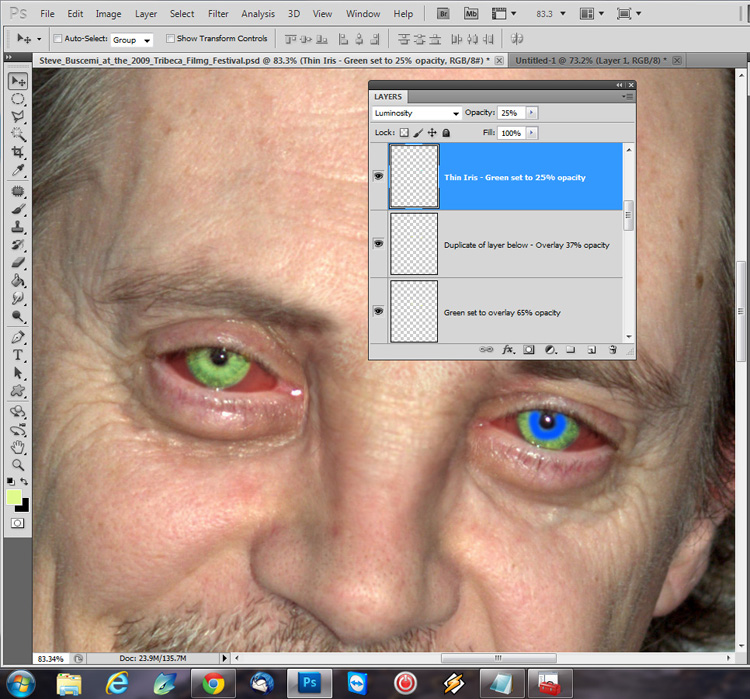
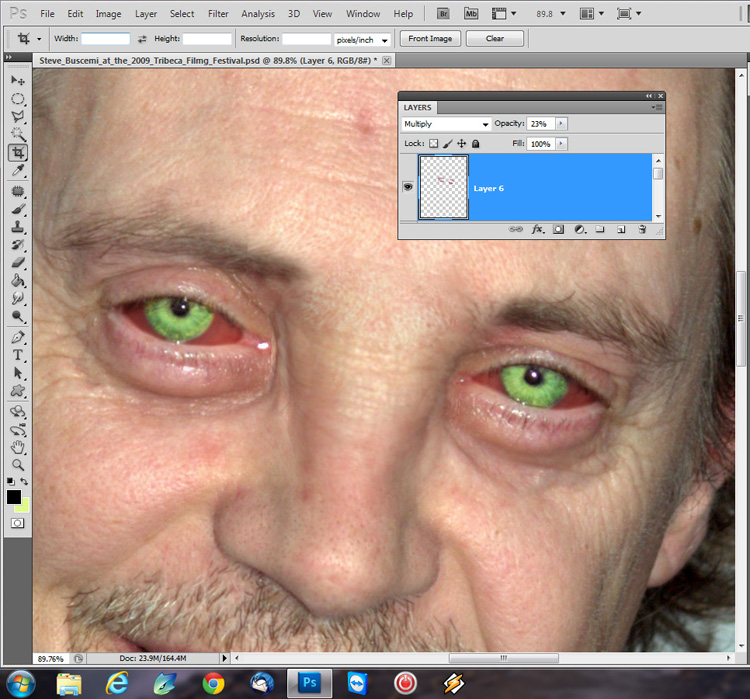
Then on a new layer I painted a thin line round the pupil using the same color green from before. I have done this in blue on one of the eyes just to show you what I mean. Set this layer to luminosity at 25% opacity.
To add even more effect to the eyes I added a new layer and took a purple and brown color and painted round the eyes like so:
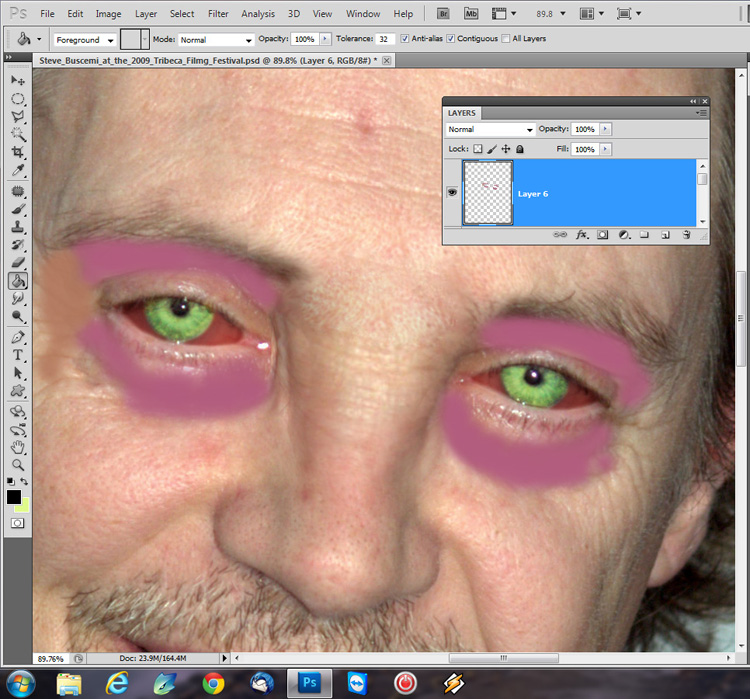
I then set this layer to multiply at about 25% opacity.
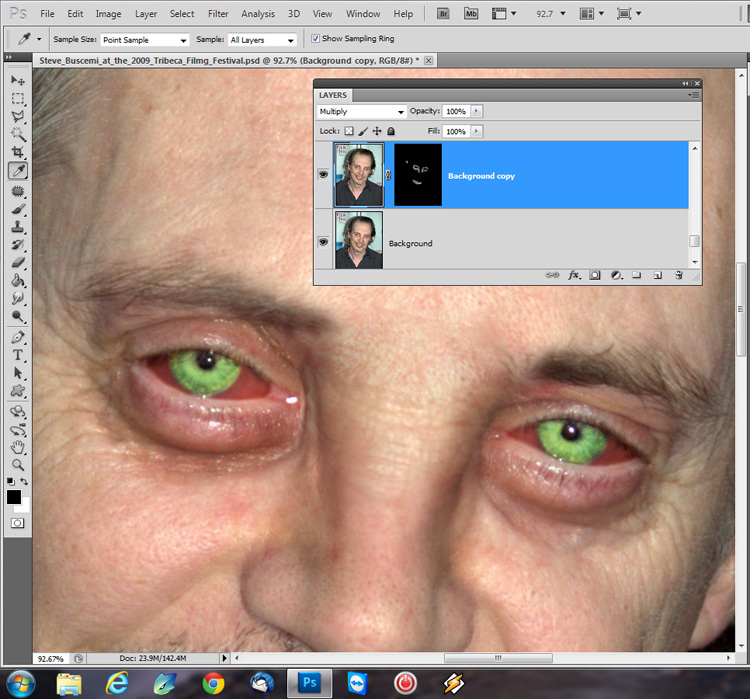
Still not happy that it was dark enough I went to the original background layer of Stevey B, duplicated this layer, set it to multiply and masked round the eyes and side of the nose so just these areas would appear from the multiply layer. I left the opacity at 100%.
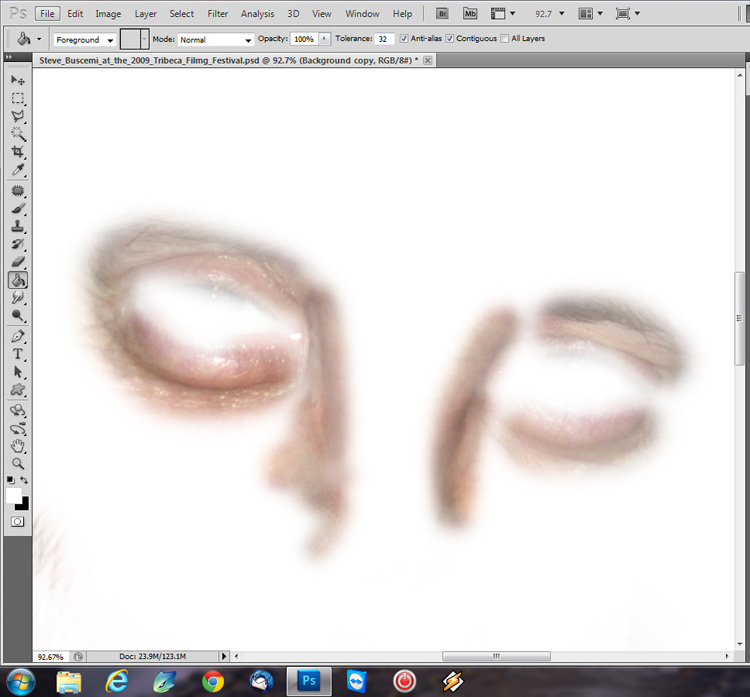
These are the areas that I masked on a white background so you can see it better:
Next to do the ears and teeth I literally just used the smudge tool at 100% and smudged them out. It’s later on that I tidy them up using the patch tool and add noise to add texture back in.
Next to create the bottom part of his beard I used this source:
With the source image open go to select / color range and click a dark area of the beard with the eye dropper then up the fuzziness. This means it wont select the skin from the original image, perfect!
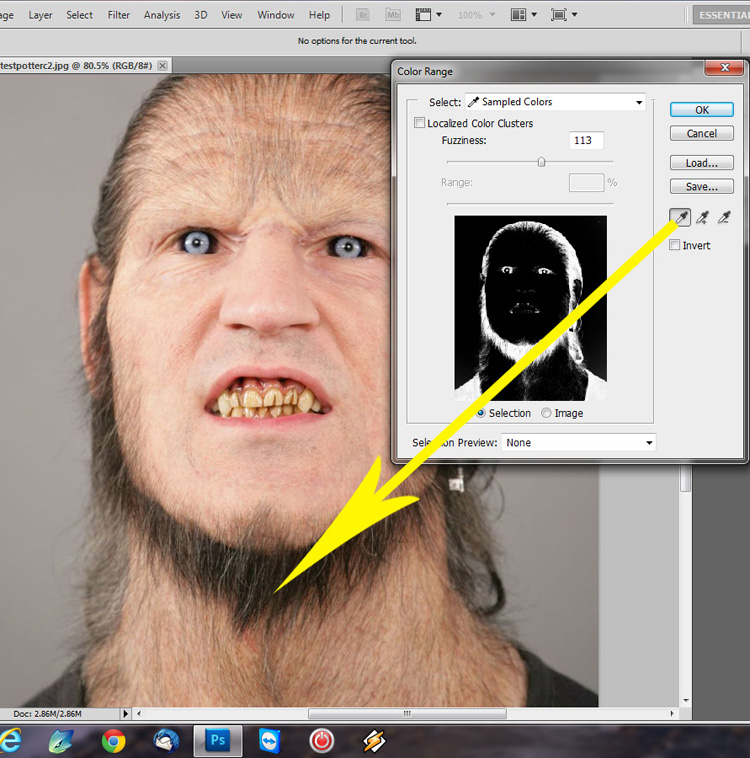
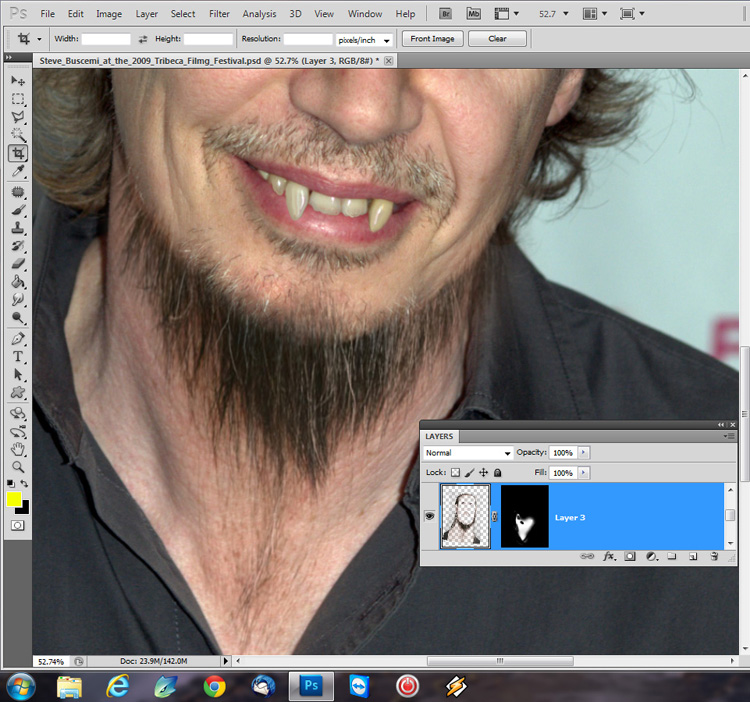
Click ok, copy and paste it on to Stevey B and then use the transform tool and warp to move it in place and fit Steve’s face (I have put this on a yellow background to show you the transformation I applied).

Next mask out just the hair part like so:
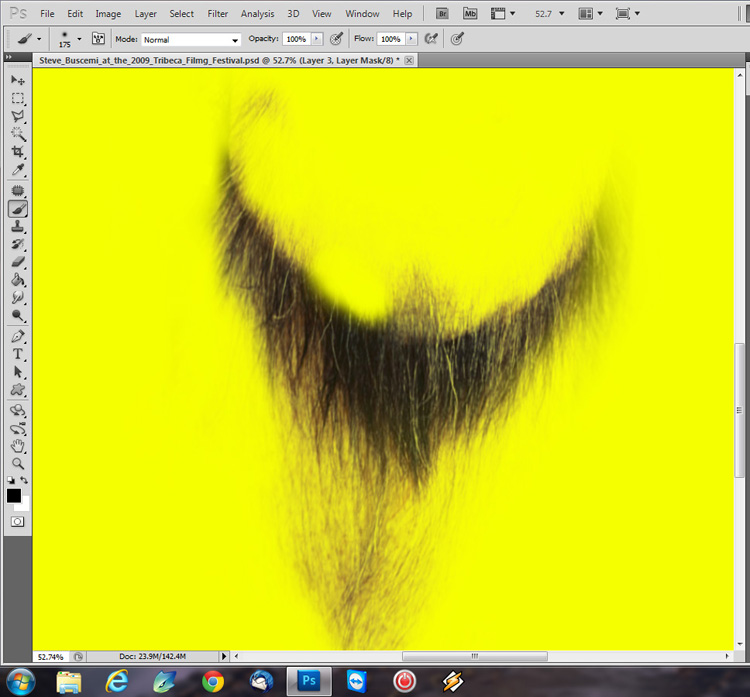
Here it is with a semi transparent yellow background so you can see the difference:
And here is what it should come out like:
Next to create side burns, monobrow and to add a few stray hairs to the cheeks I used the blade of grass brush which comes standard in Photoshop. I applied these settings:
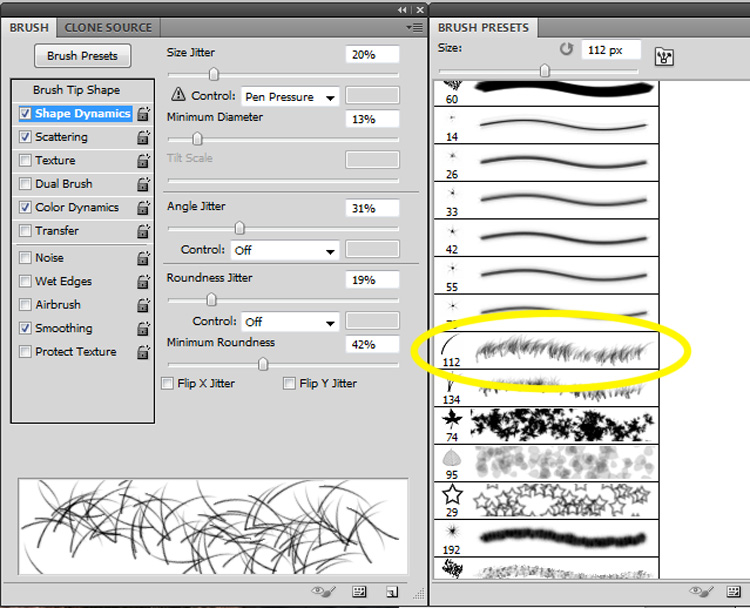
And these settings:
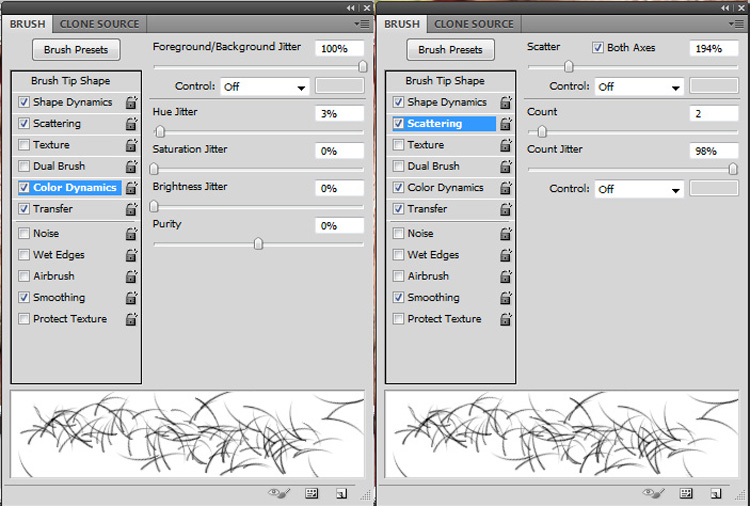
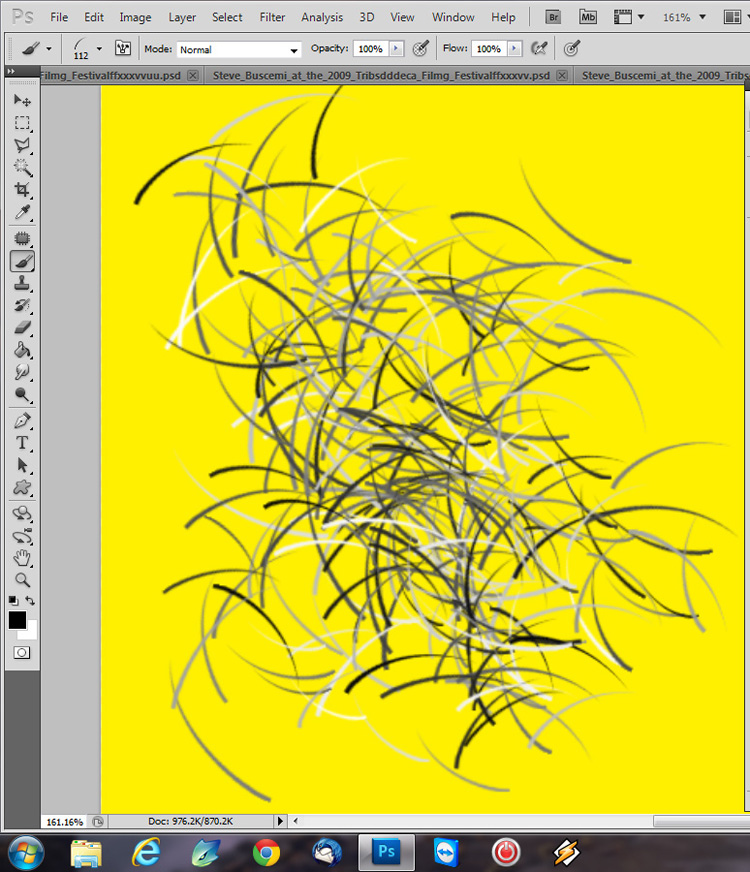
Here is what it will look like on a solid background, if you tweak the settings and opacity it does look like realistic hair, especially when it’s a lot smaller. The blade of grass brush is not the best you can get some really awesome hair brushes or create your own custom one even. I just wanted something quick but it worked for my image!
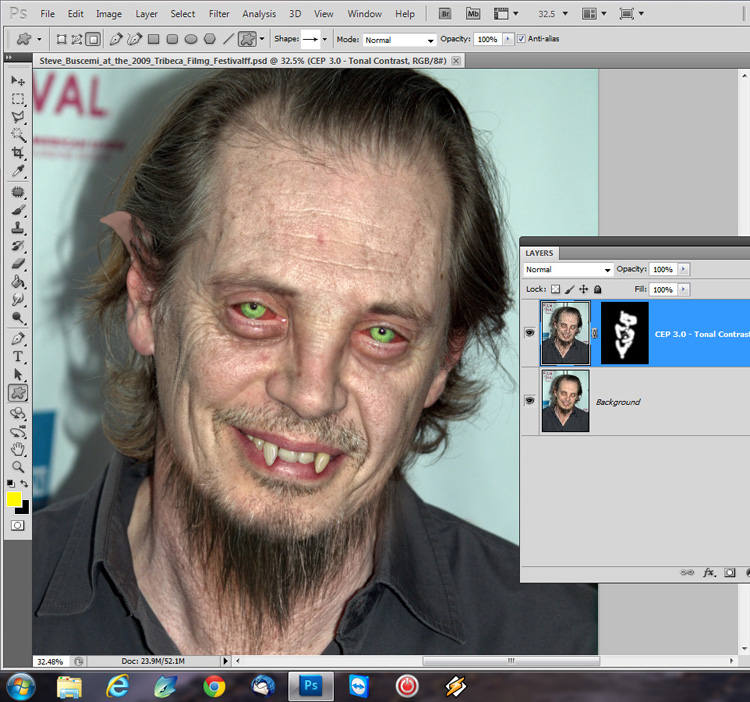
OK next is my favourite part “TONAL CONTRAST” you can really bring a source image to life with this technique. I used a filter in the Nik Color Efex Pro range called tonal contrast and applied the settings below, but do not worry you can achieve a similar effect in Photoshop and here is a GREAT tutorial by AZRainman to lead you in the right direction:
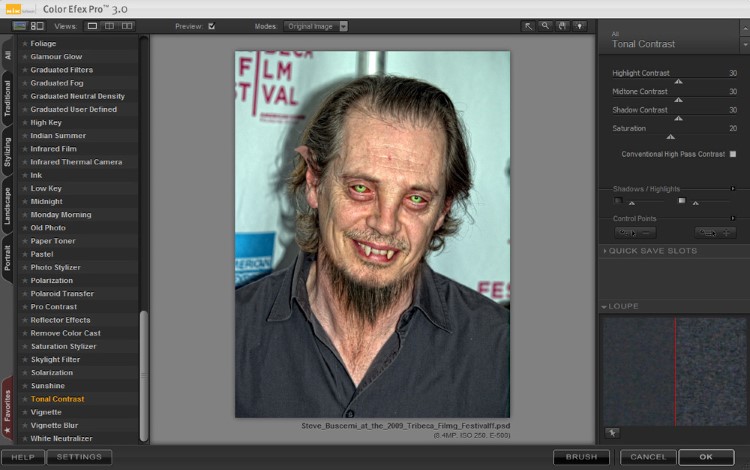
It looked a little too much to me, so I masked out a lot of the “Tonal Contrast” and just kept it on parts of the face I also desaturated it slightly to make it a little more realistic…I will tweak the overall color later
Next I had to get rid of that annoying background, it is hard to explain but because I didn’t want to mask his hair, I cheated and used some “multiply” techniques. This wont work for all backgrounds but does when the subject is already on a light background.
This is early stages of masking Steve and adding a new background, I did tidy it up later on.
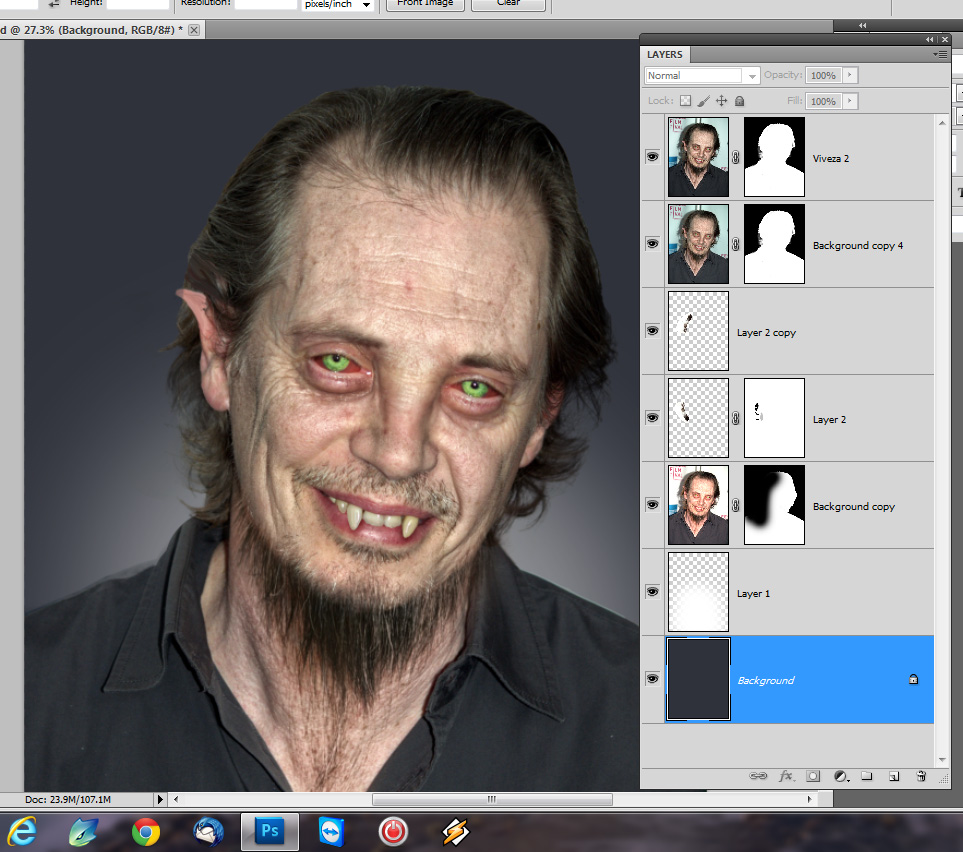
Next to make it pop, duplicate a flattened version of the image, set it as the top layer, set it to overlay and about 35% opacity and then desaturate this layer about -30 (You might not need to do this if you followed AZRainman’s tut).
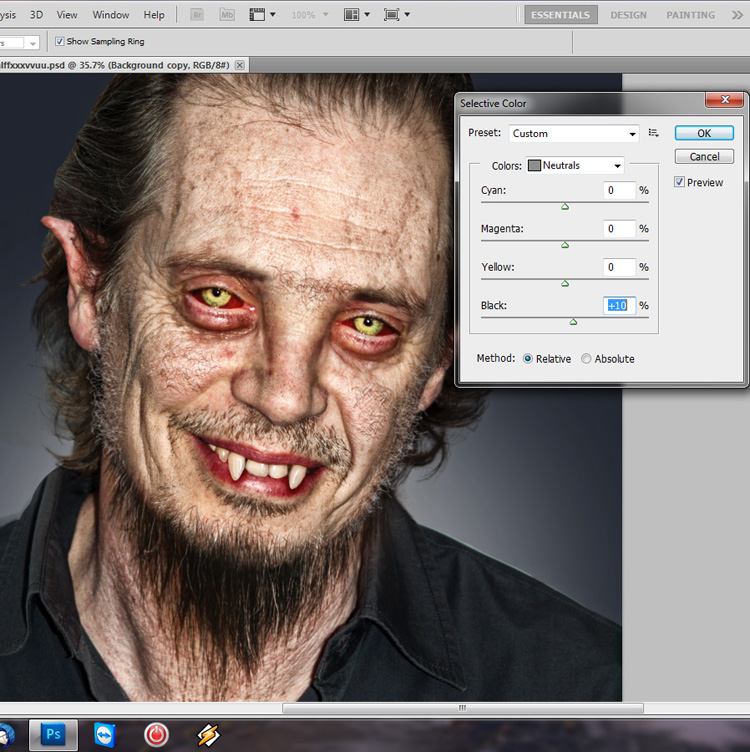
OK now you want to do a selective color adjustment, experiment with this I did some alterations to the reds, but the main one was just upping the blacks in neutrals. It makes a massive difference trust me!
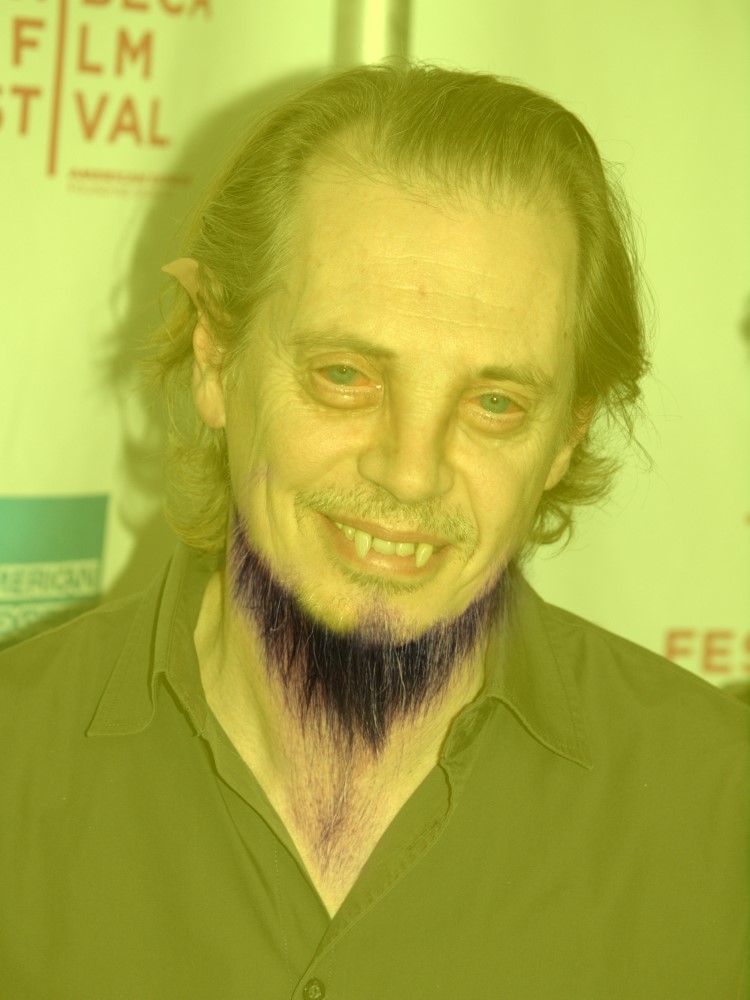
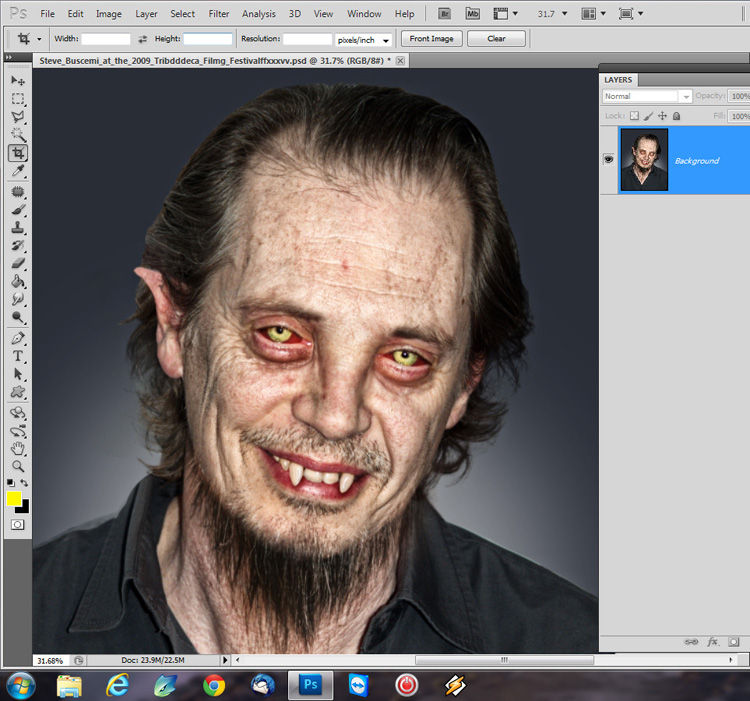
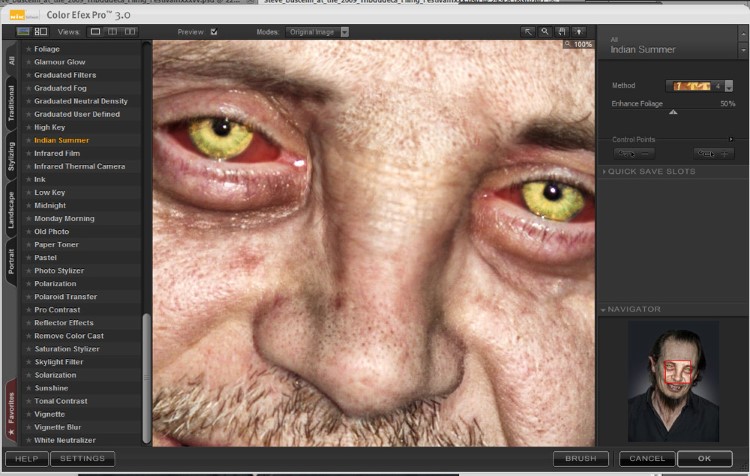
Then I wanted the eyes to be a little more realistic so I applied a filter called indian summer again from the Nik Software range (I just like to experiment till something looks good). Again I could have just done this with selective color. It just made them a little paler and yellower rather than fluorescent green.
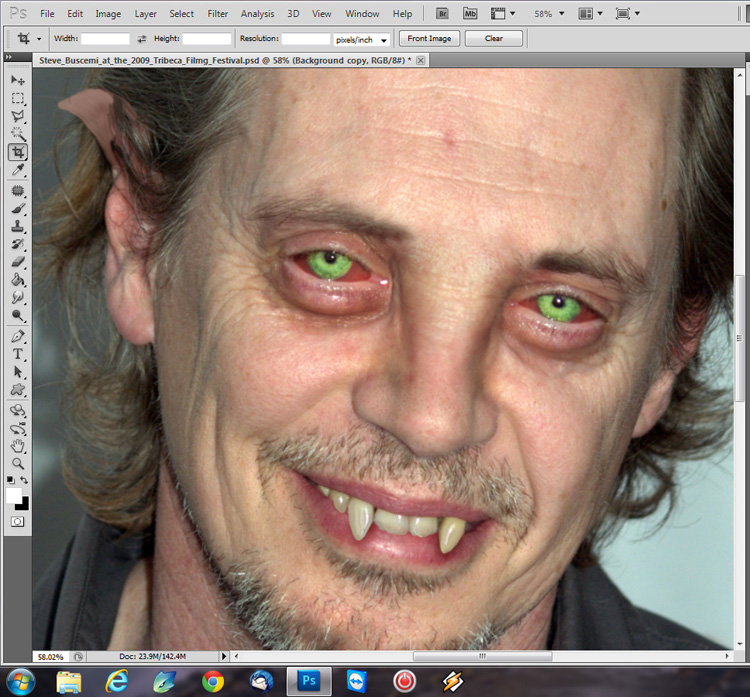
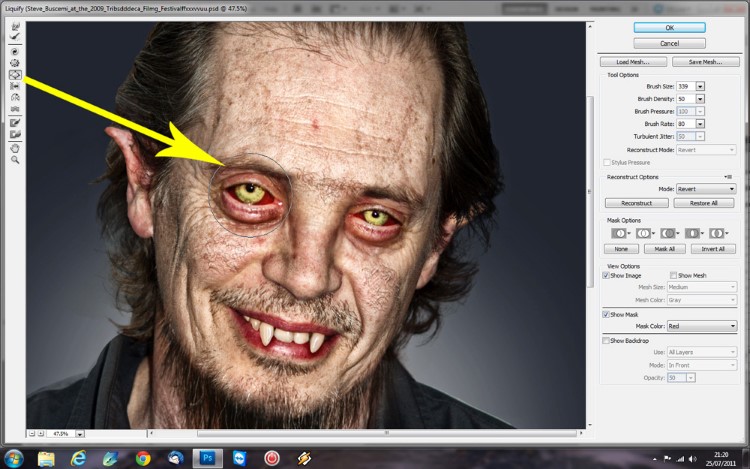
Next I wanted to make the eyes bulge so they looked really gross and like they were literally bulging out the eye sockets while he was transforming to a werewolf. To do this I literally used the liquify tool, selected the bulge tool (see below) and just clicked over the eyes a couple of times.
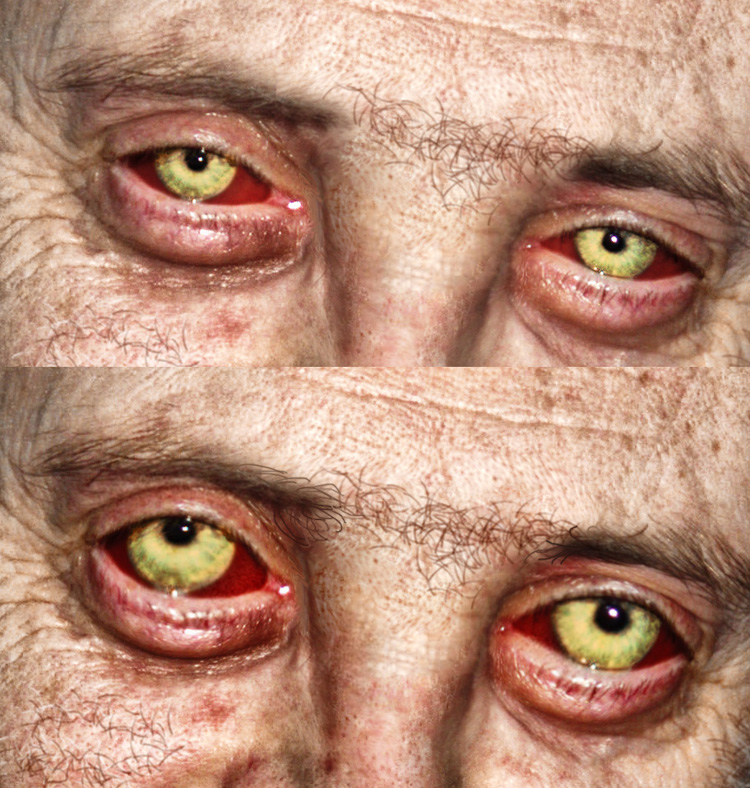
You can see the before and after here:
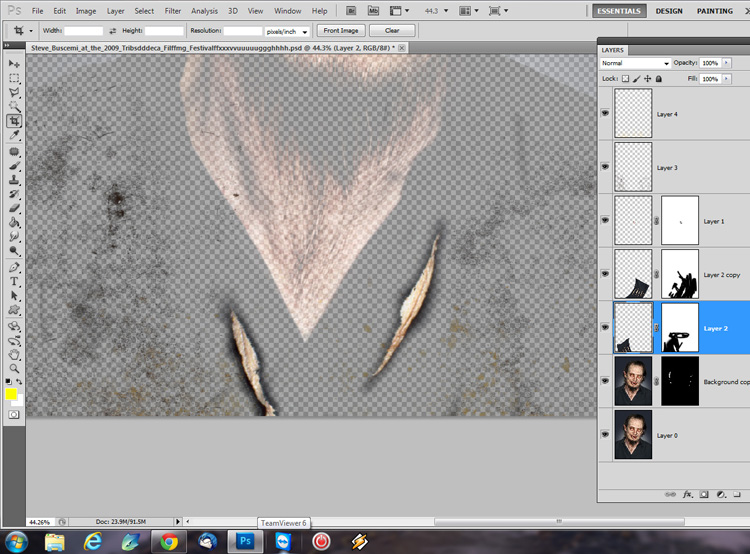
Finally for the ripping of the shirt I just searched Google images for slashed clothes and found an image with a similar clothing color to Steves shirt and transformed the image like so:
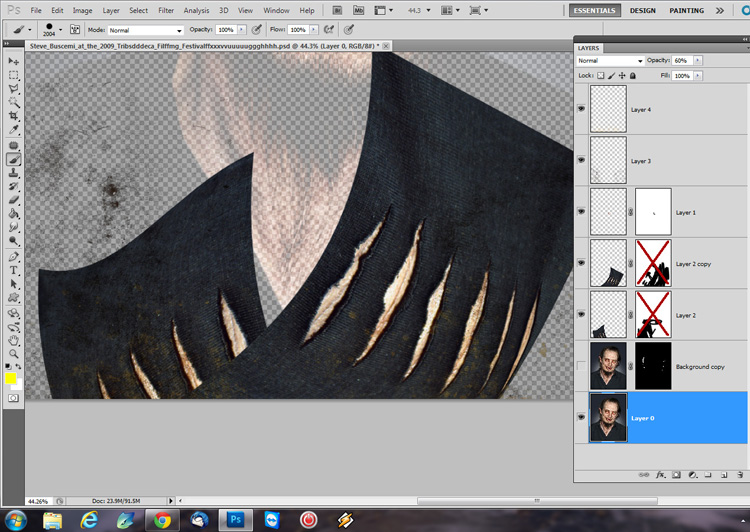
Then I just masked round the tears just leaving a couple to make it more realistic.
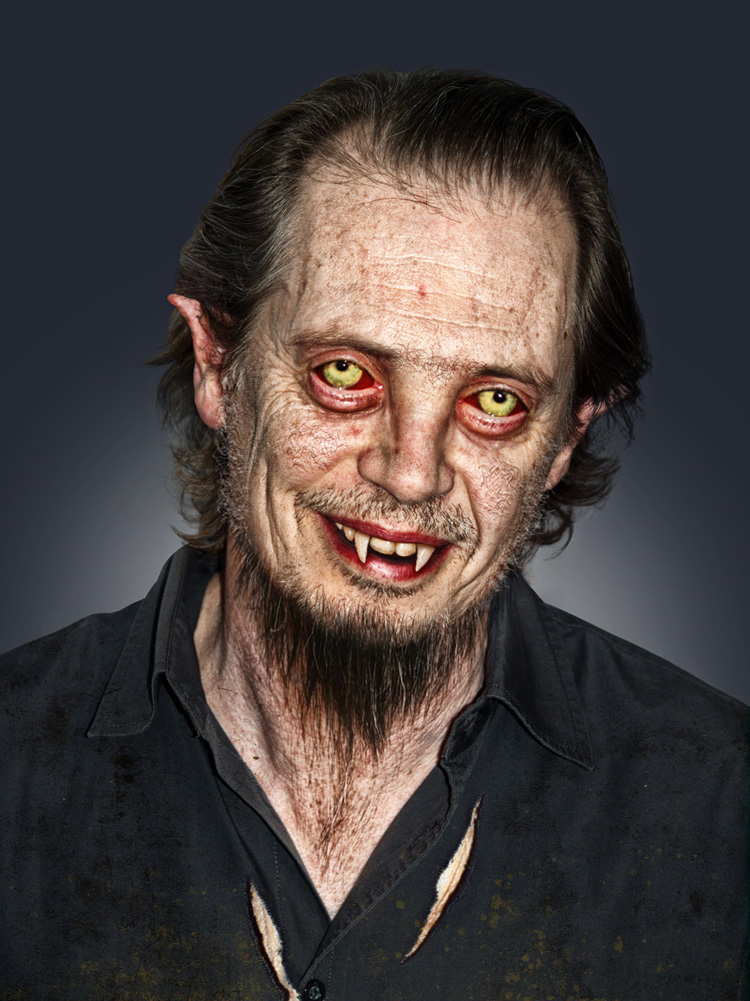
And this is the outcome. The dirt on the shirt is a Photoshop brush set to multiply. I believe I used Rons Dirt brushes! They are awesome!
That’s all. Thanks for reading!
Photoshop tutorial by mzpresto originally posted on Worth1000.
Looking for more tutorials, try this zombie one or visit blog.designcrowd.com/tag/tutorial for more helpful hints and tips to boost your designer skills

Looking to earn from your graphic design skills?
Check out the design jobs board and start earning today!
Written by DesignCrowd on Thursday, April 20, 2017
DesignCrowd is an online marketplace providing logo, website, print and graphic design services by providing access to freelance graphic designers and design studios around the world.