

In this article, we’ll walk through coding this grid interaction, originally conceptualized by Amin Ankward, a creative designer, former colleague, and now friend (feel free to follow him on X 👀).
Before We Start
We’ll be using Three.js as our WebGL library, and that’s it—no GSAP today. Instead, I’d like to show you how to create animations without relying on any external animation libraries.
I’ve prepared a repository for you to clone if you want to follow along with this tutorial. It features basic Three.js scene initialization, a loader, and some utility functions. All the files we’ll be using are already created, so you can focus solely on the animations. You can access it here.
Here’s a quick file roundup if you’re following along with my starter:
- MainThree.js – Initializes the Three.js scene, renderer, camera, and frame loop.
- ExtendedObject3D – An implementation of Object3D that includes resize handling and an update function.
- Grid.js – A class implementing ExtendedObject3D, where we’ll initialize and manage our cards.
- Card.js – A class implementing ExtendedObject3D as well, representing the cards displayed on screen.
- AssetsManager.js – The file where we’ll load, store, and retrieve our assets.
Grid Setup
Let’s start by setting up the grid, defining the number of rows and columns we want. In my example, I’ve decided to place a card every 100 pixels on the screen, but feel free to adjust it as needed.
If you’re following along with my starter, head to scripts/components/Grid.js and add the following lines:
// scripts/components/Grid.js

export class Grid extends ExtendedObject3D  1;
  static ROWS = Math.floor(window.innerHeight / 100)
Alright, you may be wondering two things:
- Why use static? These variables need to be unique, and we will need them in other files later. Making them static allows access from anywhere in the project without requiring access to the Grid instance.
- What is this “| 1” and what does it do? It’s called a “Bitwise OR operator.” In our case, it will always turn our result into an odd number. Why would we want that? For aesthetic purposes, having an odd number of columns and rows allows one to be centered on the screen.
Now that we have our grid dimensions, let’s create our cards:
// scripts/components/Grid.js

import  Card  from './Card';

export class Grid extends ExtendedObject3D
  // ...

  constructor()
    super();

    this.#_createCards();


  #_createCards()
    for(let i = 0; i < Grid.COLUMNS; i++)
      for(let j = 0; j < Grid.ROWS; j++)
        const card = new Card(i, j);
        this.add(card);


  // ...
Nothing fancy here; we’re simply looping through each column and row to place a card at every location. If you’re wondering what this.add() does, we inherit it from the Object3D class. It adds the card as a child of the grid so that it can be displayed on the screen (it’s normal if everything is still blank at the moment).
We also pass i and j as parameters to Card. We’ll use these indexes to calculate its position.
Card Initialization
Alright, our screen might look pretty blank right now. Let’s add these cards to it. Head to Card.js and insert the following code.
// scripts/components/Card.js
import
  Mesh,
  MeshBasicMaterial,
  PlaneGeometry,
  Vector2,
 from "three";

// ...

export class Card extends ExtendedObject3D
  static Geometry = new PlaneGeometry(1, 1);

  gridPosition = new Vector2();
  mesh;

  constructor(i, j)
    super();

    this.gridPosition.set(i, j);
    this.#_createMesh();


  #_createMesh()
    const r = Math.ceil(Math.random() * 255);
    const g = Math.ceil(Math.random() * 255);
    const b = Math.ceil(Math.random() * 255);

    this.mesh = new Mesh(
      Card.Geometry,
      new MeshBasicMaterial( color: new Color(`rgb($r, $g, $b)`) )
    );

    this.add(this.mesh);


	// ...
Performance tip: We’re creating the geometry as static because we’ll have many cards, all of the same size. Therefore, we only need to create one geometry instead of creating one for each card.
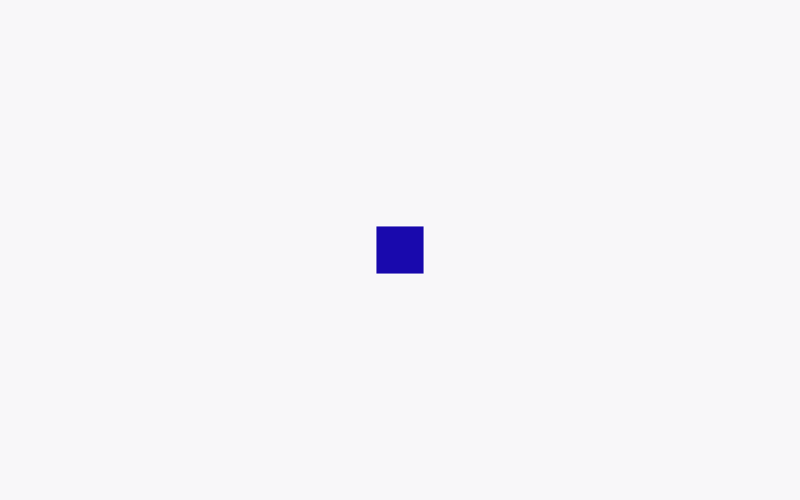
You should now see a randomly colored rectangle in the center of your screen, measuring exactly half the width and half the height of the screen.

Okay, that’s cool, but it’s not exactly what we want. Why is it rectangular when we’ve set both the width and height to 1 in our PlaneGeometry?
If you already know why it behaves this way, feel free to skip ahead. However, if you’re wondering, let’s quickly review before we continue. This will help you better understand the calculations we’ll perform later.
For those still with us, open the MainThree.js file. You should see that we’re using an OrthographicCamera.
// scripts/MainThree.js
this.#_Camera = new OrthographicCamera(
	-1, // left
	1, // right
	1, // top
	-1 // bottom
);
The parameters we’re setting here correspond to our screen coordinates. Let’s take a look at the diagram below:
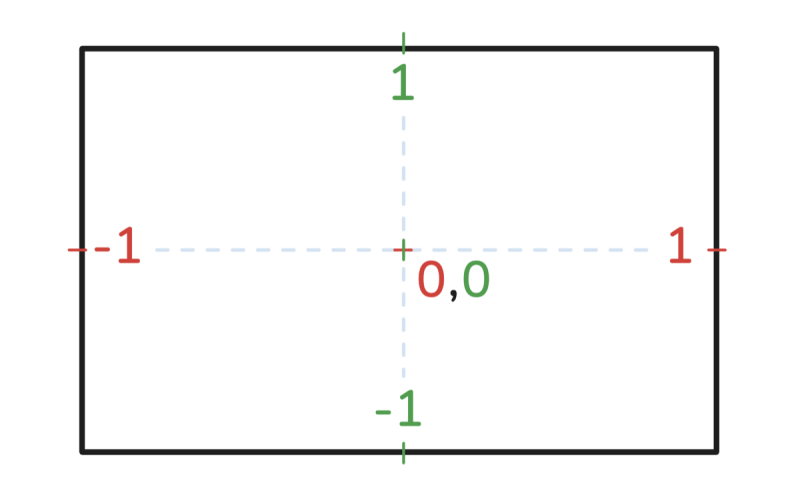
The black rectangle represents your screen. Regardless of its dimensions, the coordinates remain the same: (-1, 1) marks the top-left corner, (1, -1) marks the bottom-right corner, and (0, 0) represents the center.
In simple terms, this means that both the width and height will always span a length of 2, even if their pixel dimensions differ significantly. That’s why our plane appears rectangular right now. To make it square-shaped, we need to scale it according to our screen’s aspect ratio.
// scripts/components/Card.js

import  Grid  from './Grid';
import  MainThree  from "../MainThree";

// ...

export class Card extends ExtendedObject3D
  static #_DefaultScale = new Vector3();

  // ...

  #_createMesh()
    // ...

    this.mesh.scale.copy(Card.#_DefaultScale);

    this.add(this.mesh);


  static SetScale()
    const aspect = window.innerWidth / window.innerHeight;
    const viewWidth = MainThree.Camera.right - MainThree.Camera.left;

    const columnWidth = viewWidth / Grid.COLUMNS;

    this.#_DefaultScale.x = columnWidth;
    this.#_DefaultScale.y = columnWidth * aspect;


  resize(event)
    this.mesh.scale.copy(Card.#_DefaultScale);


  // ...
To determine the width of one column, we take the length of our camera view and divide it by the number of columns. Note that we are using a static method here to compute the size of a card only once, rather than for each card, as they will all share the same size.
To make this effective, we need to call it in both the Grid constructor and its resize function.
// scripts/components/Grid.js
export class Grid extends ExtendedObject3D
  // ...

  constructor()
    super();

    Card.SetScale();
    this.#_createCards();


	// ...

  resize()
    Grid.COLUMNS = Math.floor(window.innerWidth / 100)

  // ...
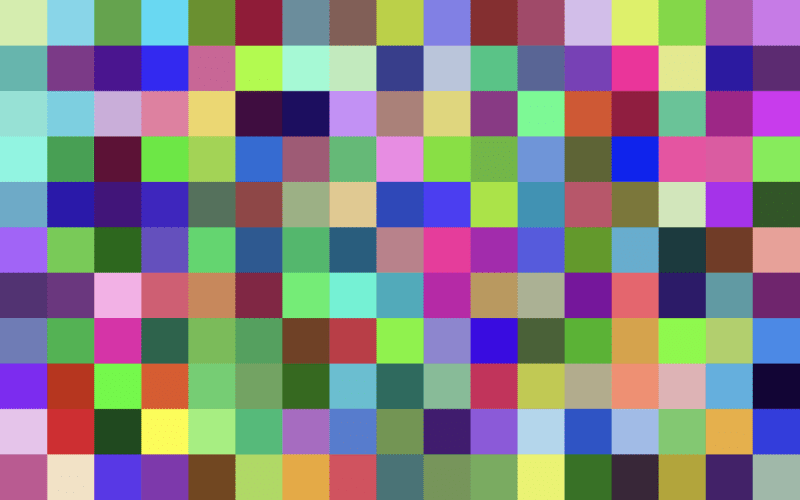
You should have something like this right now: your plane, but squared. It might seem a bit lonely, though, so let’s add its friends to the grid.
Grid Positioning
You can try it on your own first if you want to challenge yourself a bit. If you’re not sure how to achieve it, here’s the logic:
As I mentioned before, our coordinates are normalized between -1 and 1. To place them correctly, you need to remap the indexes we provided in the parameters so they correspond to your grid. To clarify, if you have 16 columns, an index of 0 should return -1, while an index of 15 should return 1.
If you’re stuck, here’s the solution I came up with:
// scripts/components/Card.js
import  mapLinear  from "three/src/math/MathUtils.js";
// ...

export class Card extends ExtendedObject3D
  // ...
  #_targetPosition = new Vector3()

  constructor(i, j)
    super();

    this.gridPosition.set(i, j);

    this.#_createMesh();
    this.#_setTargetPosition();


  // ...

  #_setTargetPosition()
    let  x, y  = this.gridPosition;

    const cardWidth = Card.#_DefaultScale.x * 0.5;
    const cardHeight = Card.#_DefaultScale.y * 0.5;

    x = mapLinear(x, 0, Grid.COLUMNS, MainThree.Camera.left, MainThree.Camera.right) + cardWidth;
    y = mapLinear(y, 0, Grid.ROWS, MainThree.Camera.bottom, MainThree.Camera.top) + cardHeight;

    this.position.set(x,y, 0)
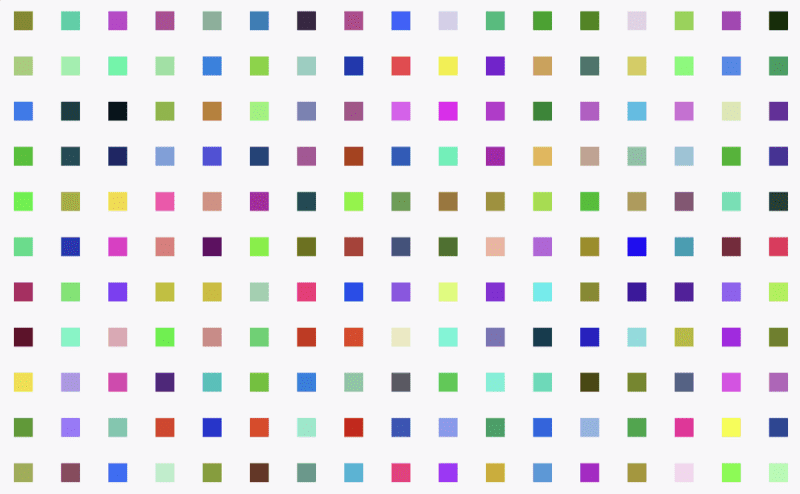
Your screen should now look like this:
Let’s reduce their size slightly to create more space.
// scripts/components/Card.js
export class Card extends ExtendedObject3D {
  // ...

  #_defaultScale = new Vector3().setScalar(0.4)

  constructor()
		this.gridPosition.set(i, j);

    this.#_createMesh();
    this.#_setTargetPosition();
    this.scale.copy(this.#_defaultScale);
We’re starting to have something interesting!
Note that we’re not scaling our mesh this time; instead, we’re scaling the
Object3Dthat contains it. This approach allows us to maintain the scale based on the aspect ratio we set earlier while also scaling it down.
Don’t add the following code; it’s just an HTML/CSS comparison to help you better understand the transformation we’ve made.
<section id="GRID">
	<div class="card">
		<div class="mesh">this is our plane</div>
	</div>
</section>
<style>
  .card
  	  transform: scale(0.4);


  .mesh
	  width: 10px;
	  height: 10px;
	  transform: scaleY(OurAspectRatio);

</style>
Hover Interaction
To achieve this, we first need to determine the distance between a card and our cursor. Let’s get the mouse position inside the Grid.
// scripts/components/Grid.js

export class Grid extends ExtendedObject3D
  // ...

  static MousePosition = new Vector2();
  #_targetMousePosition = new Vector2();

  constructor()
    super();

    Card.SetScale();
    this.#_createCards();
    this.#_setListeners();


  #_setListeners()
    window.addEventListener('mousemove', this.#_updateMousePos)
    window.addEventListener('touchmove', this.#_updateMousePos)


  #_updateMousePos = (event) =>
    const isMobile = event.type === 'touchmove';

    const  clientX, clientY  = isMobile ? event.changedTouches[0] : event;

    const halfW = 0.5 * window.innerWidth;
    const halfH = 0.5 * window.innerHeight;

    // our mouse position, normalized on a [-1, 1] range.
    const x = (clientX - halfW) / window.innerWidth * 2
    const y = -(clientY - halfH) / window.innerHeight * 2

    this.#_targetMousePosition.set(x, y)


  // ...

  update(dt)
    this.#_lerpMousePosition(dt);


  #_lerpMousePosition(dt)
    Grid.MousePosition.lerp(
	    this.#_targetMousePosition,
	    1 - Math.pow(0.0125, dt)
    );
If you’re unfamiliar with lerps and curious about what’s happening in the update() method here, I highly recommend watching this video from Freya or this one from Simon, who explains it much better than I could. We’ll use them a lot from now on, so it’s important to understand how they work. In brief, they give us these smooth movements without relying on external animation libraries like GSAP.
We’re setting MousePosition as static here to easily retrieve it in our Cards without passing a reference to the Grid instance. The #_targetMousePosition is used only to interpolate our values and will not be needed elsewhere, so we can set it as private.
Okay, now that we have our cursor position, let’s compute the distance in the Cards file.
export class Card extends ExtendedObject3D
  static #_DefaultScale = new Vector3();
  static #_MaxScale = new Vector3();

  // ...

  #_defaultScale = new Vector3().setScalar(0.2)
  #_targetScale = new Vector3()


  static SetScale()
    // ...

	const isPortrait = window.innerWidth < window.innerHeight;
	const scaleFactor = isPortrait ? 8 : 20

    this.#_MaxScale
      .copy(this.#_DefaultScale)
      .multiplyScalar(scaleFactor)


  update(dt)
    this.#_updateScale(dt);


  #_updateScale(dt)
    const aspect = window.innerWidth / window.innerHeight;

    const distanceX = Grid.MousePosition.x - this.position.x;
    let distanceY = Grid.MousePosition.y - this.position.y;
    distanceY /= aspect;

    let distance = Math.pow(distanceX, 2) + Math.pow(distanceY, 2);
    distance *= 10;

    this.#_targetScale.lerpVectors(
      Card.#_DefaultScale,
      Card.#_MaxScale,
      Math.max(1 - distance, 0)
    );

    this.mesh.scale.lerp(this.#_targetScale, 1 - Math.pow(0.0002, dt));
First, we add a #_MaxScale vector. Our card won’t be able to get larger than the value we set here. To do so, we can simply copy the default scale we set earlier and multiply it by a factor (feel free to adjust it as needed).
Next, we compute our distance in #_updateScale using the Pythagorean theorem, then use it as our interpolation factor.
If our distance is equal to 0, our card will be scaled to its maximum size. If the distance is equal to or greater than 1, it will be scaled to its minimum size.
You can adjust the radius by multiplying the distance by a factor. The higher the number, the smaller the radius.
You should have something that starts resembling our final result right now!
You might notice something off when the cards overlap. That’s because they all share the same z-position, so our renderer doesn’t know which one to render on top. Amin prepared a render that can help you better visualize what we want: the closer the card is to the mouse, the higher its z-position.
export class Card extends ExtendedObject3D
	// ...

	#_updateScale(dt)
    // ...
    this.position.z = -distance;
Yep, that’s all!
Experimenting with Variables
Now, I suggest you play with some of the variables: radius, number of columns/rows, and the interpolants in our lerp’s pow(). You can achieve results with very different feels depending on what you set.
Card Shaders
Let’s get rid of these colors and implement our images by replacing the material with a custom one.
import  CardMaterial  from "../materials/CardMaterial";

export class Card extends ExtendedObject3D
	// ...

	#_createMesh()
		this.material = new CardMaterial()

    this.mesh = new Mesh(
      Card.Geometry,
      this.material
    );

    this.mesh.scale.copy(Card.#_DefaultScale);

    this.add(this.mesh);
Your cards should all have turned red if everything went well. Before jumping straight into the shader, let’s describe what we want and what we need to achieve it.
- We want an image → We need textures
- These images are black and white by default. We want them to gradually saturate based on our mouse position → We need the distance
I’ve already loaded the textures for you, so you don’t have to worry about it. You’ll only need to retrieve them:
import  /* */ Uniform  from "three";

import  CardMaterial  from "../materials/CardMaterial";

export class Card extends ExtendedObject3D
	// ...
	static #_Textures = [
      AssetsId.TEXTURE_1,
      AssetsId.TEXTURE_2,
      AssetsId.TEXTURE_3,
      AssetsId.TEXTURE_4,
      AssetsId.TEXTURE_5,
      AssetsId.TEXTURE_6,
      AssetsId.TEXTURE_7,
      AssetsId.TEXTURE_8,
      AssetsId.TEXTURE_9,
      AssetsId.TEXTURE_10,
    ];

	#_createMesh()
    const randomIndex = Math.floor(Math.random() * Card.#_Textures.length);
    const textureId = Card.#_Textures[randomIndex];
    const texture = AssetsManager.GetAsset(textureId);

    this.material = new CardMaterial(
      uniforms:
        uDistance: new Uniform(0),
        uTexture: new Uniform(texture),

    );


  #_updateScale(dt)
    // ...
    this.material.uniforms.uDistance.value = distance;
Okay, our uniforms are set up. Let’s get this shader now!
// scripts/materials/CardMaterial.js

import  ShaderMaterial  from "three";

export class CardMaterial extends ShaderMaterial
  // ...

  #_rewriteVertexShader()
    return /* glsl */`
      varying vec2 vUv;

      void main()
        vUv = uv;

        gl_Position = projectionMatrix * modelViewMatrix * vec4(position, 1.);

    `;


  #_rewriteFragmentShader()
    return /* glsl */`
      uniform sampler2D uTexture;
      uniform float uDistance;

      varying vec2 vUv;

      void main()
        gl_FragColor = vec4(vec3(vUv, 1.), 1.);

    `;
Nothing fancy for the moment; we’re just setting it up so we can access our UVs in the fragment shader and retrieve our uniforms. Your screen should look like this right now:
Now let’s display our image and grayscale it.
// scripts/materials/CardMaterial.js

export class CardMaterial extends ShaderMaterial
  // ...

  #_rewriteFragmentShader()
    return /* glsl */ `
      uniform sampler2D uTexture;
      uniform float uDistance;

      varying vec2 vUv;

      vec3 getLuminance(vec3 color)
        vec3 luminance = vec3(0.2126, 0.7152, 0.0722);
        return vec3(dot(luminance, color));


      void main()
        vec4 image = texture(uTexture, vUv);

        vec3 imageLum = getLuminance(image.xyz);
        vec3 color = imageLum;

        gl_FragColor = vec4(color, 1.);

    `;
We’re adding a getLuminance function that gives us a grayscaled version of our image. I first learned about luminance from this article written by Maxime Heckel. Basically, it represents how the human eye perceives brightness within colors.
Now, all we have to do is apply the effect based on our distance.
// scripts/materials/CardMaterial.js

export class CardMaterial extends ShaderMaterial
  // ...

  #_rewriteFragmentShader()
    return /* glsl */ `
      uniform sampler2D uTexture;
      uniform float uDistance;

      varying vec2 vUv;

      vec3 getLuminance(vec3 color)
        vec3 luminance = vec3(0.2126, 0.7152, 0.0722);
        return vec3(dot(luminance, color));


      void main()
        vec4 image = texture(uTexture, vUv);
        float distanceFactor = min(max(uDistance, 0.), 1.);

        vec3 imageLum = getLuminance(image.xyz);
		vec3 color = mix(image.xyz, imageLum, distanceFactor);

        gl_FragColor = vec4(color, 1.);

    `;
And here we are!
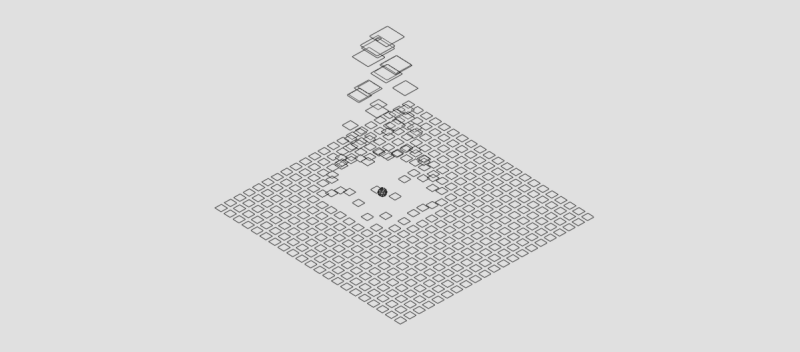
Intro Animation
Let’s put these cards back in the center by commenting out the line where we set the position, and just store it in a new Vector3 for the moment.
// scripts/components/Card.js

export class Card extends ExtendedObject3D {
  // ...
  #_gridPosition = new Vector3();

  #_setTargetPosition()
    // ...

	// Comment this ⬇️
	// this.position.set(x, y, 0);

    this.#_gridPosition.set(x, y, 0);
The logic of the animation is pretty simple: we make our card move to its target position on the x-axis first. Then, when it’s close enough, we allow it to move to its y position too. This is the trick for achieving that wavy look.
// scripts/components/Card.js

export class Card extends ExtendedObject3D
	// ...
	#_targetPosition = new Vector3();

	update(dt)
    this.#_updateScale(dt);
    this.#_updatePosition(dt);


	#_updatePosition(dt)
    const distanceX = Math.abs(this.#_gridPosition.x - this.position.x);

    this.#_targetPosition.set(
      this.#_gridPosition.x,
      distanceX < 0.075 ? this.#_gridPosition.y : 0,
      this.position.z
    );

    this.position.lerp(
      this.#_targetPosition,
      1 - Math.pow(0.005 / Grid.COLUMNS, dt)
    );
And we are done!
Even though this effect is already pretty cool, it can still be improved:
Going Further
- Handling the resize – What I would do is probably create a bunch of cards (more than we need) during the initial setup and store them. That way, if you switch to a larger screen size, you’ll just need to display/rearrange them without creating new ones each time. Just make sure the inactive ones aren’t running their update functions every frame.
- Adding border radius to cards – If you check the original post, you’ll see that my cards have rounded corners. Try implementing this on your own.
- Allow cards to have images with an aspect ratio other than 1:1 in the shader – This wasn’t the focus of the article, so I didn’t handle cases where our images aren’t square. They would be stretched otherwise right now.
- Completing the intro animation – In the original example, I’ve done an animation where the cards come from below. Try to reimplement this by yourself; there’s a small trick involved 👀
And that’s it! Thank you for reading all the way through; I hope you’ve enjoyed this tutorial and learned something along the way! 🙏