Feature flagging has changed the paradigm of how backend developers can test and modify the things they build. With feature flags, we can enable and disable a feature or change the functionality of something on the fly with a single click (no need to redeploy).
In this tutorial, we will see how feature flags help us to enable and disable a feature/a part of code whenever we want from the UI, without the need to redeploy the whole code.
To understand things more deeply, we will build an app from scratch, look at feature flagging capabilities, and use a tool called Flagsmith to manage our created feature flags from a single dashboard.
Here’s what we’ll cover:
Prerequisites
-
Golang installed and a medium-level understanding of it.
-
A running Redis instance (Remote or local instance)
-
Flagsmith Account (It’s Free. We will cover this later in the article.)
What is a Feature Flag?
Feature Flag is a technique in development that allows teams to turn features on or off without modifying the source code or redeploying.
To make it a bit simpler, think of them as functioning sort of like conditional statements (for example, if-else statements): based on when something’s true or false, it determines the code path that will be executed.
Feature Flags for Backend Development
You may have seen feature flags used in frontends and websites, but there is much more to them. You can use them on the server side to modify the functionality of an API, doing things like modifying/setting the rate limit, changing the API endpoint’s functionality or completely turning it off. As backend developers, we can level up our testing with feature flags.
To demonstrate this, we will go through building a demo app. The demo app is curated to show feature flagging capabilities from modifying the functionality (rate limit) on the fly to adding a new endpoint to the API for beta testing or initial rolling purposes. We’ll use entirely open-source tools along the way!
We will be using open source tools to build this app (Golang, Redis, and Flagsmith). Open source brings more transparency and trust and encourages collaboration with the global community of backend developers.
By integrating open source tools, we get full visibility as we build and test. For example, we will integrate feature flags with GitHub, which lets us track the lifecycle of a feature by linking a Flagsmith feature flag with a GitHub Pull Request or Issue. This lets us stay updated with the changes to our features without having to manually track each modification. We can easily track the status of our features across different environments.
Let’s Code!
In this tutorial, you’ll see how the functionality of an app changes before and after testing with feature flagging mechanisms. The tools and frameworks we’ll use are Golang, Docker, Redis, Flagsmith, and GitHub. As discussed, all are open source and free to create an account to test.
To get started, open your favourite IDE, initialize a Golang project, and then copy the below code in the main.go file. Then run go mod tidy to install all the dependencies it needs.
Let’s understand what’s going on in the below code snippet:
package main

import (
    "context"
    "errors"
    "fmt"
    "log"
    "net/http"
    "os"
    "strconv"

    "github.com/gin-gonic/gin"
    "github.com/go-redis/redis_rate/v10"
    "github.com/joho/godotenv"
    "github.com/redis/go-redis/v9"
)

var (
    redisClient *redis.Client
    limiter     *redis_rate.Limiter
)

func initClients() {
    redisClient = redis.NewClient(&redis.Options{
        Addr: os.Getenv("REDIS_URL"),
    })
    limiter = redis_rate.NewLimiter(redisClient)
}

func main() {
    err := godotenv.Load()
    if err != nil {
        log.Printf("Loading environment variable from the host system")
    } else {
        log.Printf("Loading environment from .env file")
    }

    initClients()
    defer redisClient.Close()

    r := gin.Default()
    r.GET("/ping", func(c *gin.Context) {
        err, remainingLimit := rateLimitCall(c.ClientIP())
        if err != nil {
            c.JSON(
                http.StatusTooManyRequests,
                gin.H{"error": "Rate Limit Hit"})
        } else {
            c.JSON(
                http.StatusOK,
                gin.H{"Your left over API request is": remainingLimit})
        }
    })
    r.GET("/beta", func(c *gin.Context) {
        c.JSON(
            http.StatusOK,
            gin.H{"message": "This is beta endpoint"})
    })
    r.Run(":" + os.Getenv("PORT"))
}

func rateLimitCall(ClientIP string) (error, int) {
    ctx := context.Background()

    rateLimitString := os.Getenv("RATE_LIMIT")
    RATE_LIMIT, _ := strconv.Atoi(rateLimitString)

    res, err := limiter.Allow(ctx, ClientIP, redis_rate.PerHour(RATE_LIMIT))
    if err != nil {
        panic(err)
    }

    if res.Remaining == 0 {
        return errors.New("You have hit the Rate Limit for the API. Try again later"), 0
    }

    fmt.Println("remaining request for", ClientIP, "is", res.Remaining)
    return nil, res.Remaining
}
Initializing the Tools
func initClients() {
    redisClient = redis.NewClient(&redis.Options{
        Addr: os.Getenv("REDIS_URL"),
    })
    limiter = redis_rate.NewLimiter(redisClient)
}

func main() {
    err := godotenv.Load()
    if err != nil {
        log.Printf("Loading environment variable from the host system")
    } else {
        log.Printf("Loading environment from .env file")
    }

    initClients()
    defer redisClient.Close()

    r := gin.Default()
    ...
    })
At the top, we declare variables to store Redis and Rate limiter clients to reuse and initialise them once. Then we initialise them in the initClients().
In main(), first, we load the environment variables from the system or the .env file. Then we call initClients(). This will create clients and store them in the variables we created.
Next, we create a Gin router that handles all our incoming requests. These are the environment variables we need in our .env file. For this demo, we need a Redis instance running to store all the data for rate-limiting functionality. We can use Docker or any remote machine – just remember to update REDIS_URL accordingly. I am going to use Docker.
We could also go a mile ahead and get all the environment variables from the feature flags, but we won’t do this here.
REDIS_URL=localhost:6379
PORT=8080
RATE_LIMIT=10
Creating Endpoints for the API
r.GET("/ping", func(c *gin.Context) {
        err, remainingLimit := rateLimitCall(c.ClientIP())
        if err != nil {
            c.JSON(
                http.StatusTooManyRequests,
                gin.H{"error": "Rate Limit Hit"})
        } else {
            c.JSON(
                http.StatusOK,
                gin.H{"Your left over API request is": remainingLimit})
        }
    })
    r.GET("/beta", func(c *gin.Context) {
        c.JSON(
            http.StatusOK,
            gin.H{"message": "This is beta endpoint"})
    })
    r.Run(":" + os.Getenv("PORT"))
Then we create two GET endpoints, /ping and /beta. Every time someone hits the /ping endpoint we call the rateLimitCall() function. It checks and sets the rate limit of incoming requests from an IP address. All this is stored in the Redis instance we created.
So, now if the user has interacted with the /ping API endpoint for the first time, will create an entry with a limit of 10 per hour. The limit number 10 comes from the RATE_LIMIT we set, and the hourly refresh form comes from the redis_rate.PerHour(RATE_LIMIT) function.
Next, we check if the user has a remaining limit. If yes, we will return a message with the number of requests they have remaining. Otherwise, if they hit the limit cap, we return a message letting them know this.
Apart from the /ping endpoint, we have another endpoint /beta. It returns a simple message, but later we’ll see how (using feature flags) we can completely turn on and off the functionality of this endpoint.
How to Add Feature Flagging
Now it’s time to add feature flagging capabilities to our app. We are going to use Flagsmith. Flagsmith is an open source software that lets us easily create and manage feature flags across web, mobile, and server-side applications.
Using Flagsmith, we can wrap features in a flag and then toggle them on or off for different environments, users, or user segments. And then you’ll be able to manage all of them from the Flagsmith dashboard without needing to redeploy.
So, let’s install the Flagsmith package by running the below command:
go get github.com/Flagsmith/flagsmith-go-client/v3
Then we import the package by giving it an alias flagsmith. Below is the updated functionality after we apply feature flagging to our existing code.
Let’s understand the changes we’ve made here (I’ll explain below the code snippet):
package main

import (
    "context"
    "errors"
    "fmt"
    "log"
    "net/http"
    "os"

    flagsmith "github.com/Flagsmith/flagsmith-go-client/v3"
    "github.com/gin-gonic/gin"
    "github.com/go-redis/redis_rate/v10"
    "github.com/joho/godotenv"
    "github.com/redis/go-redis/v9"
)

var (
    redisClient     *redis.Client
    limiter         *redis_rate.Limiter
    flagsmithClient *flagsmith.Client
)

func initClients() {
    redisClient = redis.NewClient(&redis.Options{
        Addr: os.Getenv("REDIS_URL"),
    })
    limiter = redis_rate.NewLimiter(redisClient)
    flagsmithClient = flagsmith.NewClient(os.Getenv("FLAGSMITH_ENVIRONMENT_KEY"))
}

func main() {
    err := godotenv.Load()
    if err != nil {
        log.Printf("Loading environment variable from the host system")
    } else {
        log.Printf("Loading environment from .env file")
    }

    initClients()
    defer redisClient.Close()

    r := gin.Default()
    r.GET("/ping", func(c *gin.Context) {
        err, remainingLimit := rateLimitCall(c.ClientIP())
        if err != nil {
            c.JSON(
                http.StatusTooManyRequests,
                gin.H{"error": "Rate Limit Hit"})
        } else {
            c.JSON(
                http.StatusOK,
                gin.H{"Your left over API request is": remainingLimit})
        }
    })
    r.GET("/beta", func(c *gin.Context) {
        flags := getFeatureFlags()
        isEnabled, _ := flags.IsFeatureEnabled("beta")
        if isEnabled {
            c.JSON(
                http.StatusOK,
                gin.H{"message": "This is beta endpoint"})
        } else {
            c.String(http.StatusNotFound, "404 page not found")
        }
    })

    r.Run(":" + os.Getenv("PORT"))
}

func rateLimitCall(ClientIP string) (error, int) {

    ctx := context.Background()

    flags := getFeatureFlags()
    rateLimitInterface, _ := flags.GetFeatureValue("rate_limit")
    RATE_LIMIT := int(rateLimitInterface.(float64))
    fmt.Println("Current Rate Limit is", RATE_LIMIT)

    res, err := limiter.Allow(ctx, ClientIP, redis_rate.PerHour(RATE_LIMIT))
    if err != nil {
        panic(err)
    }

    if res.Remaining == 0 {
        return errors.New("You have hit the Rate Limit for the API. Try again later"), 0
    }

    fmt.Println("remaining request for", ClientIP, "is", res.Remaining)
    return nil, res.Remaining
}

func getFeatureFlags() flagsmith.Flags {
    ctx := context.Background()
    flags, _ := flagsmithClient.GetEnvironmentFlags(ctx)
    return flags
}
Understanding the Feature Flag Code Logic
func getFeatureFlags() flagsmith.Flags {
    ctx := context.Background()
    flags, _ := flagsmithClient.GetEnvironmentFlags(ctx)
    return flags
}
First, let’s directly jump to the new getFeatureFlags() function we created at the bottom. This function will return all the flags we created on the Flagsmith dashboard, by calling the GetEnvironmentFlags() method on flagsmithClient.
We initiated the flagsmithClient inside the initClients() function. The Flagsmith Client needs the access key (the NewClient() function) that we can get from the Flagsmith dashboard. As we did for the Redis and Limter clients, we will store the client in a global variable for reusability. You’ll understand the dashboard, creating flags, and retrieving the key in later steps.
func rateLimitCall(ClientIP string) (error, int) {

    ctx := context.Background()

    flags := getFeatureFlags()
    rateLimitInterface, _ := flags.GetFeatureValue("rate_limit")
    RATE_LIMIT := int(rateLimitInterface.(float64))
    fmt.Println("Current Rate Limit is", RATE_LIMIT)

    res, err := limiter.Allow(ctx, ClientIP, redis_rate.PerHour(RATE_LIMIT))
    if err != nil {
        panic(err)
    }

    if res.Remaining == 0 {
        return errors.New("You have hit the Rate Limit for the API. Try again later"), 0
    }

    fmt.Println("remaining request for", ClientIP, "is", res.Remaining)
    return nil, res.Remaining
}
Now coming to the rateLimitCall() function, instead of getting RATE_LIMIT from the environment, we get the value from the rate_limit flag (that we will create later). We call getFeatureFlags() and get the flag rate_limit value out from all the flags.
By setting these as feature flags, we can dynamically change the limit anytime from the dashboard. We don’t need to change the code’s functionality or do it the traditional way by changing the RATE_LIMIT value and re-running the server so that it catches new updated values.
    r.GET("/beta", func(c *gin.Context) {
        flags := getFeatureFlags()
        isEnabled, _ := flags.IsFeatureEnabled("beta")
        if isEnabled {
            c.JSON(
                http.StatusOK,
                gin.H{"message": "This is beta endpoint"})
        } else {
            c.String(http.StatusNotFound, "404 page not found")
        }
    })
Now coming to the /beta endpoint, based on whether the beta flag is enabled or disabled, this endpoint will serve the query. Otherwise, it will act as a non-reachable endpoint and return a 404 error message.
In our example, I have added a basic placeholder message to show how it will work, but this opens new possibilities in testing and initial releases (beta). If the API has a new endpoint, we can wrap the functionality in the feature flag and make it available and unavailable with a single click of a button. Also, we can do a lot more like scheduling and canary releases.
Also, our .env file will look like this. We have removed RATE_LIMIT and added FLAGSMITH_ENVIRONMENT_KEY.
REDIS_URL=localhost:6379
PORT=8080
FLAGSMITH_ENVIRONMENT_KEY=ser.ZRd***********469
How to Create Feature Flags in the Flasgsmith Dashboard
Let’s head to the Flagsmith dashboard to create the flags we used above and get the access key. If you don’t have a Flagsmith account you can sign up for free here.
After you sign up you will be prompted to create an organisation and a project. Project separation is good, as it helps us isolate logic for different projects. Once you are done, you will see a dashboard, just like the screenshot below.
We have loads of functionalities from integrations to scheduling the flags to compare the changes. Apart from Go, Flagsmith provides many SDKs. You can click on where the language name is written and it will give you some boilerplate code for that language.
Rate Limiting Feature Flag
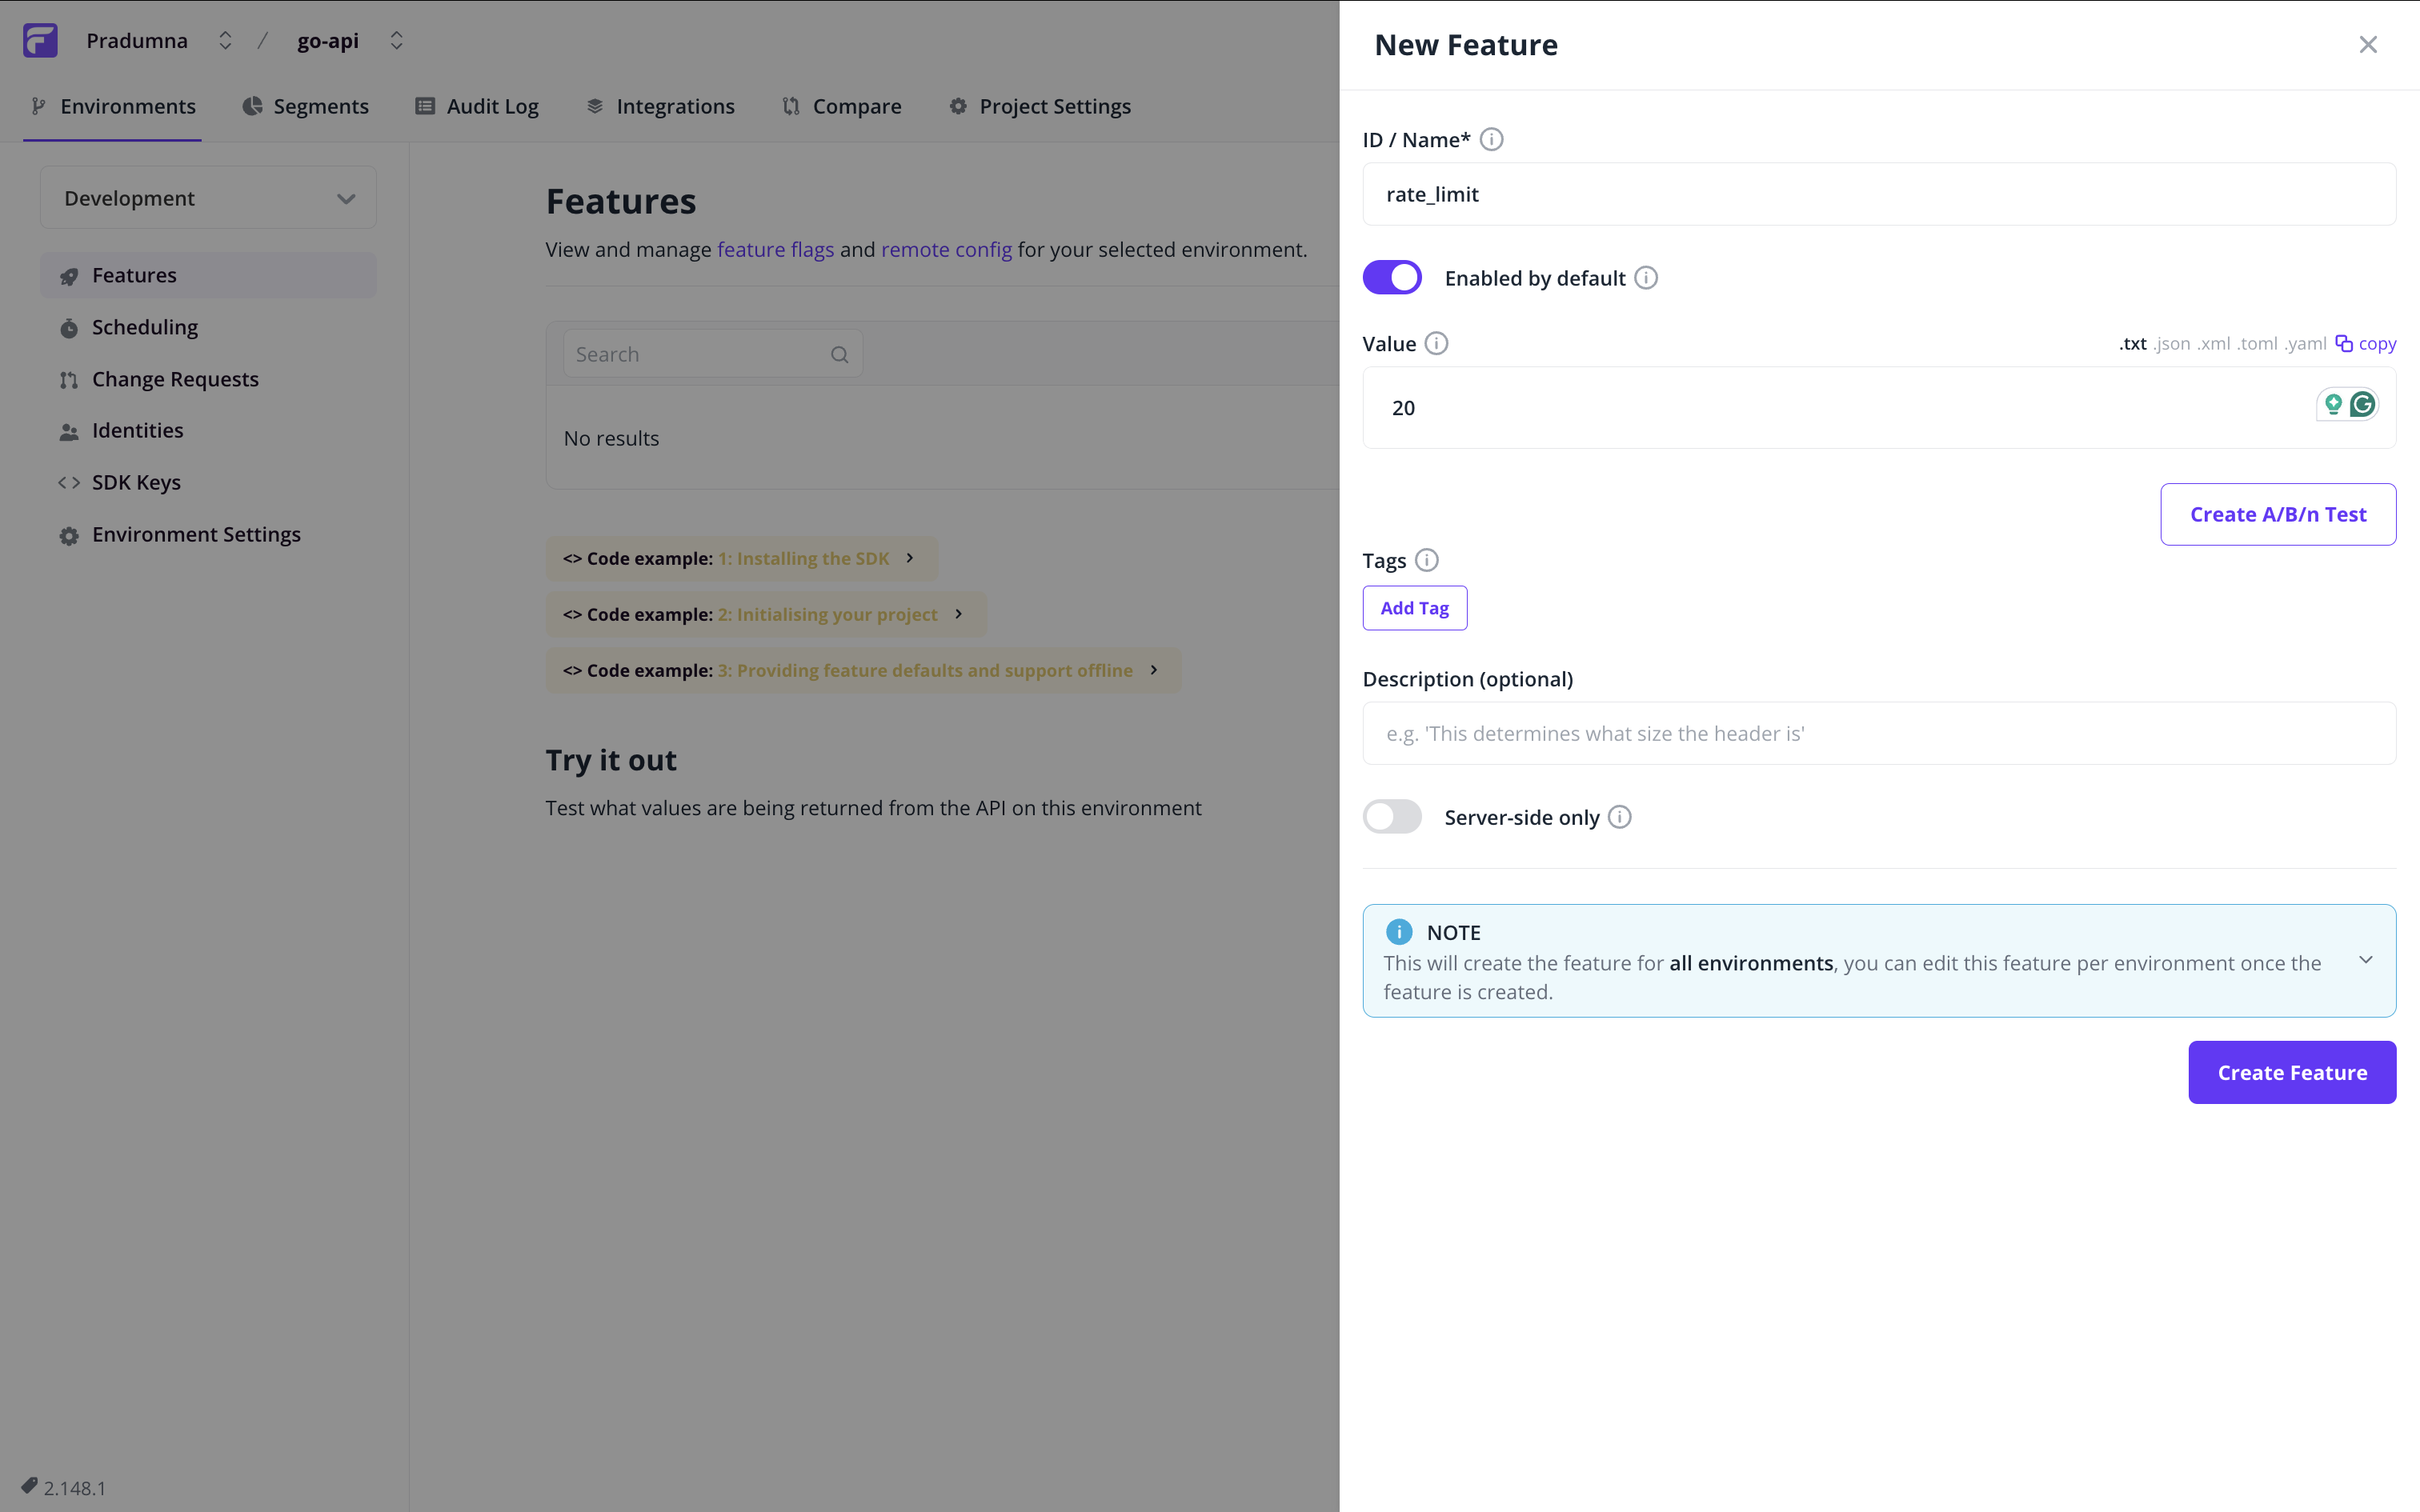
Now, let’s create our first feature flag for the rate limit. Click on the Create Feature button in the top right corner. A sidebar window will open up. Set the name, then to make the flag turn on the right way while creating, we can select Enabled by default.
In the value section, we need to set the flag value. It can take formats like Txt, JSON, XML, and so on. As our feature value is simple text like 20, 30, and so on, we will choose Txt (the default one) and set a random limit – we’ll go with 20.
You can also give tags and descriptions. Tags can be helpful when filtering out the Feature Flags. For example, we can create a tag backend to filter out all the feature flags related to Backend. The description is a concise explanation of what this particular future flag does when it is enabled (and will help with future understanding).
The screenshot below shows how it will look after filling in the details. Then, click on the Create Feature button to create the flag.
Beta Feature Flag
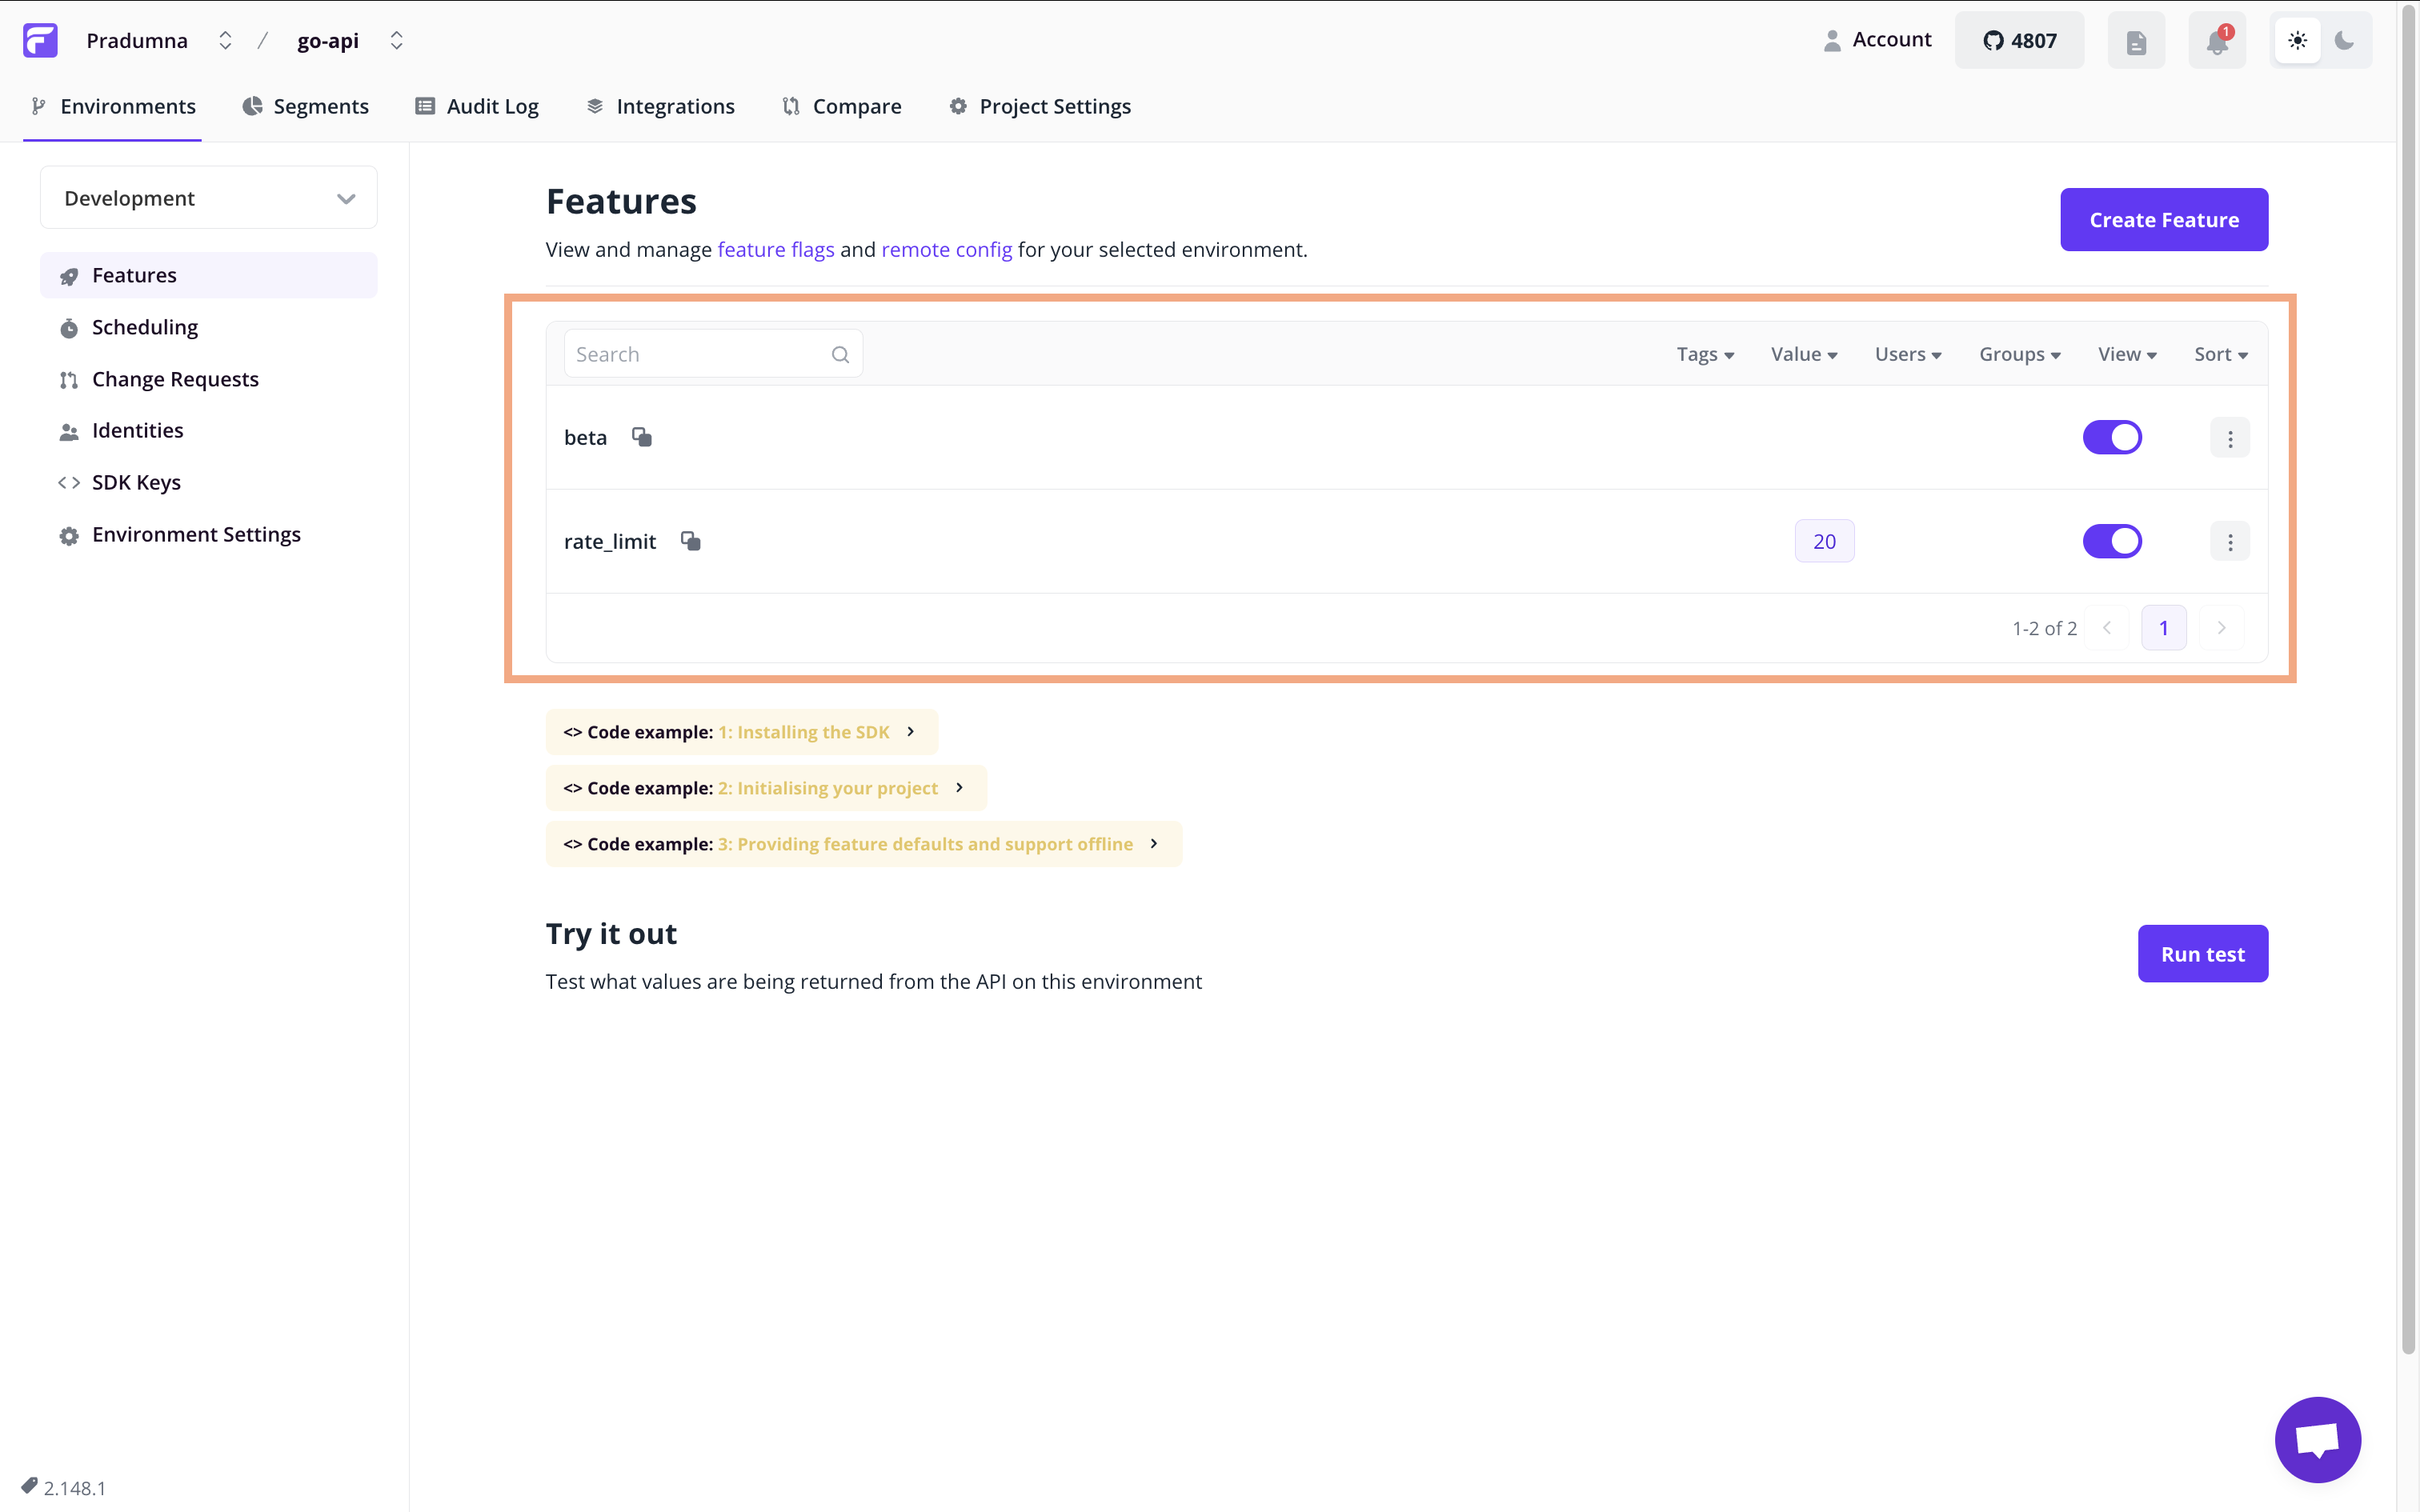
Let’s now create a second, beta feature flag. It will be the same process as the first one, but in this one, we don’t need to set any flag value and leave that column empty. Once we create both flags, our dashboard will look like this. It shows the flag name, value, current state (view), and so on.
Getting the Access Key
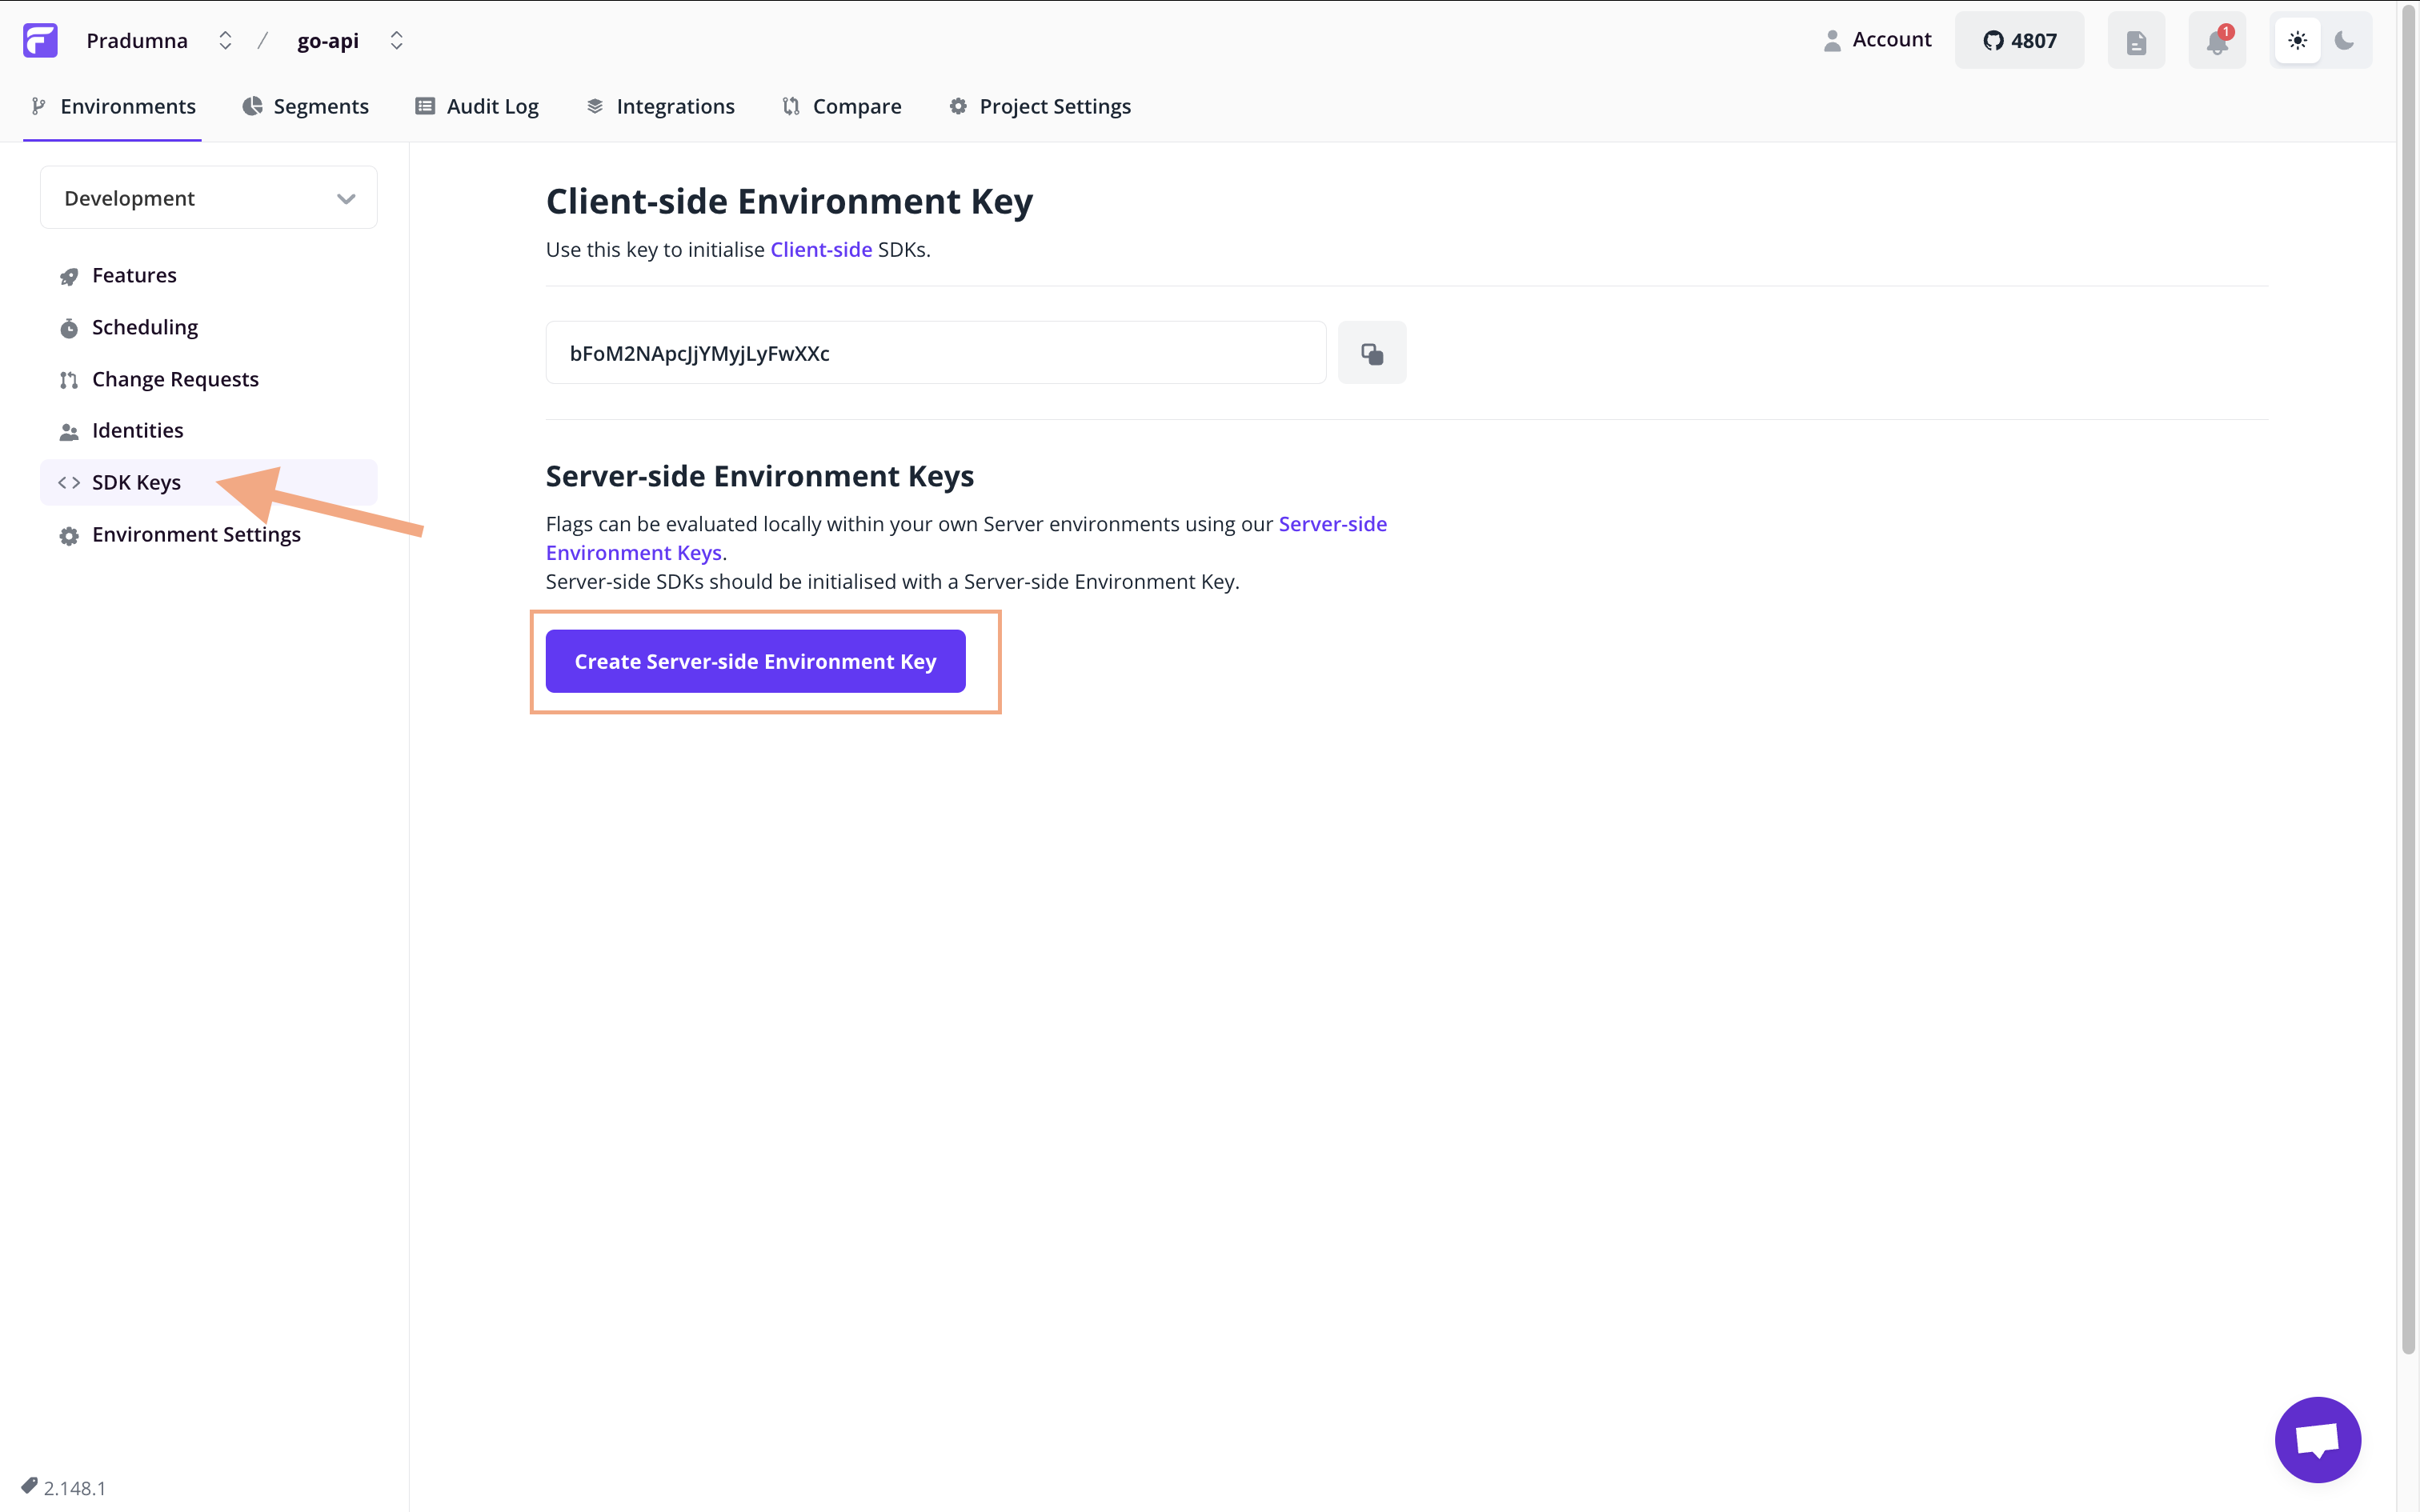
To get the Access Key, click on the SDK Keys from the sidebar, and click the Create Server-side Environment Key button to generate a key. As our app is server-side, it’s good to use that one only. Then copy and paste that key into the value placed in .env for the FLAGSMITH_ENVIRONMENT_KEY key.
Running the API
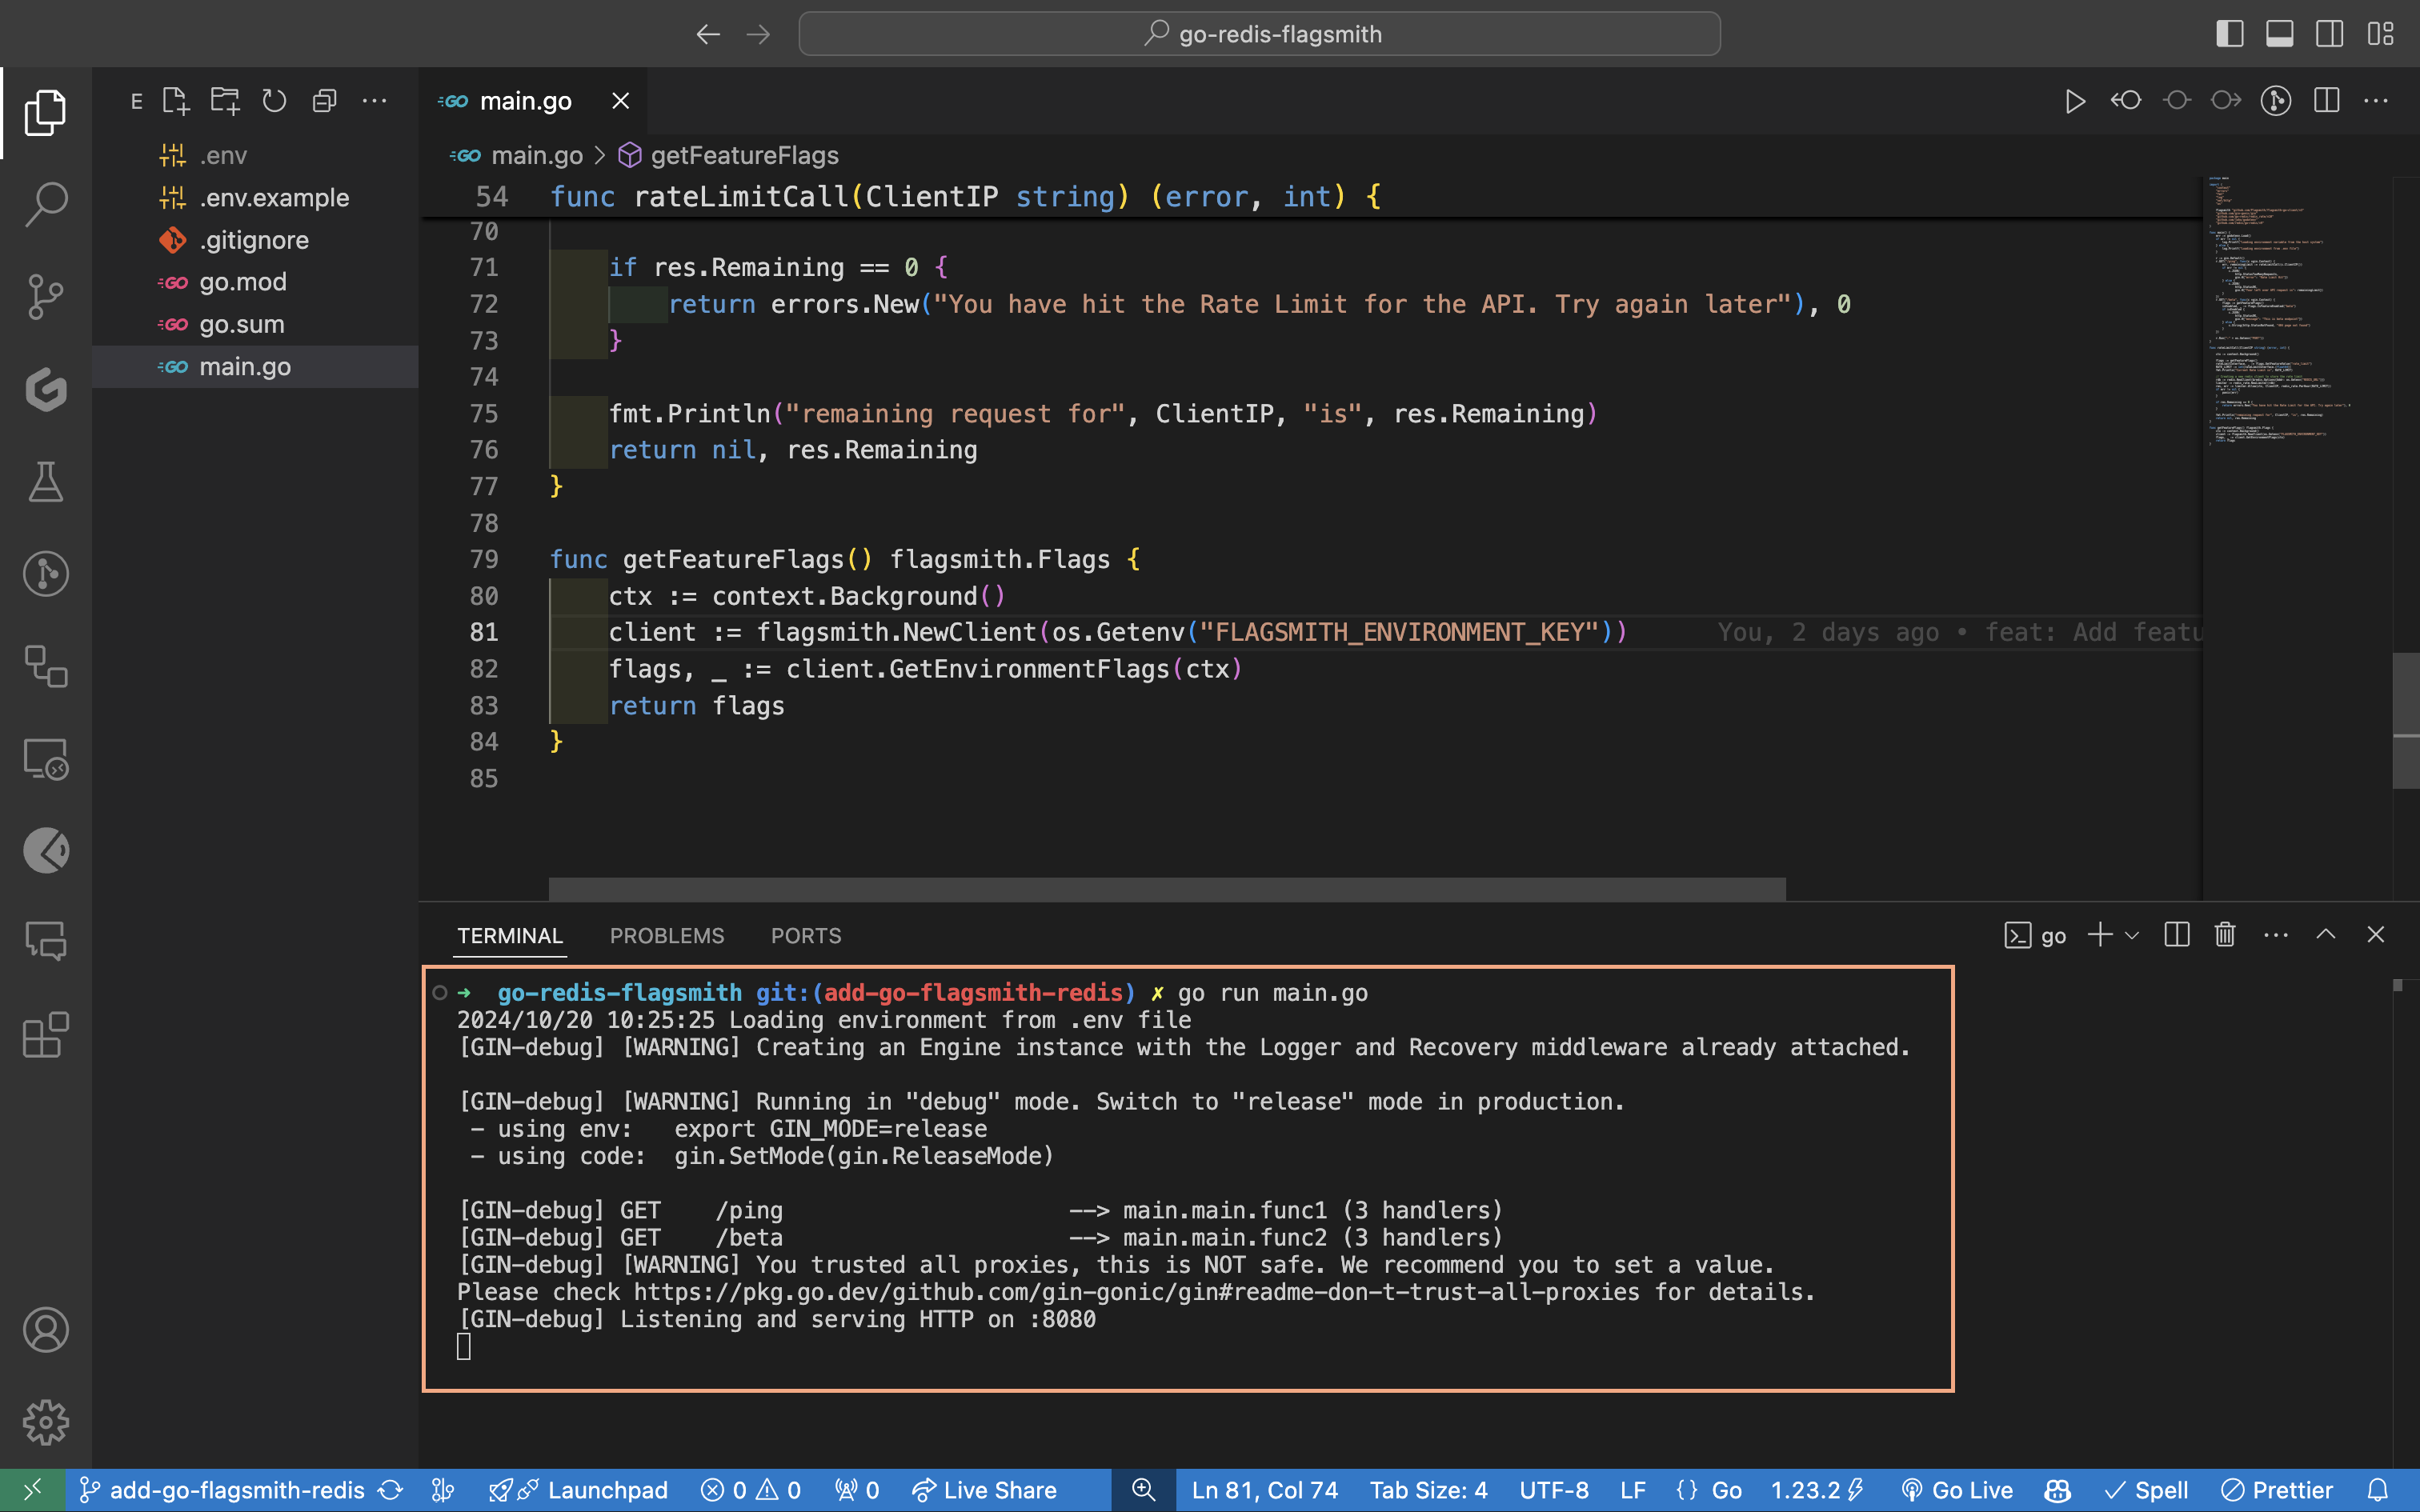
Now everything is set, so let’s head over back to IDE and run the server by executing the go run main.go command in the terminal. We will see this message In the terminal. In case you encounter any errors, just check that the packages are correctly installed, the variables are correctly set, and the app accesses the Redis instance.
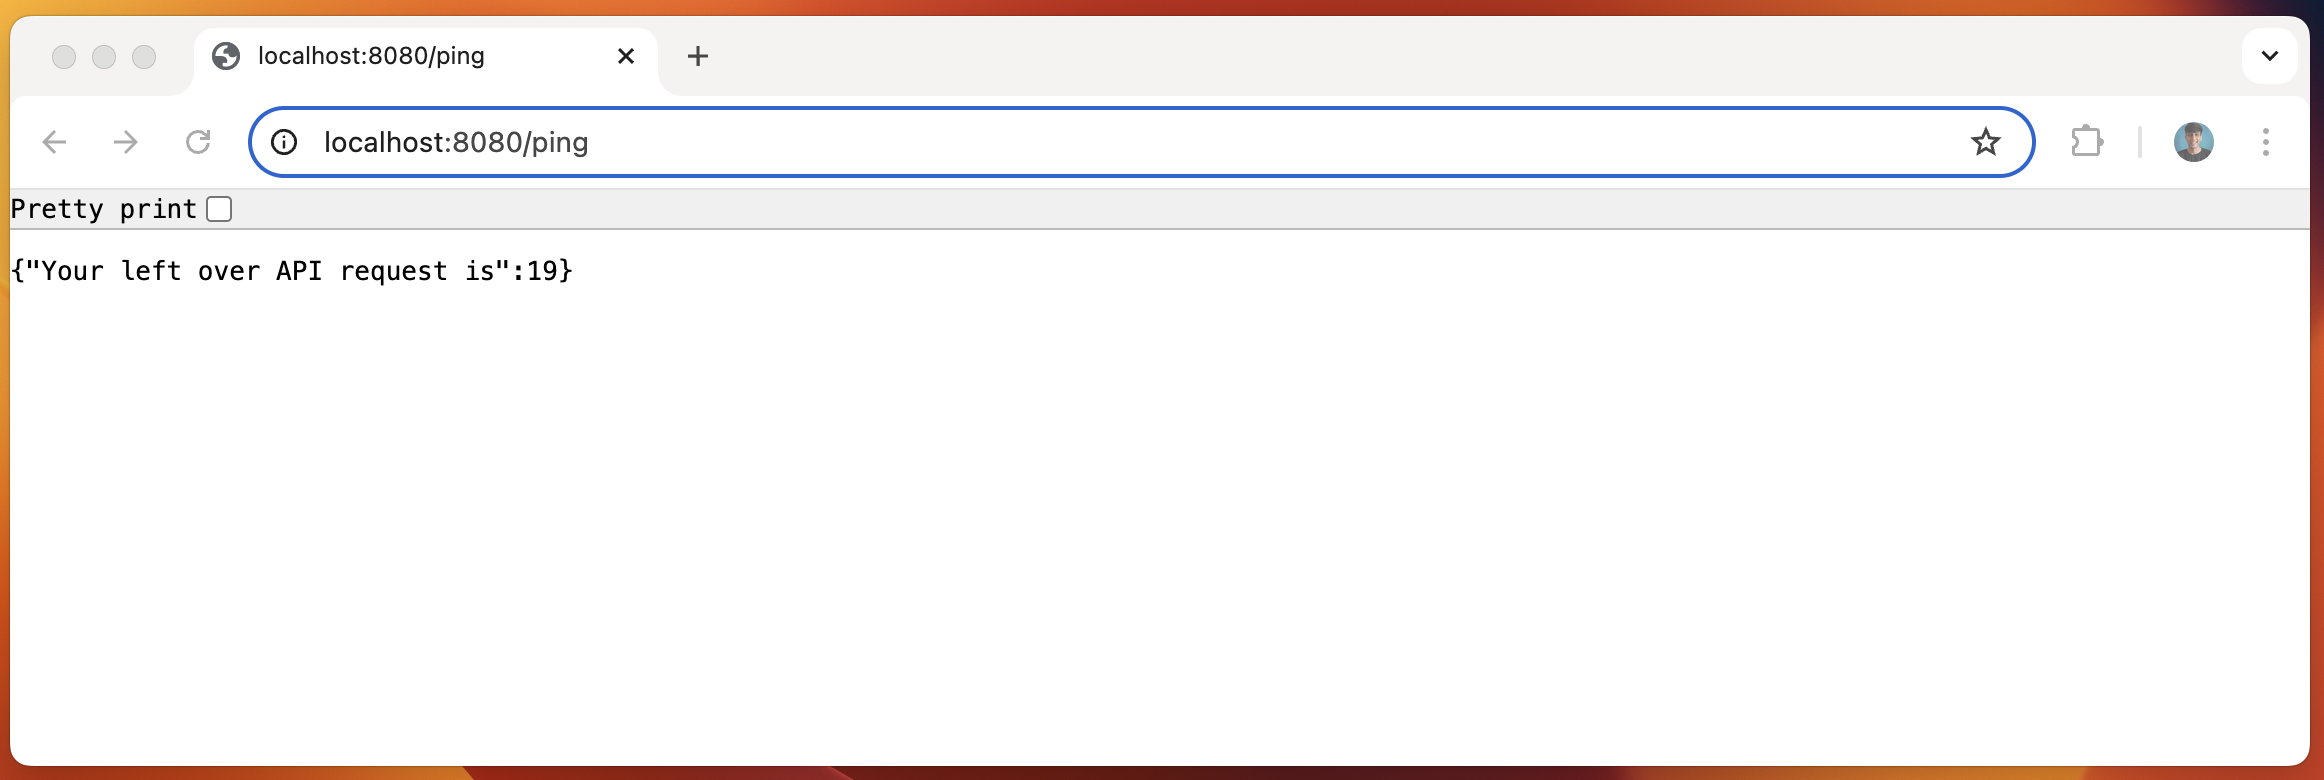
Now if we visit localhost:8080/ping, we will get a message {"Your left over API request is":19}. The limit was 20, we did one request now, and the remaining is 19.
Updating the rate_limit Flag
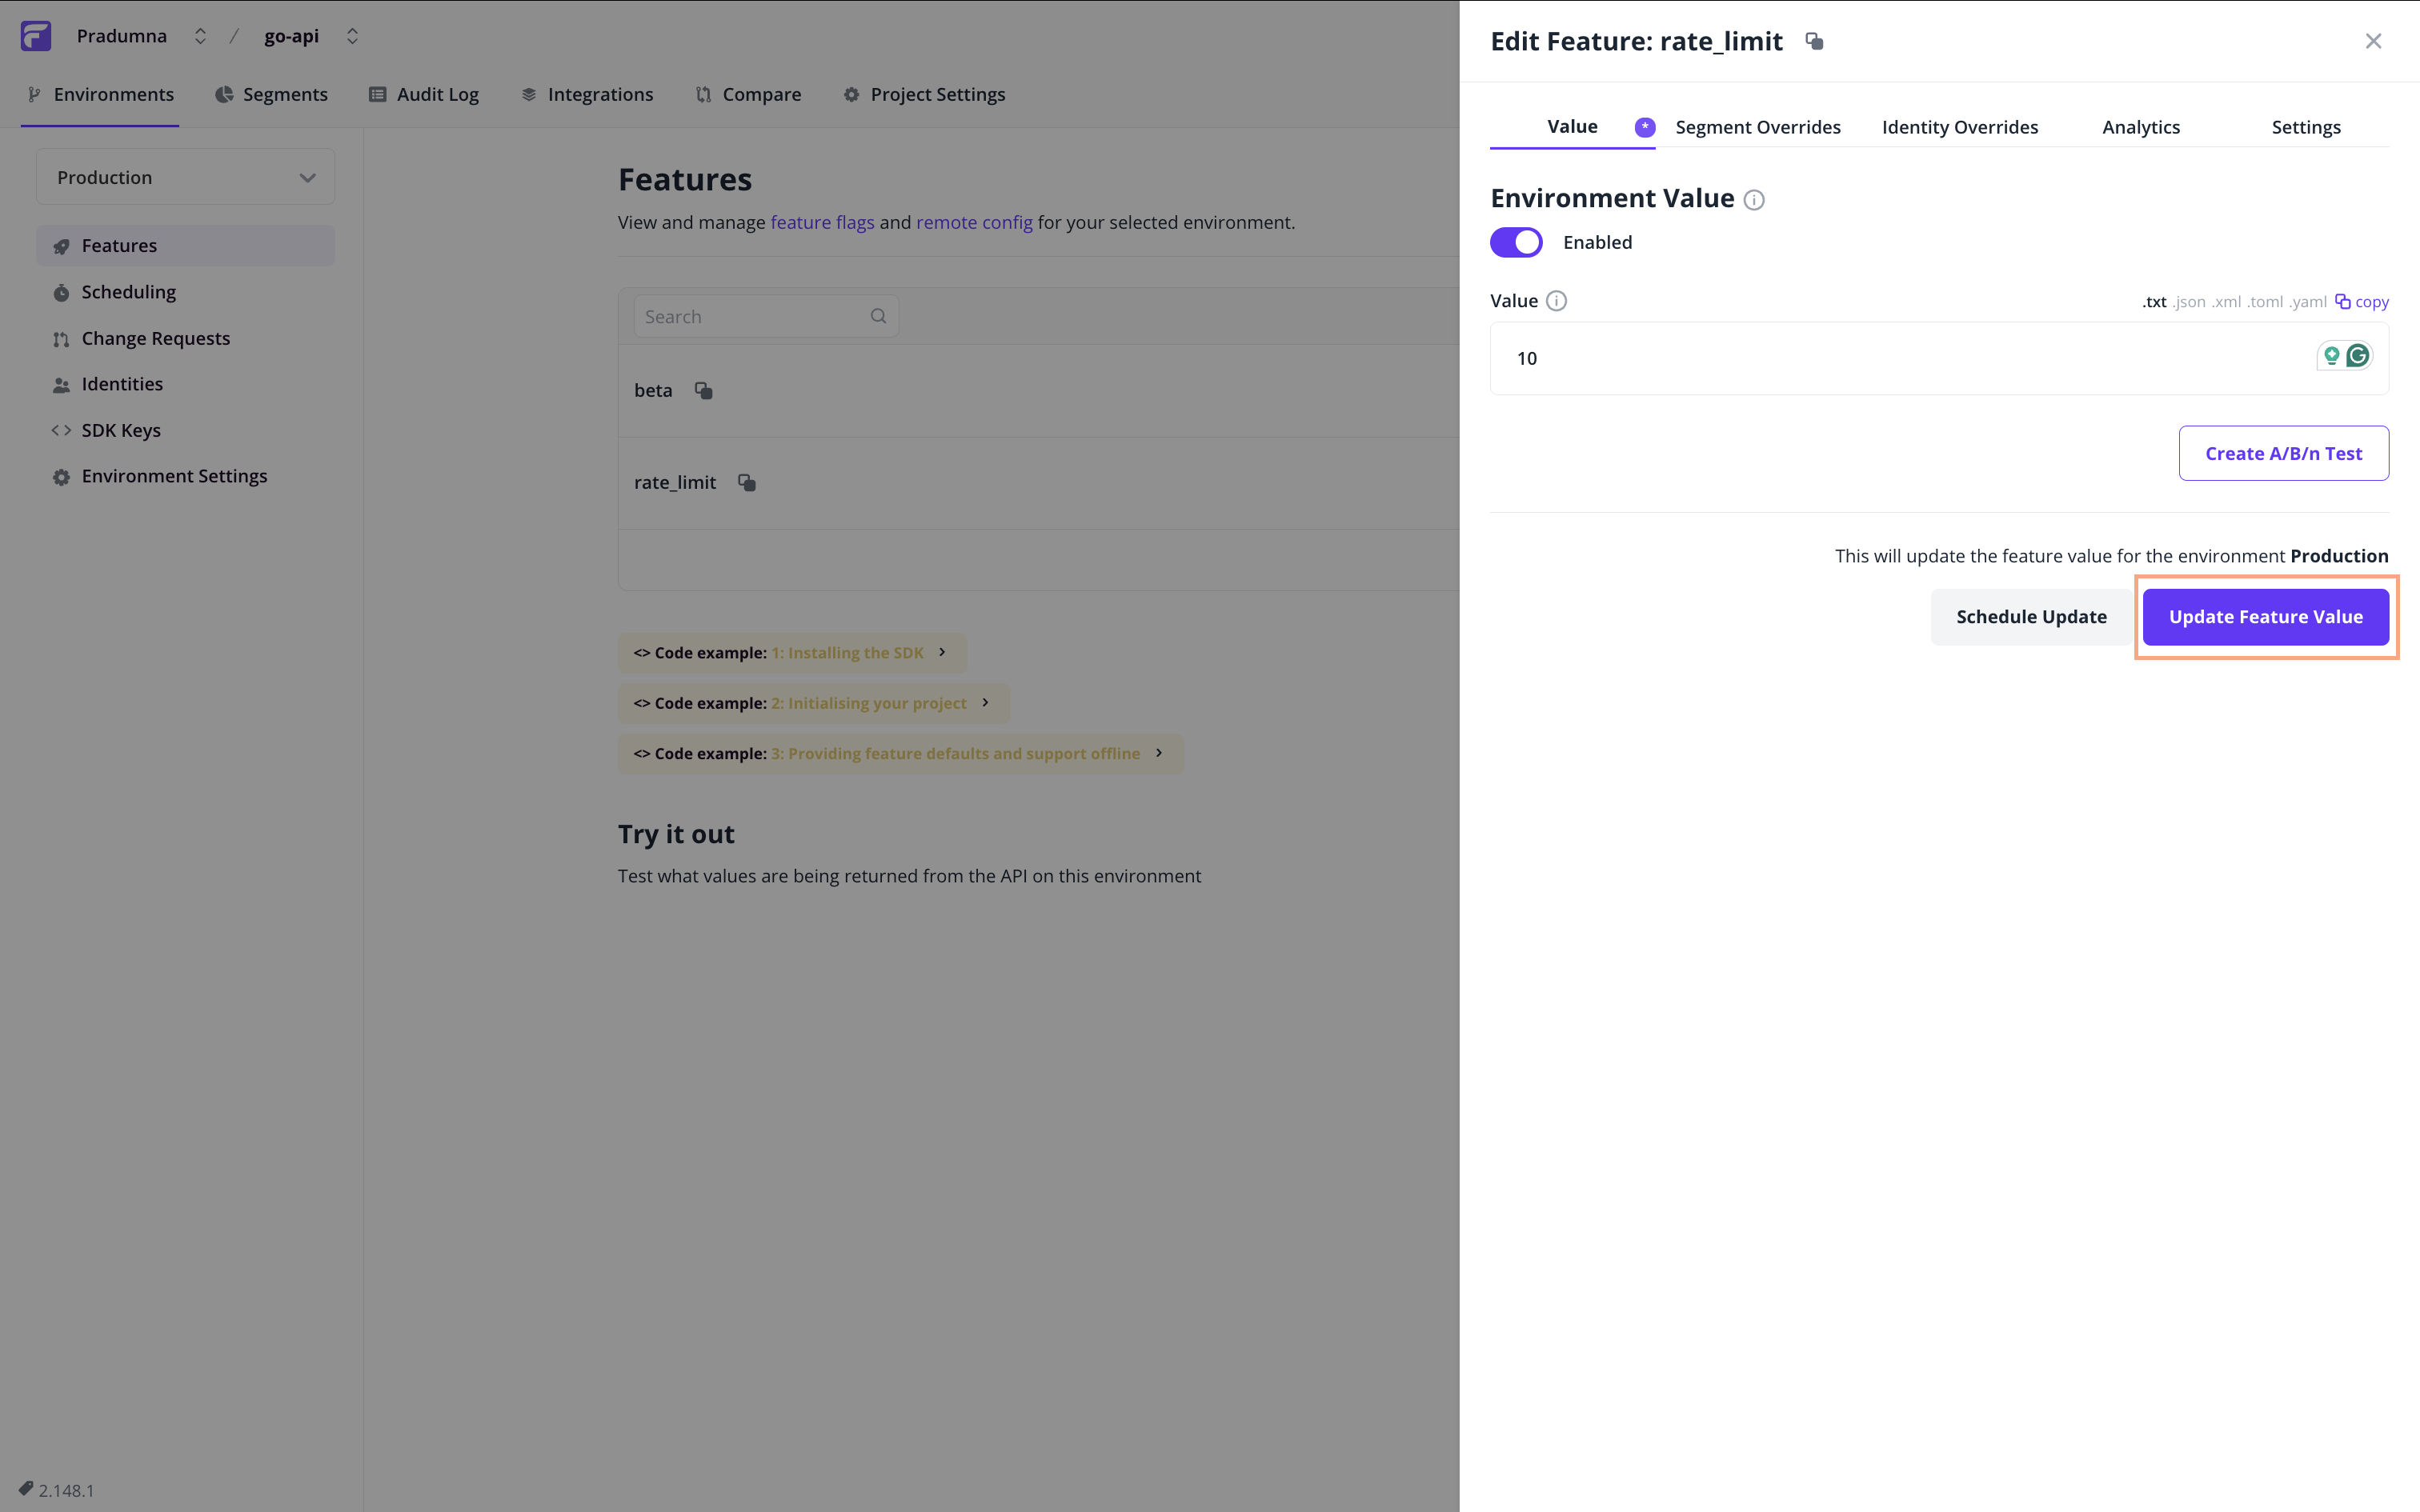
Let’s update the rate_limit flag value to 10 and see what happens. To do so, again visit the Flagsmith dashboard and click on the flag name. A side menu bar will open. Update the value to 10, and click on the Update Feature Value button.
We can also schedule the update. For example, this can be useful when we expect a spike in traffic at a certain timeframe and reduce the limit per user to reduce server load.
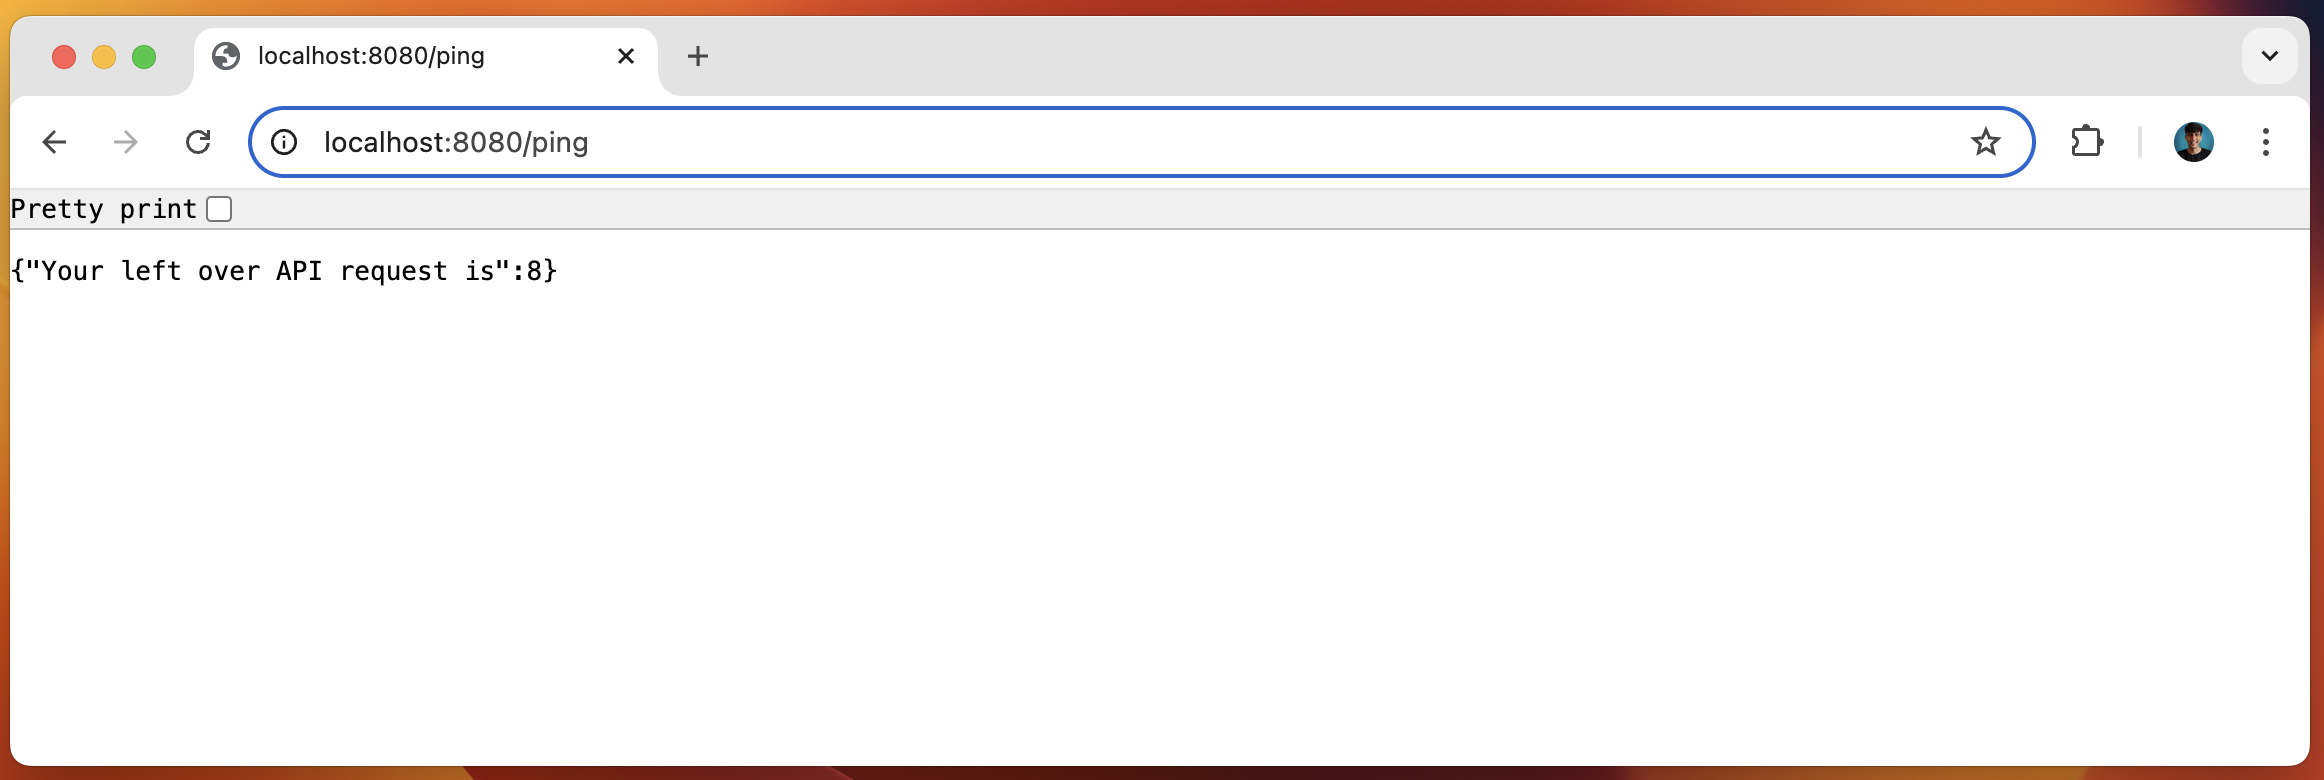
If you now visit localhost:8080/ping, you will get a message {"Your left over API request is":8} – because the total limit is 10 and we have already requested two times.
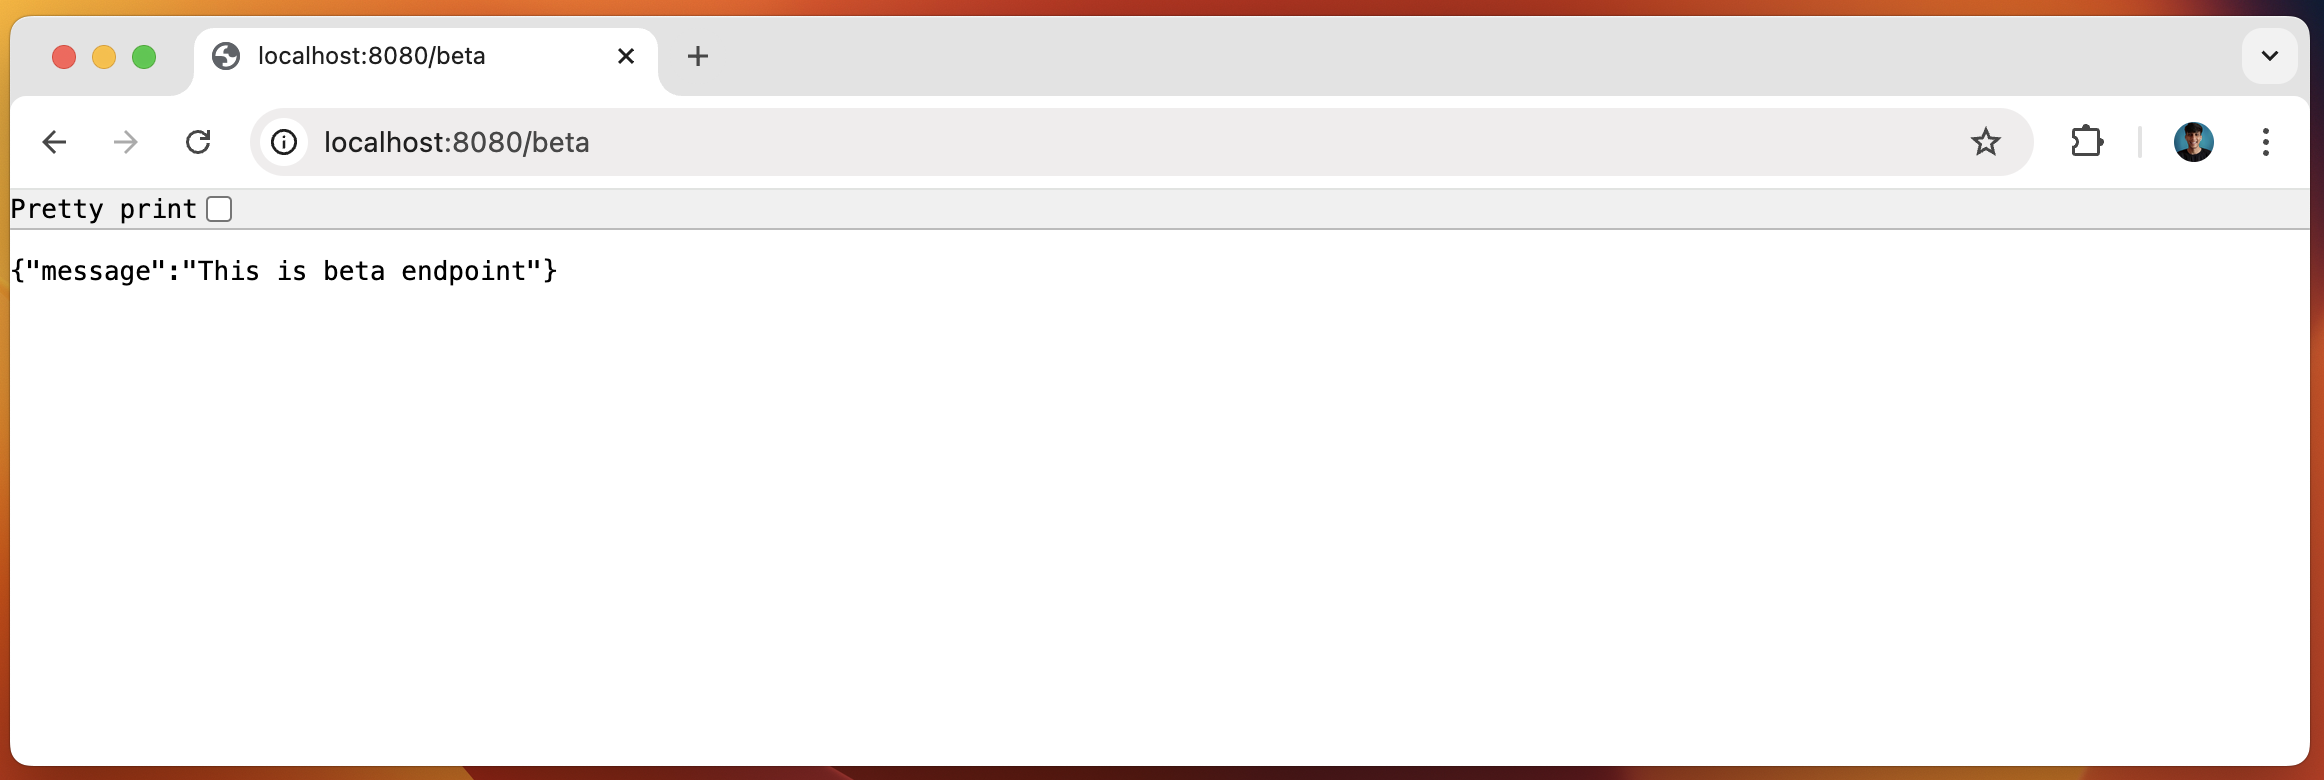
Let’s now test the /beta endpoint. Visit localhost:8080/beta, and we will see a message {"message":"This is beta endpoint"}.
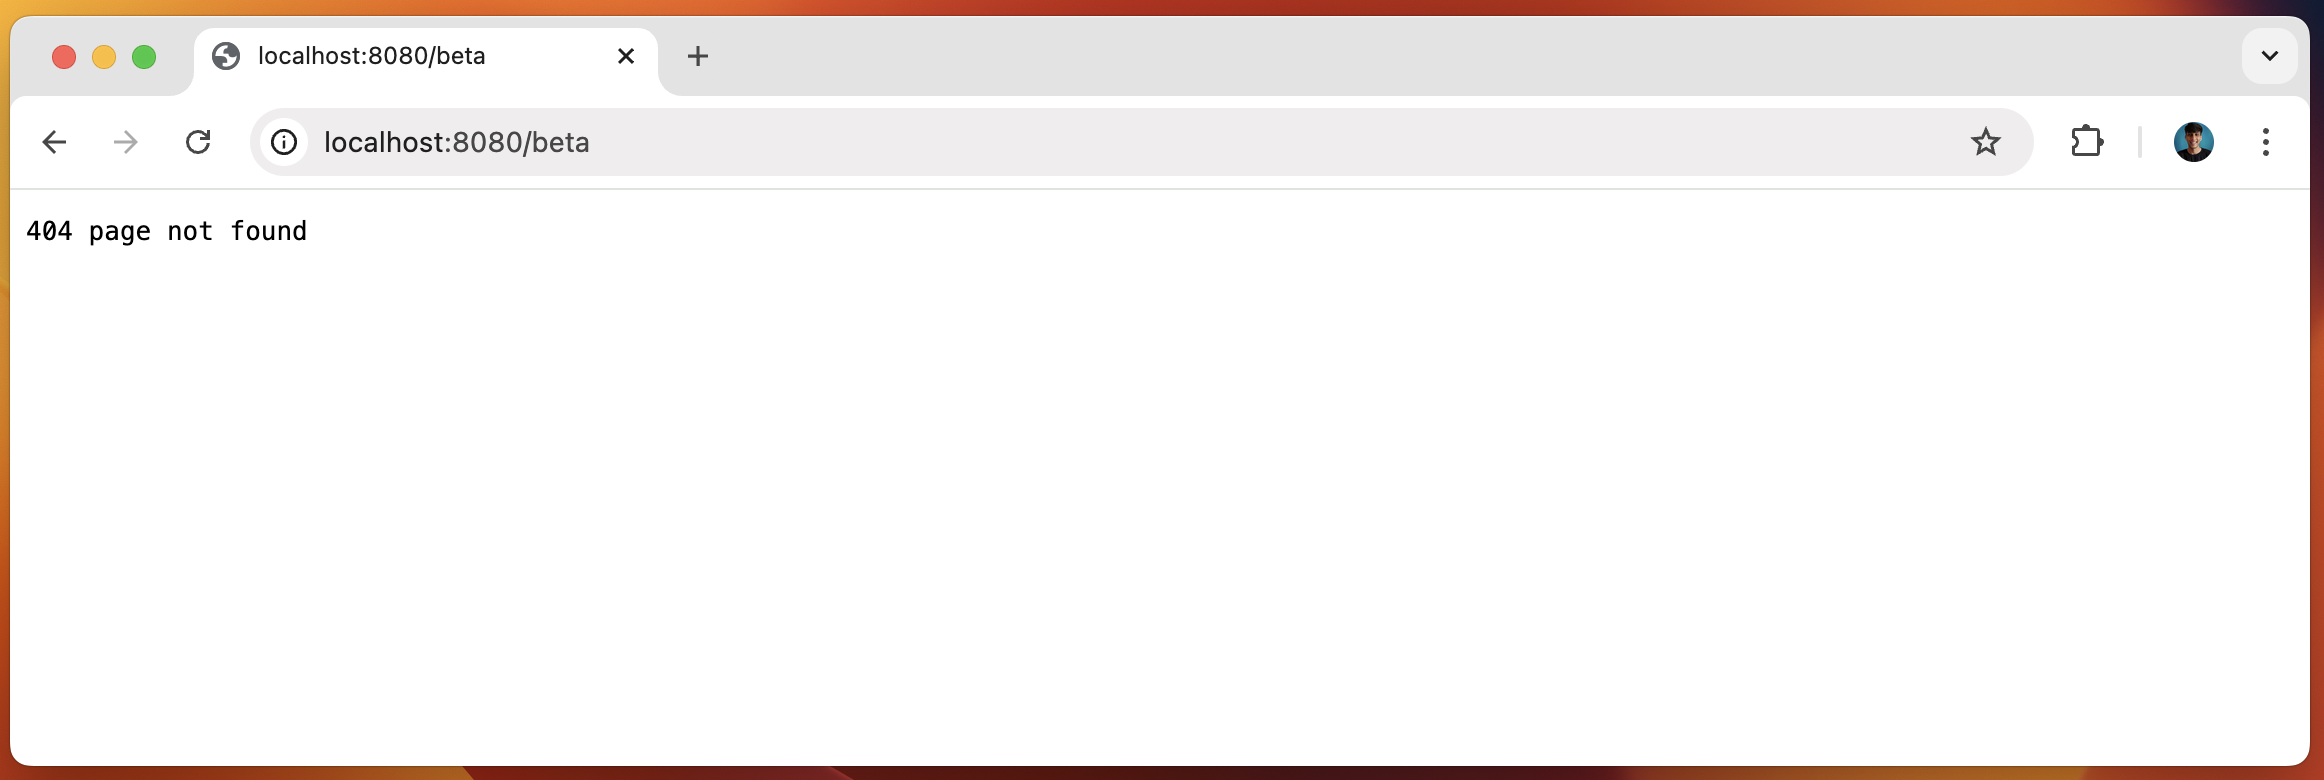
Now go back to the Flagsmith dashboard and toggle the switch to disable this flag. Now visit the the URL. You will get a 404 message like this endpoint never existed.
Now that we’ve set up the functionality and demoed the feature flagging capabilities, let’s see how we can integrate the Flasgsmith GitHub App.
How to Integrate Feature Flags with the GitHub App
First, make sure you have pushed your app to GitHub. After that, install the GitHub Flasgsmith App on your repo from the GitHub Marketplace.
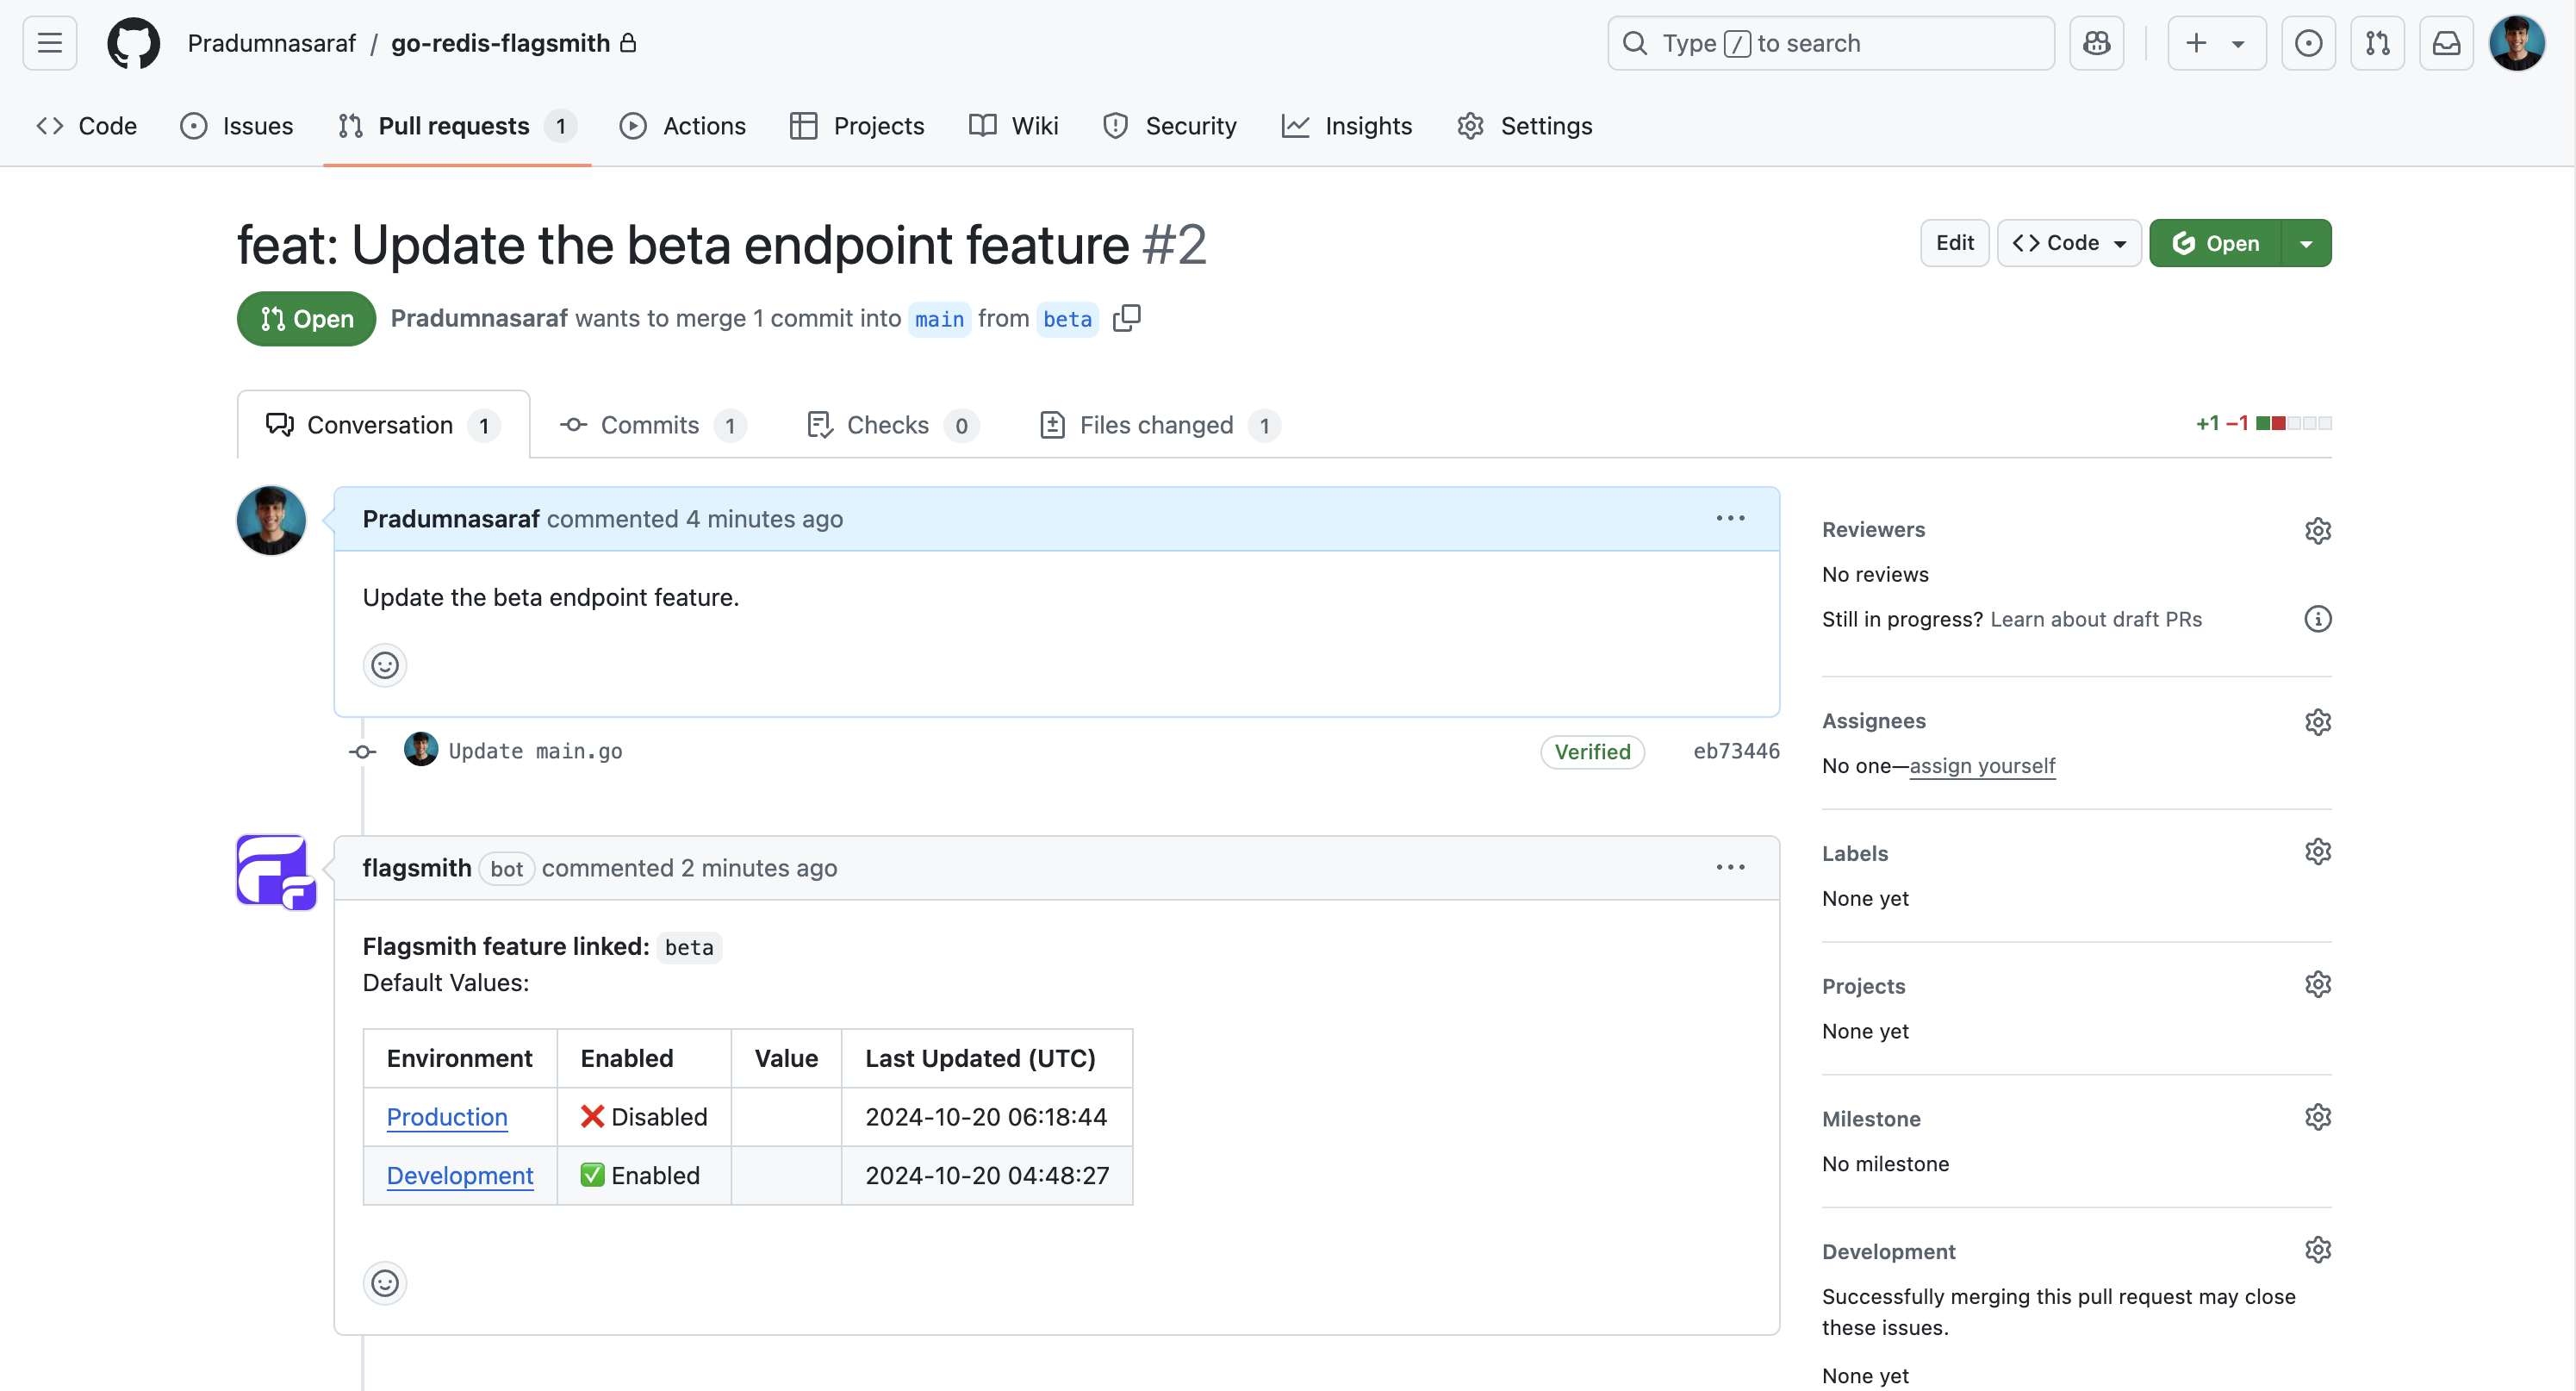
By integrating GitHub and Falagsmith, we can view updates on your feature flags/features as comments in GitHub Issues and Pull Requests. This allows us to easily track features, from creating an issue to merging a PR and deploying the changes.
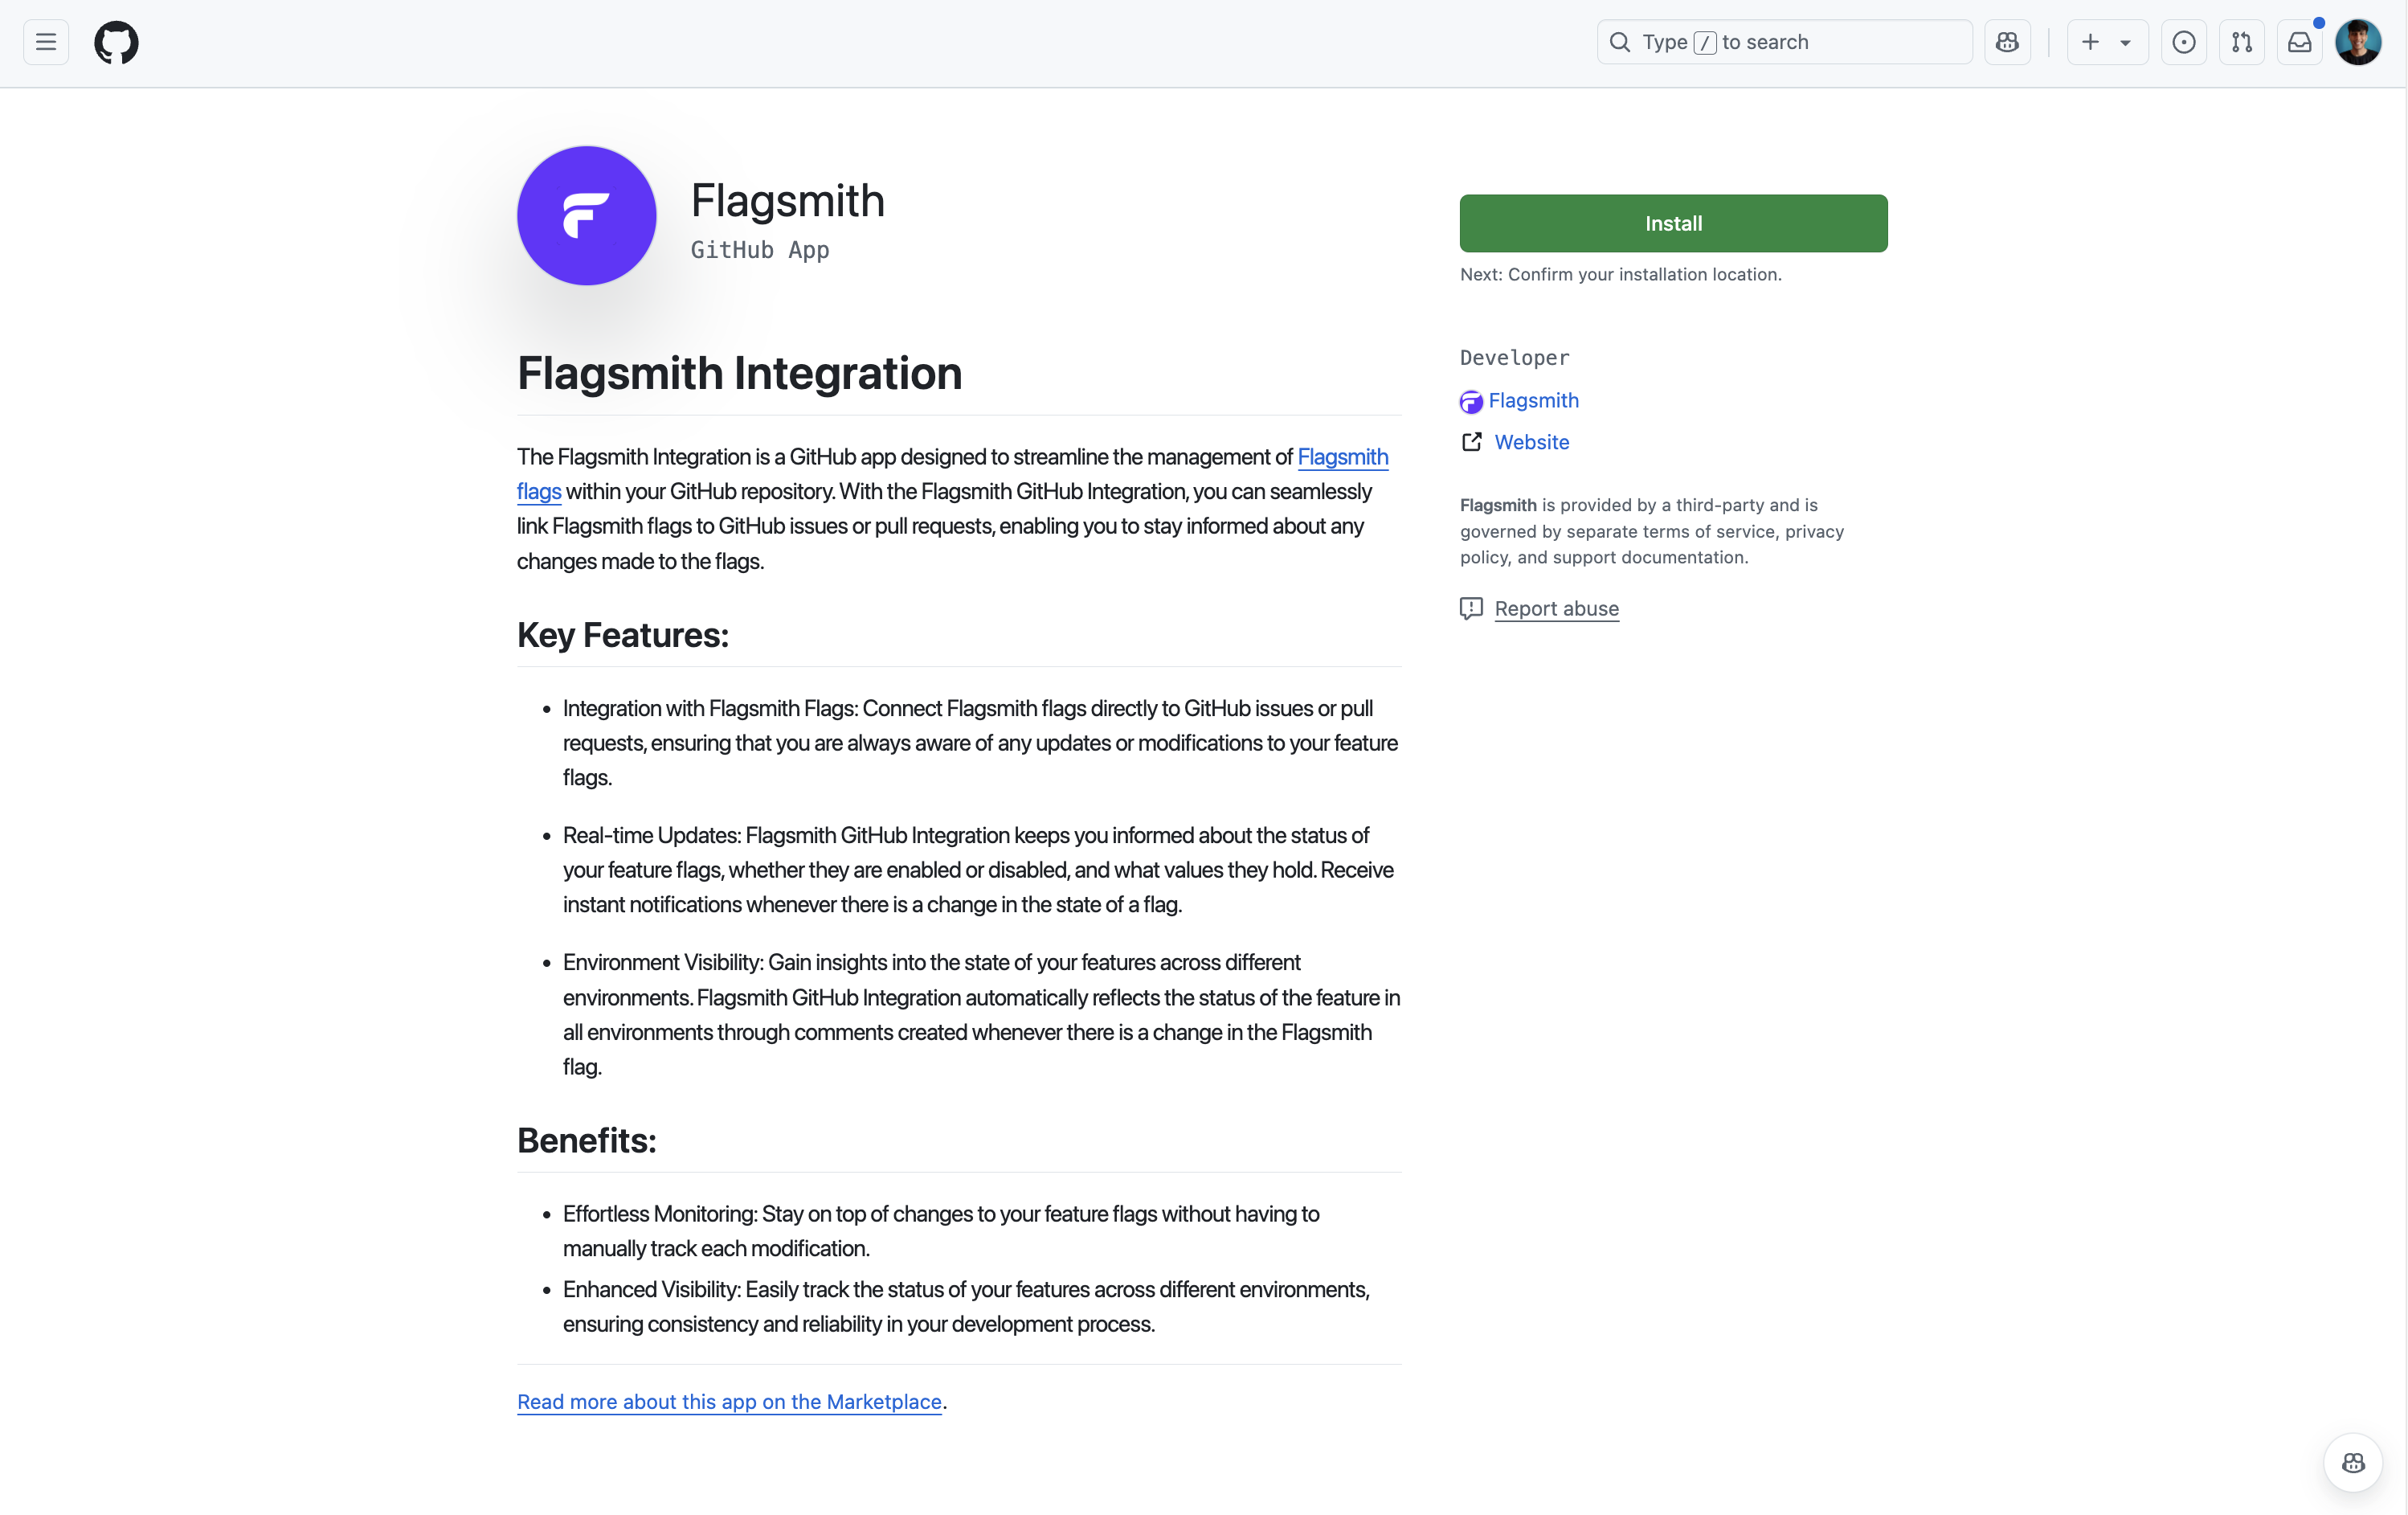
Then select your organisation and the repositories where you want to install the app. You can install it on all of your repos or select a particular one.
As you install it, you will be auto-redirected to the Flagmsith dashboard to configure and complete the integration. Most of the data will be pre-populated, so you just need to select and add a project, and then save the configuration.
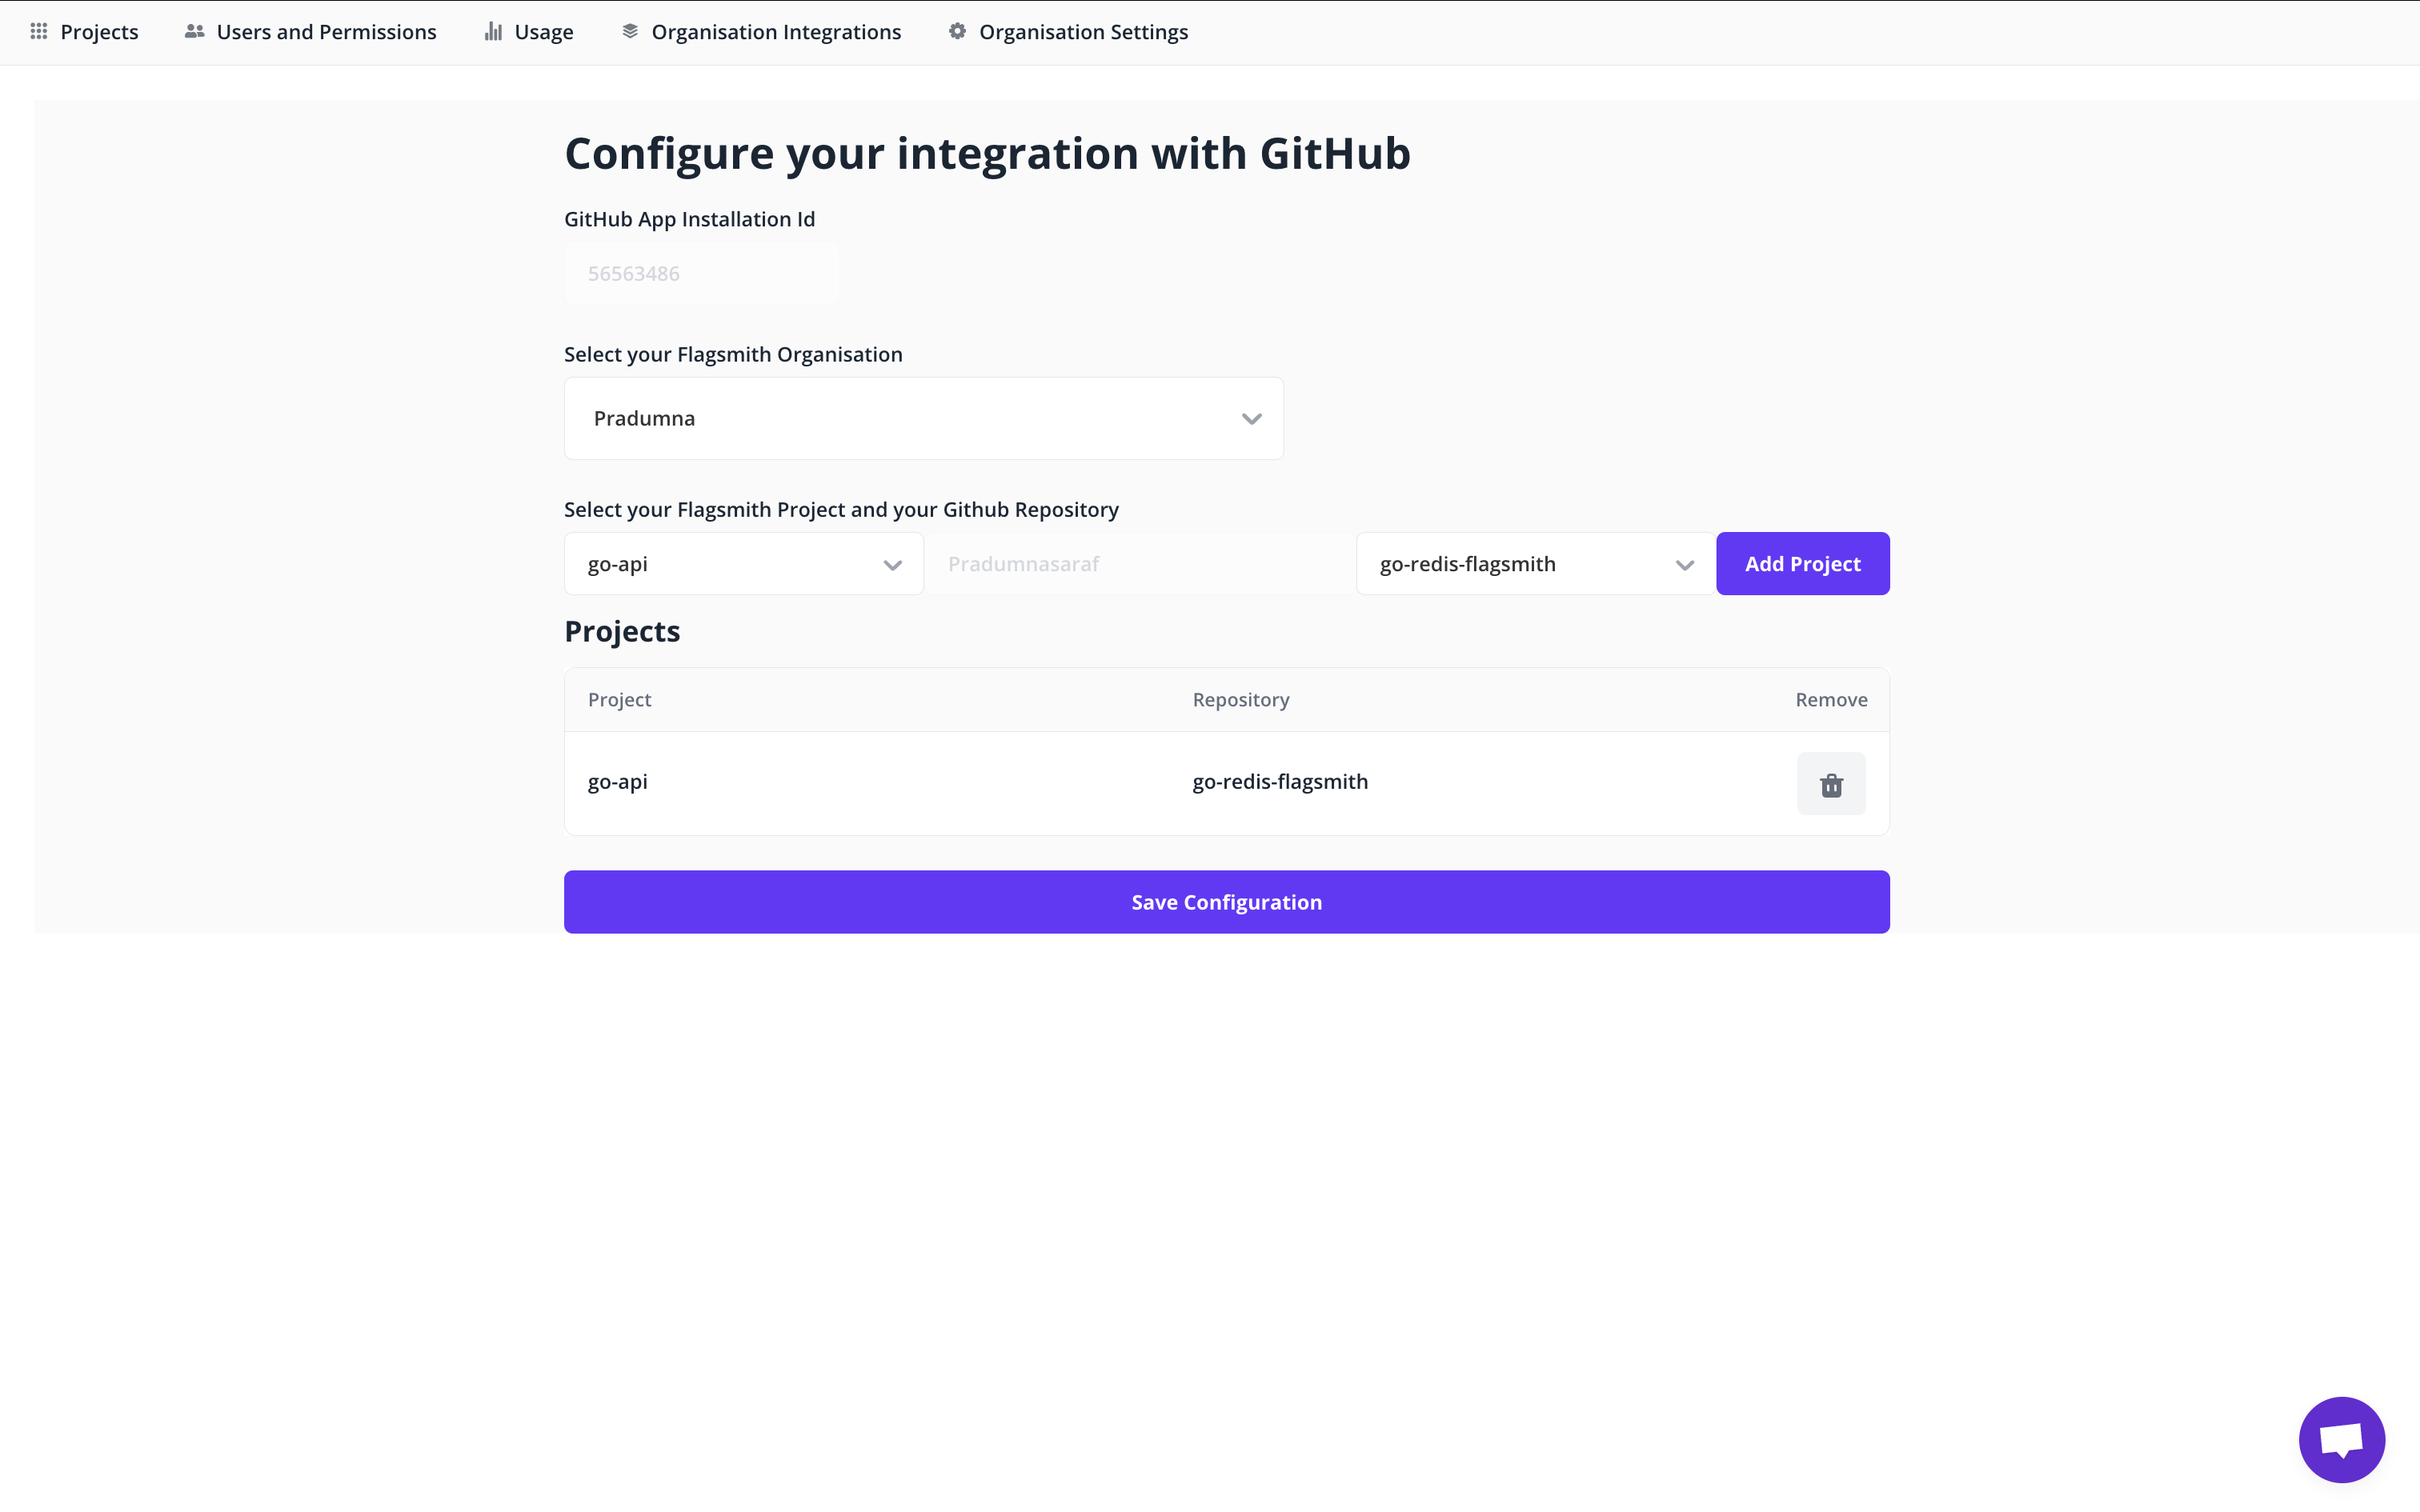
Once you hit the Save Configuration Button, it will redirect you back to the main Flagsmith dashboard where we were previously working.
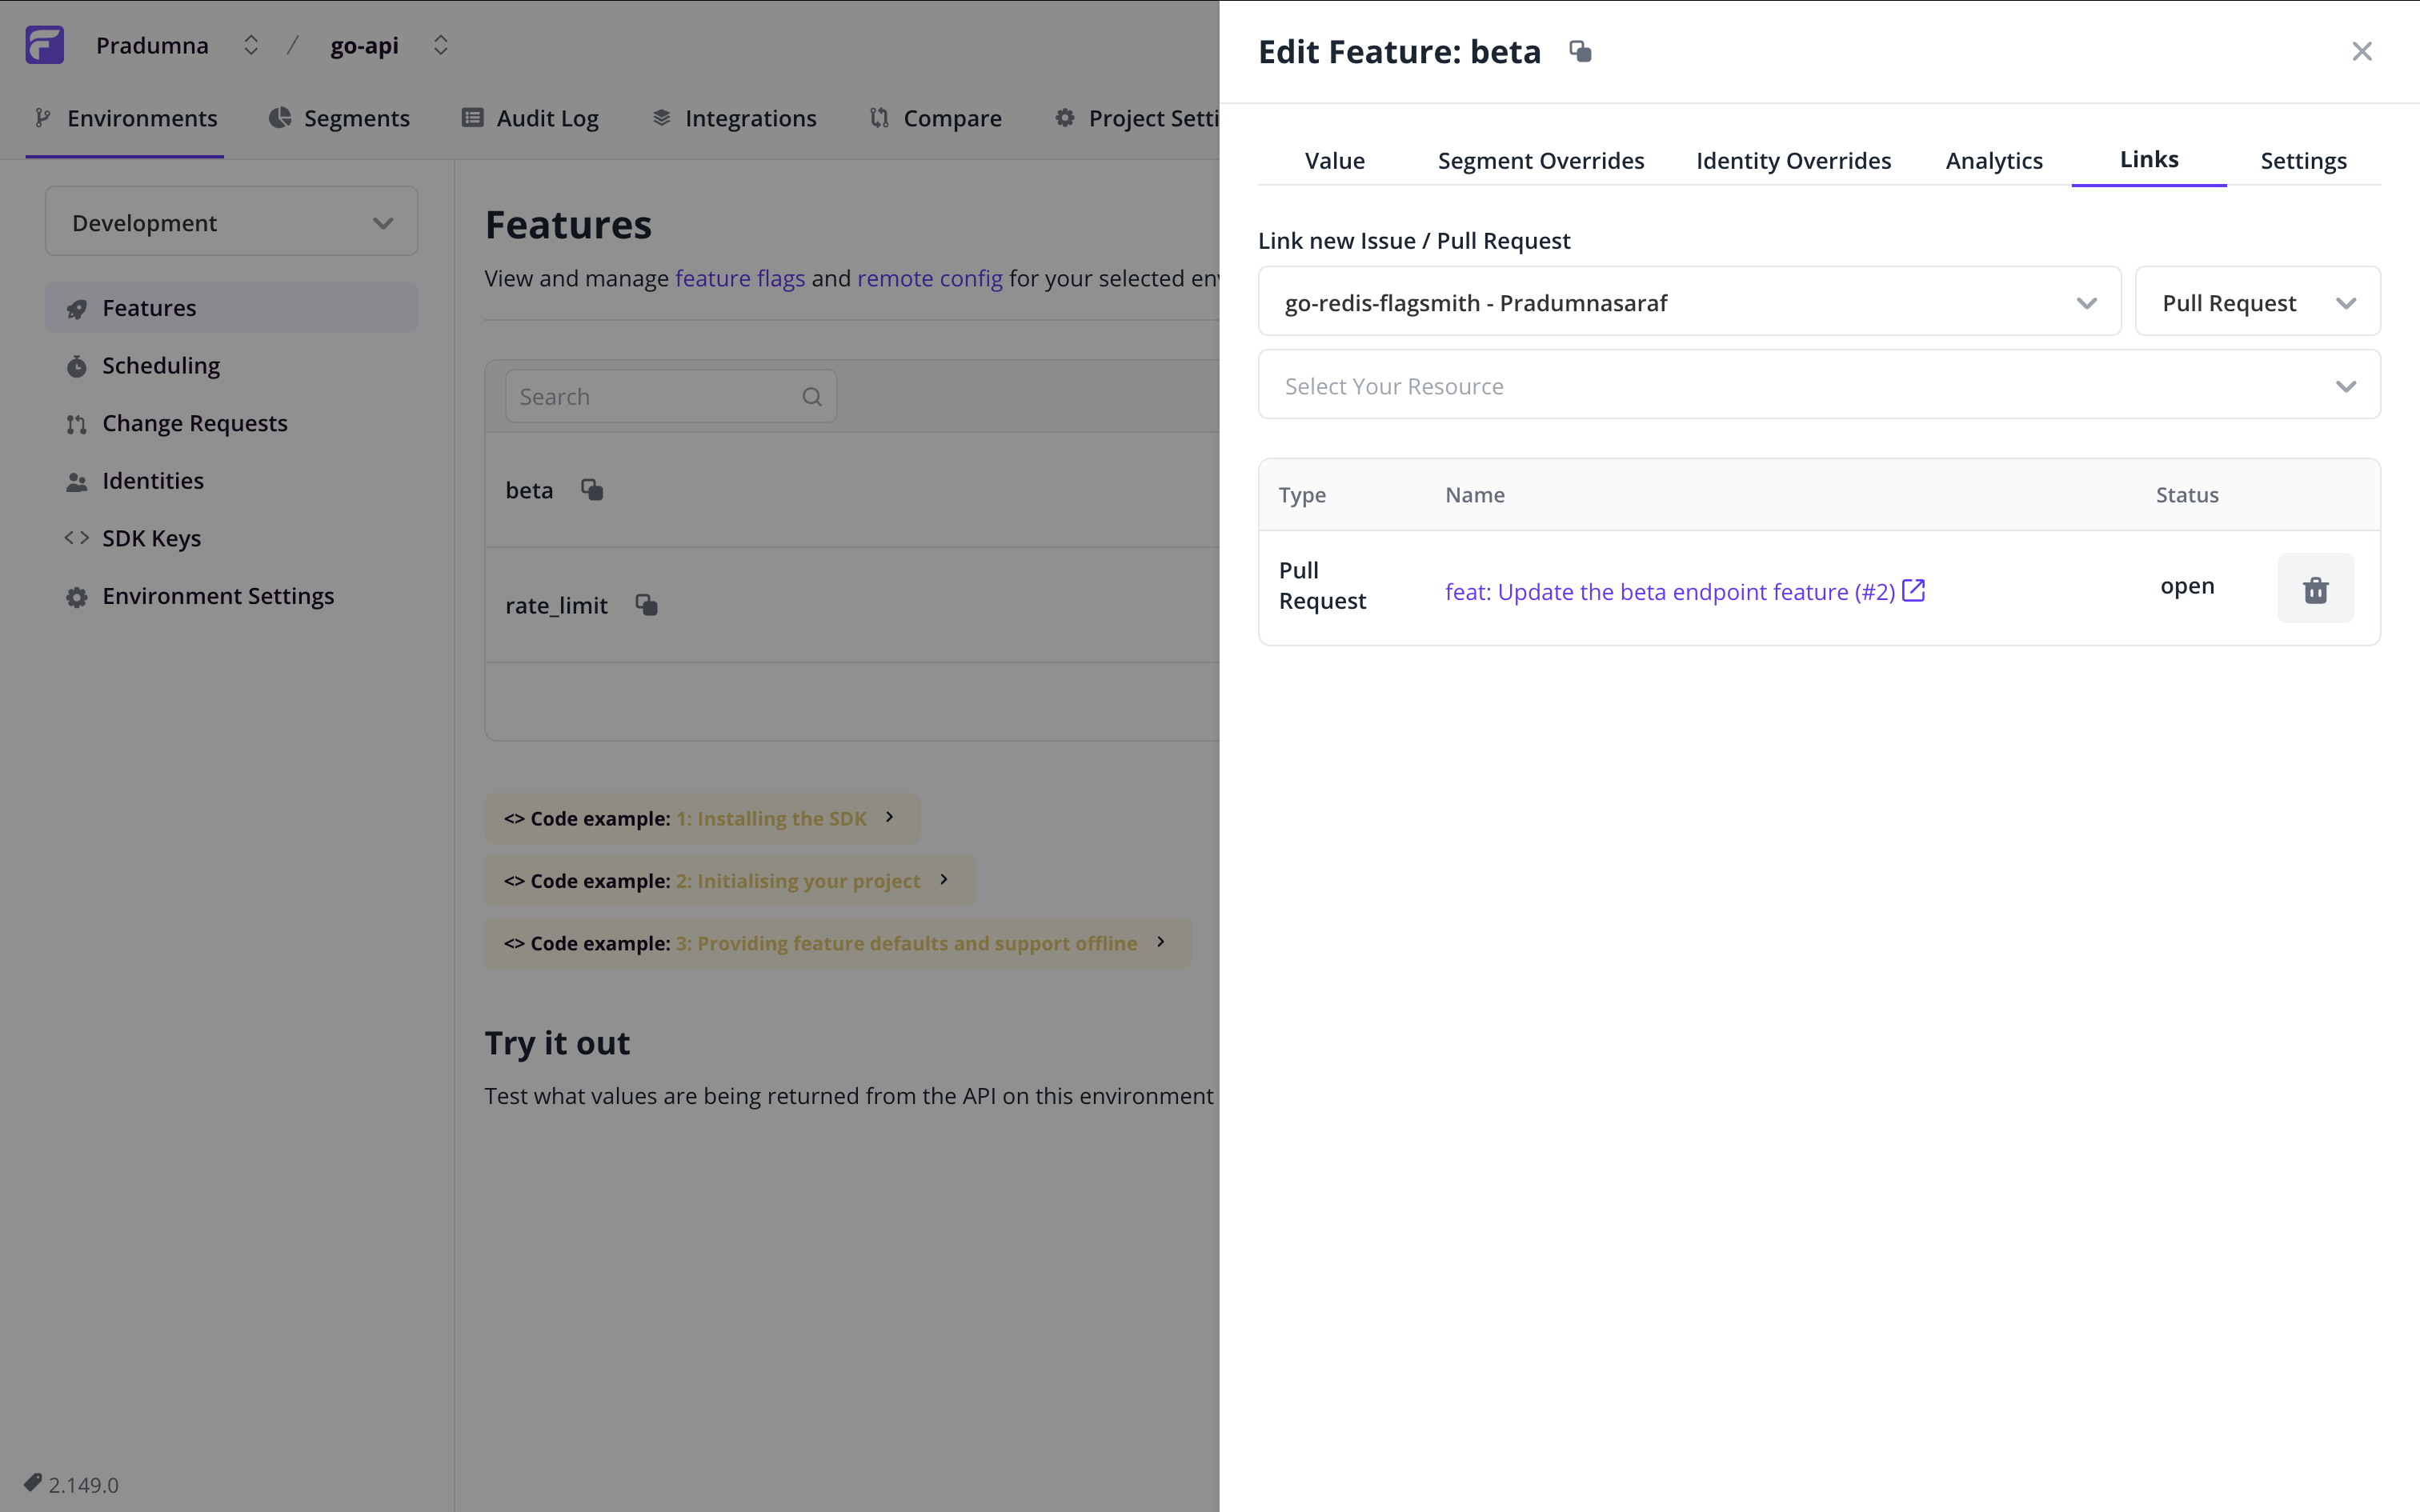
Now let’s link one of the existing flags with the GitHub issue/pull request (raise a dummy PR/issue to test it), or you can create a new flag to test. Let’s proceed with the beta flag which we already created for the beta endpoint.
To link the flag with an existing issue or a pull request, click on the flag name, and a side menu will pop up from the right. Then, choose the ‘Link’ tab. Then select the Pull Request option, and choose the Pull Request you want to link. All of your Issues and Pull Requests linked to this flag are visible below:
To verify that the flag is successfully linked, click the hyperlink with the arrow icon below the Name column heading. It will navigate you to that particular Issue/Pull Request on GitHub. You can see that the Flagsmith GitHub App has commented below with all the details, such as environment, enabled value, and so on.
Testing the Flagsmith GitHub App
After this, when you make any changes to the flag settings, such as turning on/off the flag or changing the value, the bot will comment with all the updated details.
Let’s test by turning the flag off. As soon as you turn off the flash from the Dashboard, the bot should comment that the flag has now been disabled:

That’s it. That is how it’s simple to integrate Flagsmith with GitHub.
Conclusion
To sum it up, you now know how you can leverage feature flags as a backend developer to change the functionality of your app on the fly.
To take things to the next level, we integrated our demo app with the Flagsmith GitHub app so it could stay updated with the changes to our feature flags’ status on Pull Requests/Issues without having to manually update them.
Check out the Flagsmith repo here and don’t forget to give each of these projects a star to show your support. You can also join their amazing community to get technical support.
You can connect with me – Pradumna Saraf, on socials here.

