

🎯 The Objective
In this guide, I’ll introduce you to Postman, a popular API development and testing tool.
If you are a beginner mainly focused on frontend development, you may not have had much experience fetching data from an API. And in that case you probably haven’t encountered many situations where you need to make multiple requests to an API for testing purposes during your development process.
But understanding how to test APIs and connect with them via Postman or similar tools will become important at some point in your career. If you decide to venture into backend development, understanding these concepts is essential.
After covering some basic information about Postman and the Spotify API documentation, we’ll dive into more key Postman features. Then, we’ll select one Spotify endpoint and walk through the process of making requests to it.
🔐 Here’s What We’ll Cover
-
You’ll gain fundamental knowledge of working with Postman.
-
You’ll strengthen your ability to work with APIs and their documentation.
-
You’ll explore the basics of the public Spotify API.
📝 Prerequisites
Table of Contents
-
Exploring the Spotify API with Postman
-
The Postman Experience
-
How to Make Your First Request to the Spotify API
-
Spotify API Authorization
-
Spotify API Authorization Scopes
-
Summary
Exploring the Spotify API with Postman
To get a brief overview of what Postman is, let’s refer to the following explanation from ChatGPT:
“Postman is a popular API (Application Programming Interface) development and testing tool that simplifies working with APIs by providing an easy-to-use interface for sending HTTP requests and receiving responses. It’s widely used by developers, QA engineers, and teams who work with APIs to ensure they function correctly and efficiently.”
While we will focus on making HTTP requests, it’s important to note that Postman is also versatile and can be used to work with GraphQL, gRPC, WebSocket, Socket.IO, and MQTT.
With Postman in hand, we need an API endpoint to test. For this, we’ll use the public Spotify API, which offers a variety of endpoints for different use cases. This can even be an exciting opportunity for your next project if you’re a beginner looking for a fun project to explore.
The Spotify Web API is professionally designed, offering all the necessary information for developers. With their “Overview” and “Getting Started” sections, it’s straightforward to follow along, even for beginners.
While learning the basics of Postman, we will explore key parts of the Spotify API documentation necessary for successful API testing. For instance, we will demonstrate how to make an HTTP request to the endpoint for retrieving data from a playlist.
But first, let’s cover some Postman fundamentals.
The Postman Experience
You can use Postman in a number of different ways. In my case, I’m using the desktop version of Postman.
But you can also use Postman directly in your browser, or even via the Postman CLI (Command Line Interface). There’s also an official Postman extension for VS Code. You can find these versions through the link I just shared.
If you’re completely new to Postman, you may want to start with the web version or the downloadable desktop version, especially if you plan to use Postman regularly in the future.
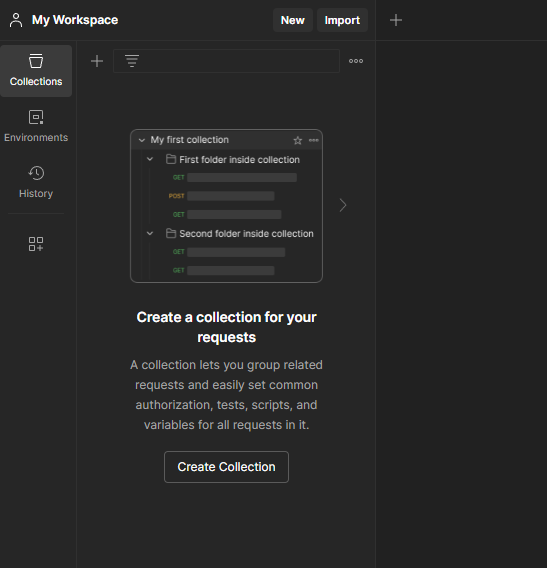
After starting the desktop version of Postman, the first thing you’ll see is this:
This might look slightly different from what you see initially. I already have an account. You may need to create one first for free. You also may need to create a workspace first. In my case, I’m already inside the “My Workspace” workspace.
In the upper left corner, you’ll find several tabs, including “Collections”, “Environments”, “History”, and an icon to configure this sidebar.
For now, we’ll stay on the “Collections” tab and click on “Create Collection”:
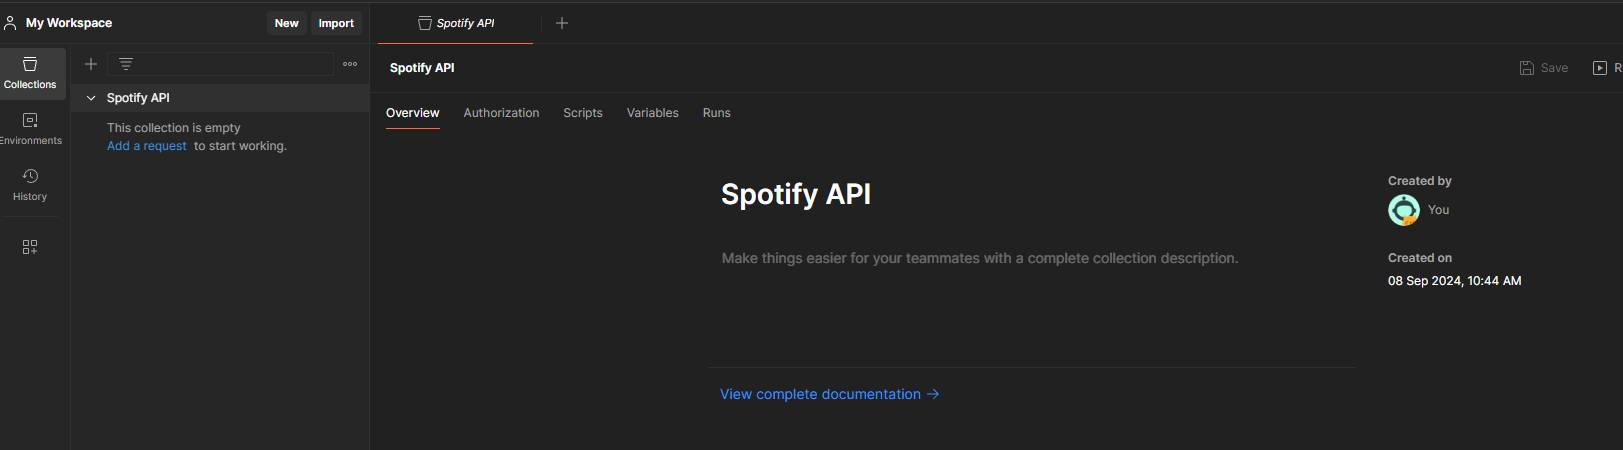
Once you click on that, your focus will shift to the name of the collection in the top center. By typing, you can rename your collection from “New Collection” to something more appropriate for your specific use case.
For this case, I named the collection “Spotify API”:
Now, we have a collection, but what exactly is that? A collection is essentially a space to organize multiple request structures. This will become clearer once we add our first HTTP request. You can do this by clicking on the blue text that says “Add a request”:
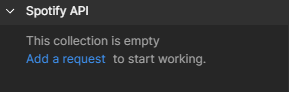
When you do that, your focus will again be on the name of the element. If you type something now, you can rename the request from “New Request” to something more appropriate for the situation. In this case, since I’m not sure which request I want to create yet, I’ll simply call it “test” for now.
If you’d like to create another request at this point, you can click on the three dots to the right of the collection’s name (the 6th option):
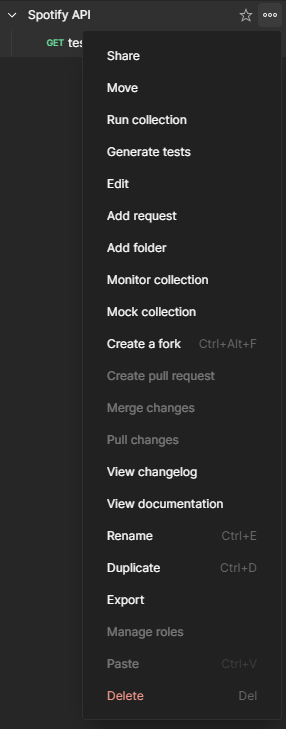
There are multiple options you can choose from, with “Add request” being one of them.
At this point, we’ve created a collection within our workspace, and inside that collection, we’ve added an HTTP request. You can have multiple collections, each containing multiple requests. This helps organize your requests, especially when you reach a point where having one large list of pre-configured requests becomes cumbersome to manage.
On the newly created HTTP request, we can see some details:

The first thing you might notice is the HTTP request method, which is set to “GET” by default. If you click on “GET” with the downward arrow, you can choose from various methods or even type in your own if needed.
To the right of that, there’s a text field where you’ll enter your API’s URL along with its endpoint (we’ll try this shortly).
Below, there are several important tabs. Right now, we’re on the “Params” tab. Here, you can add key-value pairs that will directly modify the request you’re making. These are called Query Params, which you may have encountered before. For example, if your URL is https://google.com, adding a key-value pair as a Query Param might look like this:

As for Query Params, whether you need them depends on the request you’re making. A common use case would be pagination on a website with a table. For example, you might use a query param like “page=4” to specify which page of results you want.
Next is the “Authorization” tab, which handles authentication and authorization for your request. We’ll cover this in more detail later, so we’ll skip it for now.
Then, we have the “Headers” tab, which is crucial because it contains all the information included in your request’s header, such as any authorization data if that’s set up.
Finally, the “Body” tab, located to the right, is also quite important. For instance, if you’re making a POST request to add an item to a database, you’d likely need to send information such as the item’s name or category. This kind of data is often included in the request body in JSON format.
To add JSON-formatted data, you can click on “raw” within the “Body” tab, and then select the format you want (with “JSON” being the default option):

As with Query Params, the format and data required depend heavily on the API and endpoint you’re using. Just keep in mind that you can configure all the necessary options within these tabs.
The remaining two tabs are “Scripts” and “Settings.” In the “Scripts” tab, you can add custom code, but this is more advanced and not necessary for our current situation. The “Settings” tab allows for adjustments, though in most cases, you won’t need to modify anything here.
How to Make Your First Request to the Spotify API
Now, we’ll make our first actual request using Postman. For this, we can dive into the Spotify API developer documentation, where all endpoints are listed. For this first test, we’ll fetch data about a playlist.
In that description, you’ll find a wealth of useful information, including the endpoint and the required data for a successful response. You also have the option to make the request directly from the page after logging in with your Spotify account:
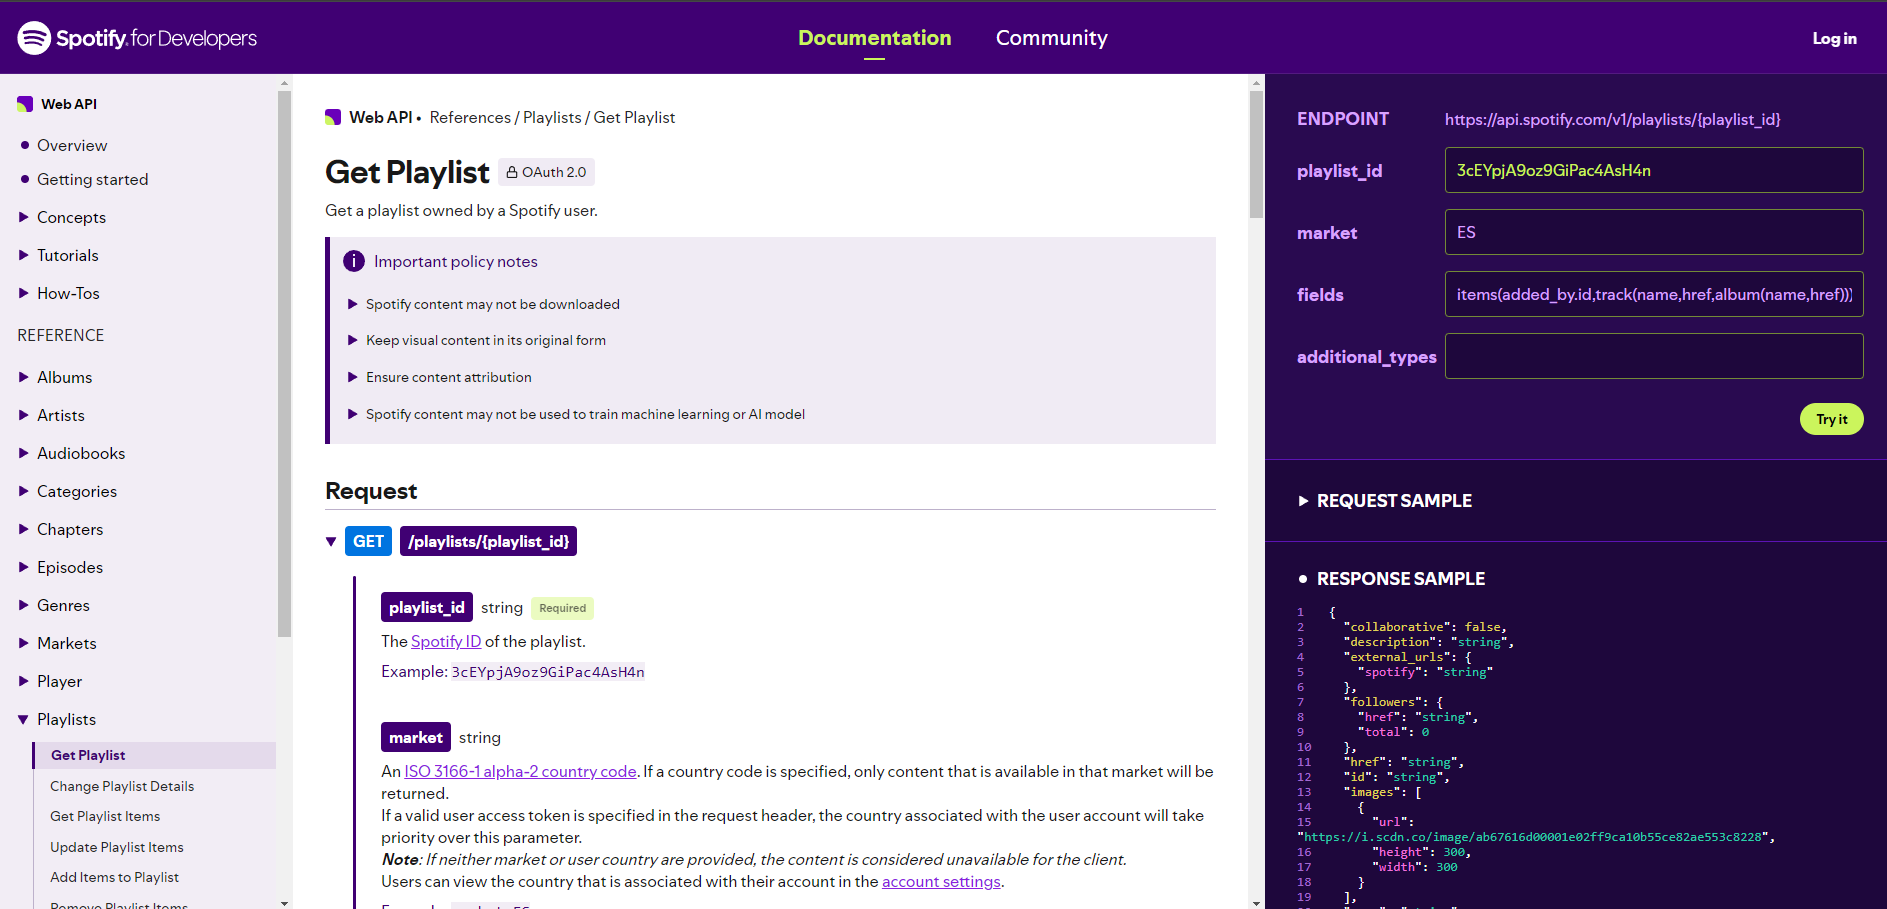
Such extensive API documentation is incredibly helpful and makes it easy to work with, especially for beginners. Keep in mind, though, that not all API documentation is this thorough.
In this case, we can see the endpoint is https://api.spotify.com/v1/playlists/{playlist_id}, with playlist_id being the only required parameter in the curly brackets. You’ll also see optional parameters like market, fields, and additional_types, which can help refine the response. But again, these are optional, and you only need playlist_id for the basic request.
If you want to include optional information, like market, you’d use the Query Params mentioned earlier. For example, adding ES as the market alongside the playlist_id would change the URL to: https://api.spotify.com/v1/playlists/3cEYpjA9oz9GiPac4AsH4n?market=ES.
To make the basic request in Postman (without any optional parameters), we’ll return to our “test” request and enter the URL with the corresponding endpoint:

This approach will work, but I recommend another method.
Since we have our Spotify API collection and may want to add multiple requests to that collection, it’s a good practice to use variables for sections of the URL or information that will remain consistent across multiple requests. In this case, the base URL, https://api.spotify.com/v1/, will stay the same for all Spotify API requests. Instead of manually adding it to every request, we can create a variable for it.
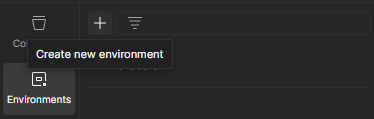
To do this, we’ll switch to the “Environments” tab in the upper left corner. From there, click on the plus icon to create a new environment:
We’ll name the environment “Spotify API”.
Next, we’ll create variables, such as base_url, and assign the appropriate value to it. You can also choose between the type options: default or secret. Since this isn’t sensitive data, it can remain set to default. If you choose secret, you’d need to click on an eye icon to reveal the variable’s value each time, otherwise, it would be masked with ••••, similar to how passwords are displayed.
Here’s what it looks like so far:

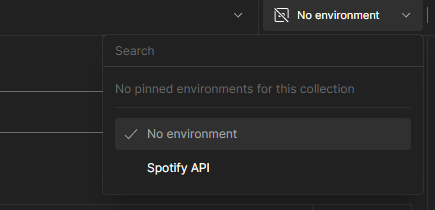
Next, we’ll return to the Spotify API collection and look at the upper right corner, where it currently says “No environment”. Click there and select the “Spotify API” environment that we just created:
Now, we can use the variables from that environment for all the requests within the “Spotify API” collection. To insert a variable, you’ll use double square brackets, like this:

If you receive a message that the variable couldn’t be found, make sure to save the “Spotify API” environment. The dots on the right of the tab names indicate that you can save new information by pressing CTRL + S, for example. This step is necessary for the created variable to be recognized.
With the variable in place, you can now modify just this one variable to change the base_url for all your corresponding requests. While this may not seem immediately useful for the base_url, since it likely won’t change anytime soon, variables can be incredibly helpful in other scenarios. This was an opportunity to introduce you to how they work.
Next, I’ll rename the HTTP request from “test” to something more descriptive, like “Playlist,” to indicate what this request is about. Along with the “GET” method, it will be clear that this request is for fetching playlist data.
Now that everything is set, let’s send the request by clicking the “Send” button on the right while viewing the HTTP request. You’ll see the response appear in the bottom half of the screen:

What a bummer, the request wasn’t successful!
This happened because we didn’t provide any authorization. That’s why we received a “401 Unauthorized” error with the message “No token provided”.
Since this is a protected endpoint, we need an access token, which you would obtain by logging into Spotify. If you tried making a request on the Spotify API documentation website earlier, you probably noticed that it asked you to log in before sending the request. By doing so, it acquired your session’s access token, which is exactly what we need in our situation as well.
However, instead of logging in with our username and password, we’ll use a different authorization method.
Spotify API Authorization
To make basic requests to the Spotify API, you’ll need an access token, which can be generated using your credentials. This is a common approach with many APIs, where you need to obtain an access token before you can access the endpoints you’re targeting.
The Spotify Developer API provides a step-by-step guide on how to get your access token.
Following the outlined steps, the first task is to create an application profile, which you can do in just a few seconds, especially for a test project:
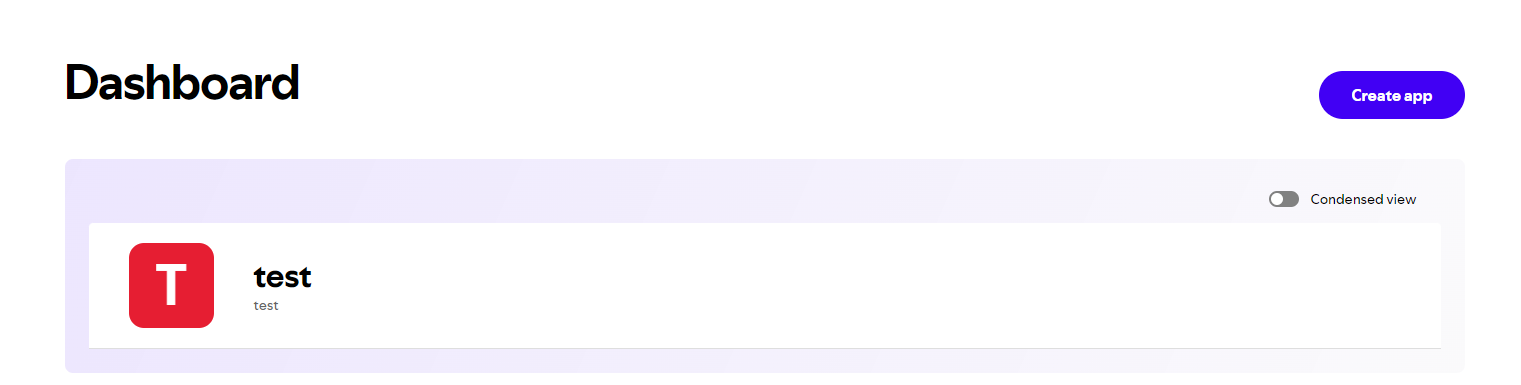
After completing this step, we can proceed by clicking on the “test” project to navigate to the “Settings” of the project. Here, you’ll find the “Client ID” and “Client Secret”:
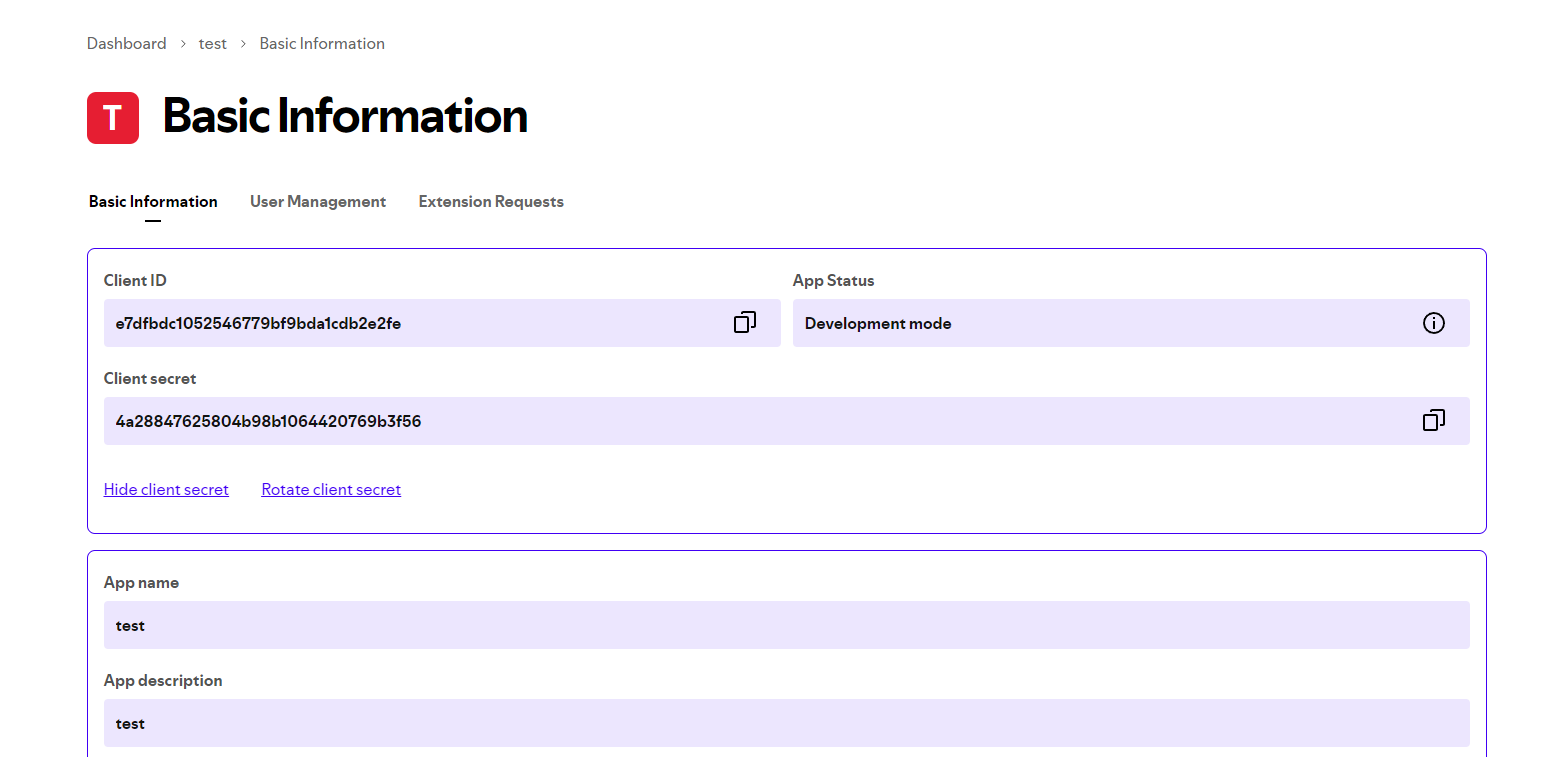
Keep in mind that this information is generally considered sensitive, so you should avoid sharing it publicly (in most cases). But since this is just a test project, which will be deleted by the time this guide is published, I am showing it to make it easier for you to follow along with my explanations.
With your Client ID and Client Secret in hand, you now have the information needed to request an access token. These access tokens are used to authorize yourself when interacting with API endpoints.
You can kinda compare this to logging into software, where you need to authenticate yourself before accessing certain information. In such cases, it’s likely that an access token is generated for the duration of your session to authorize your requests to the software’s backend API.
Also, remember that access tokens change with each login session, meaning you receive a different token every time. Just keep in mind that with our current selected method, we don’t have access to specific user information. Instead, we only can make basic GET requests without acting on the behalf of a user. Later on we will cover this a little more.
The Spotify API documentation is quite helpful and provides detailed instructions on the exact request you need to make. We’ll now jump into Postman for this step.
Go to your “Spotify API” collection and click on the “Authorization” tab. Here, you need to choose the appropriate “Auth Type”. There are several options, and the authorization method can differ depending on the API you’re using.
If you already have an access token, you may opt for the “Bearer Token” auth type, where you simply paste the token directly. This is the type of authorization we’ll use in the end. But instead of manually requesting a token and then inputting it into the “Bearer Token” field, we can automate this process. For this, we’ll select “OAuth 2.0” as the auth type.
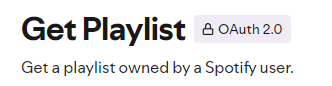
How did I know “OAuth 2.0” was the right choice? If you check the Spotify API documentation, you’ll find some corresponding information while going through their step-by-step guide. Also, all endpoints that need authorization are tagged with “OAuth 2.0”, including the “Get Playlist” endpoint:
The documentation also mentions that Spotify uses “Client Credentials” for its tutorial. This is the “grant type” and indicates the information you’ll provide for the authorization request. With “Client Credentials,” you pass your Client ID and Client Secret (the information from our test application).
For instance, with the “Password Credentials” grant type, you would also pass a “Username” and “Password,” which is used when logging in with an actual user account.
There are other authorization methods as well, and the API documentation usually specifies which approach to use. In our case, since we have the Client ID and Client Secret and don’t need specific user access, we know the “Client Credentials” grant type is the appropriate choice.
When passing your Client ID and Client Secret in Postman, you may receive a suggestion to use variables for this information:
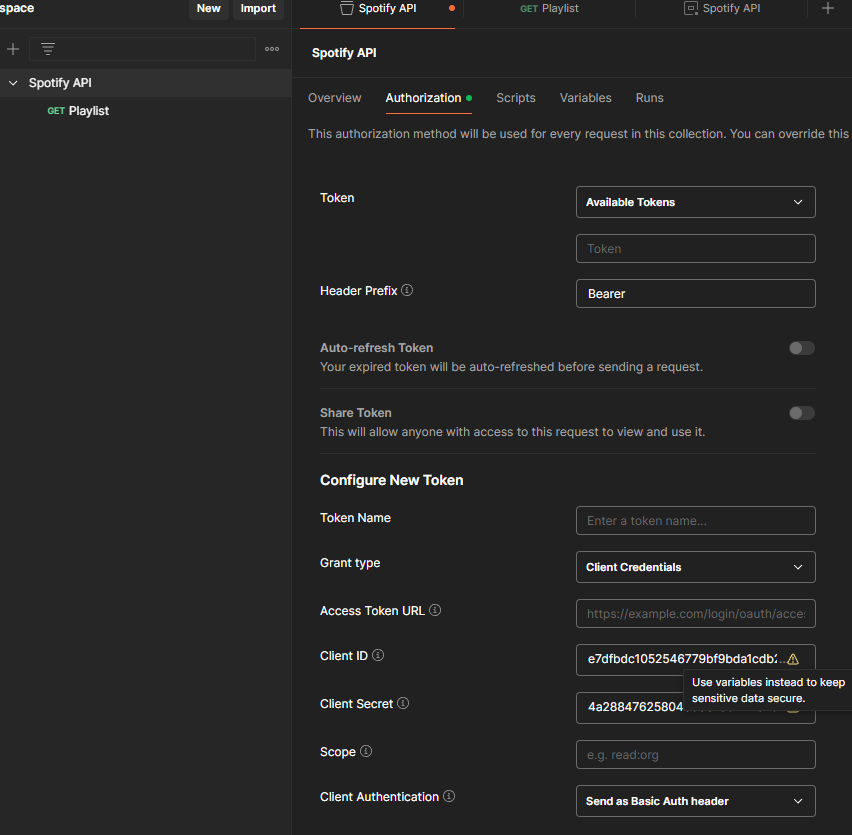
Similar to the base_url variable we used earlier, creating variables for the Client ID and Client Secret can be helpful, especially if you plan to use multiple HTTP requests with similar authorizations. This way, you can reference the same variables in all your requests, and if anything changes, you only need to update the variable in one place.
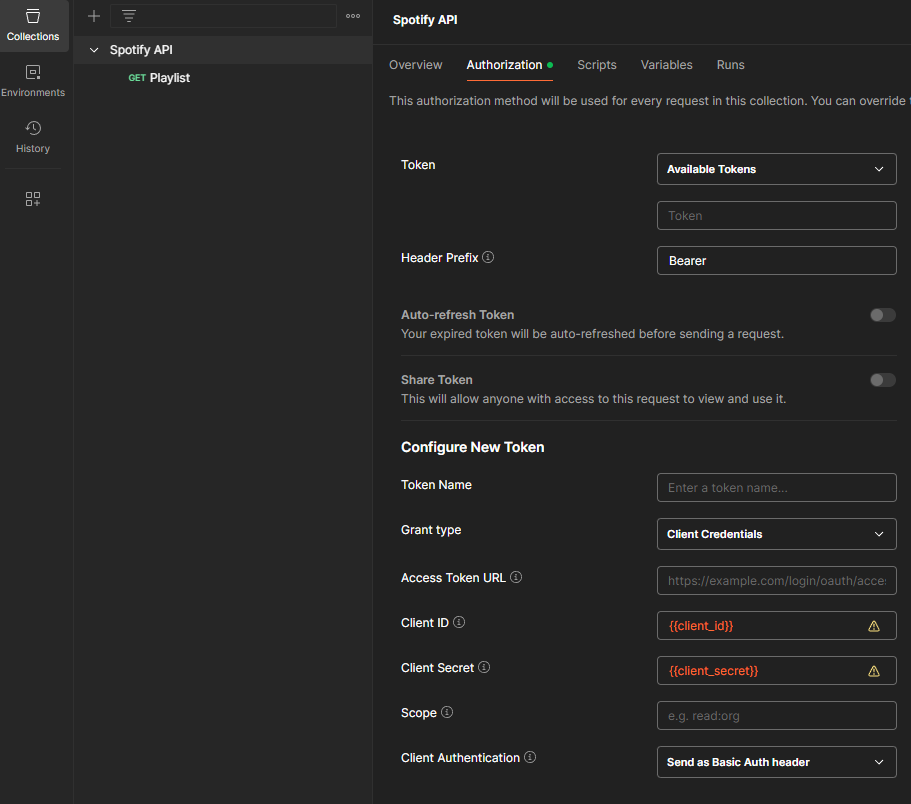
In this case, we’ll do the same by switching to the “Environments” tab and adding variables for both client_id and client_secret.

Next, you’ll insert those variables into the authorization process we started earlier:
Now, we just need to add the token authorization URL, which can be found on the same page as before: https://accounts.spotify.com/api/token. Enter this into the “Access Token URL” field. Then, give the setup a fitting name of your choice and scroll down to click the “Get New Access Token” button:
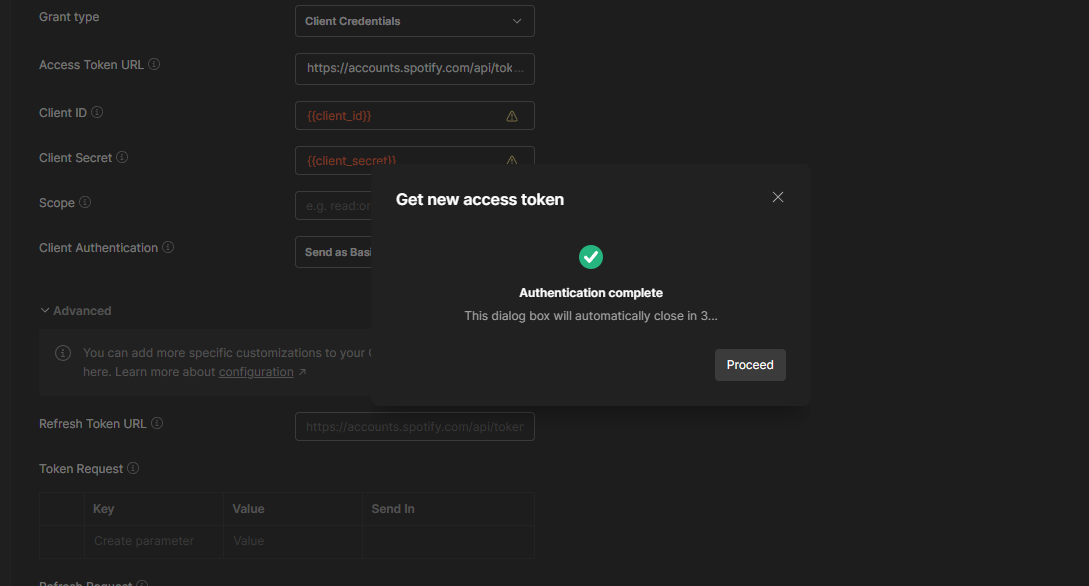
It was successful! Now, click on “Proceed” to view more details about the generated access token:
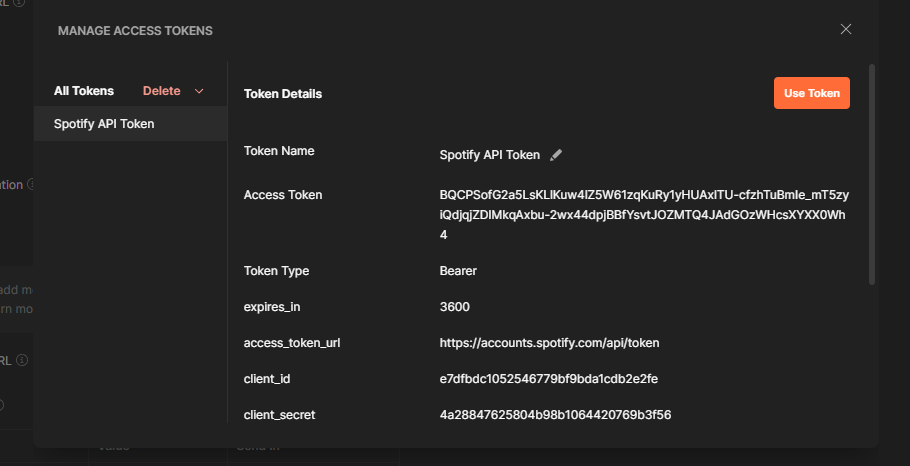
With our access token ready, click on “Use Token” in the upper right, and Postman will confirm that the token has been added.
Now, if we switch to the “Playlist” GET request we created earlier, you’ll see the option to set up an authorization method for this specific request. But since we’ve already set up authorization for the entire collection, simply select “Inherit auth from parent” as the “Auth Type” for this request:
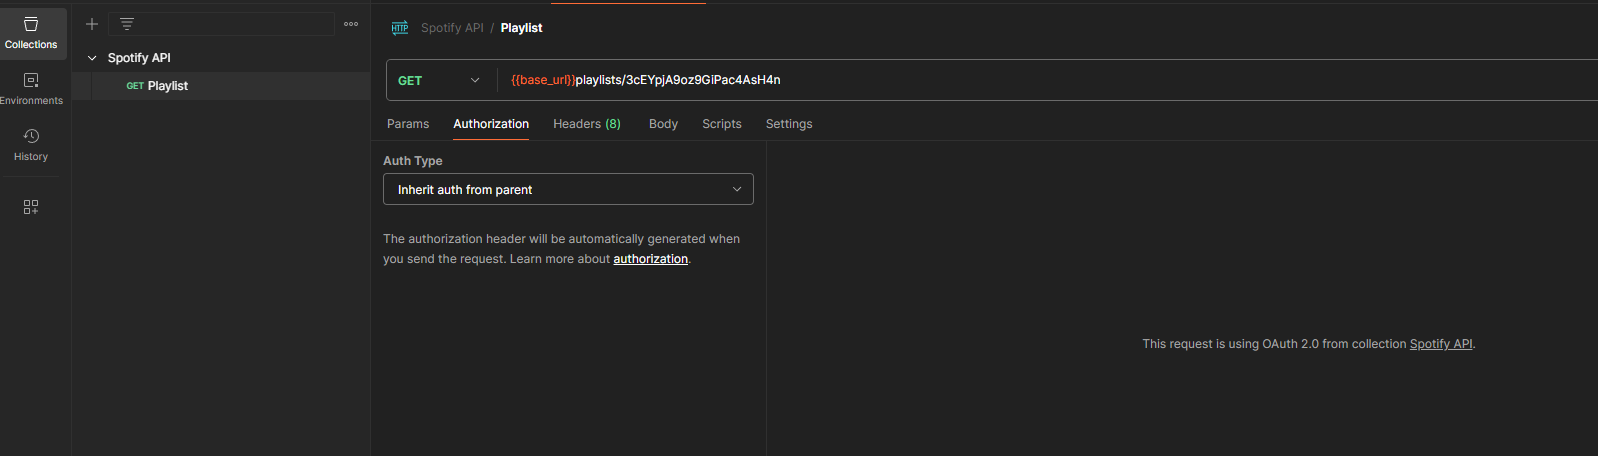
Postman will indicate which authorization type is being used and where it’s coming from. In this case, it will say: “The request is using OAuth 2.0 from collection Spotify API.”
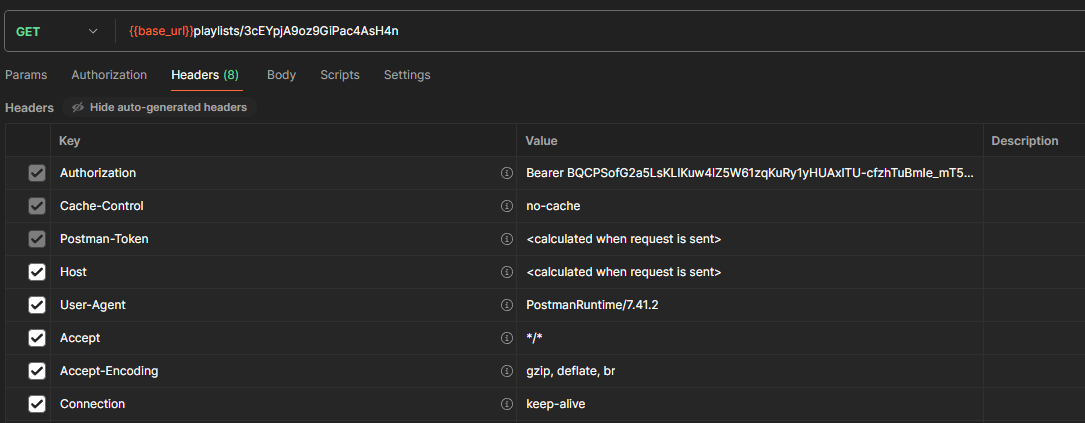
Next, if we switch to the “Headers” tab and click on “8 hidden,” we can see an “Authorization” key. By clicking on the eye symbol to the right, we can reveal this information.
If you compare this with the access token we just generated, you’ll notice they are the same (with “Bearer” in front of the actual access token). When you create a new token for the collection, as we did earlier, this information updates automatically.
With everything set up, we are now ready to send the request we tried earlier, this time with a valid access token in the “Authorization” header.
And if we now hit “Send”, we will get a response like this:
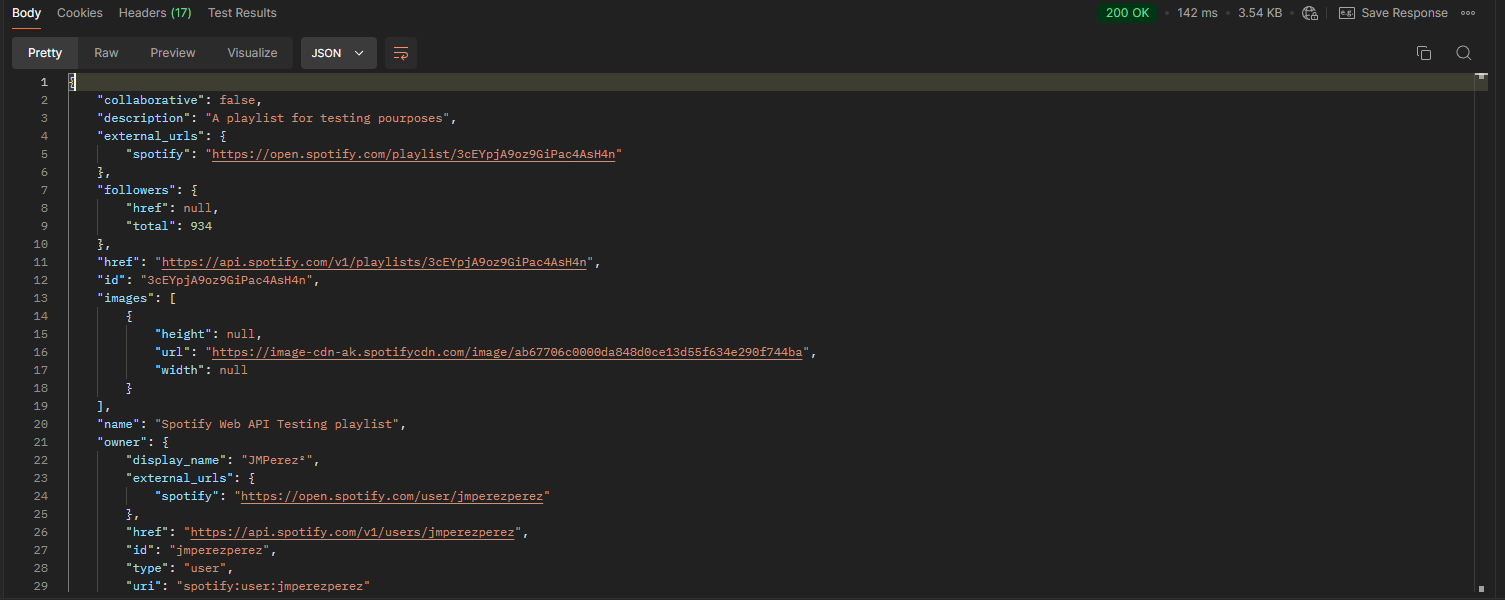
The response is a JSON object containing a lot of information to explore. You can do this for your own playlist as well, as long as it’s set to public on Spotify.
To give another example, I’ll go to Spotify, use the “Share” option for my playlist, and copy the playlist link, which looks like this: https://open.spotify.com/playlist/1OPgvkPckzXm9SB0CIJf3o?si=cbe9c361f8024abd.
The part we’re interested in is the playlist ID, which is found after the last forward slash and before the question mark—in this case, 1OPgvkPckzXm9SB0CIJf3o. We’ll replace the current playlist ID with this one in Postman:

Now, if we hit “Send,” we’ll receive the corresponding JSON response:
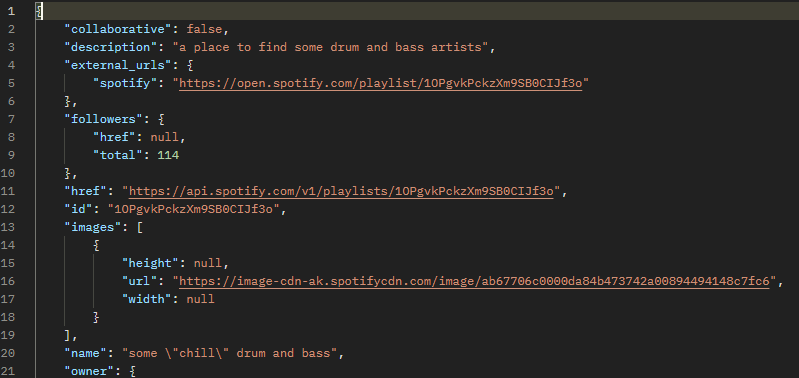
This response is also a large JSON object with plenty of data to explore.
And that’s it! We’ve successfully configured a fundamental Postman setup with an HTTP GET request, including authorization, to fetch data from the Spotify API.
Spotify API Authorization Scopes
By now, we’ve successfully used authorization with our Client ID and Client Secret. But if you dive deeper into the Spotify API documentation, you’ll find situations where this method of authorization is insufficient for certain actions.
While fetching playlist data and other GET requests work with Client ID and Client Secret authorization, you may encounter endpoints that use POST, PUT, or DELETE methods.
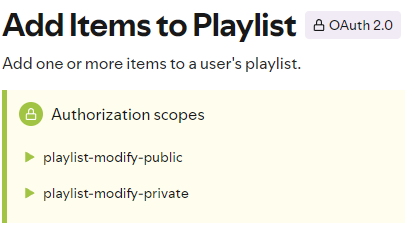
For example, adding new songs to a playlist requires more than just Client ID and Client Secret authorization. You need to authenticate as the actual user associated with the playlist.
In such cases, the documentation lists “Authorization scopes” that define the required permissions. For instance, “playlist-modify-public” and “playlist-modify-private” scopes are needed for modifying public and private playlists, respectively:
If you review the Spotify API documentation, you’ll see that it outlines four main authorization methods:
The Client credentials method (which we used) does not provide access to user-specific data. To perform actions on behalf of a user, such as modifying their playlists, the “Authorization code” method is required.
In real-world projects, you would typically implement this as part of your app’s authentication and authorization process when users log in. For instance, in Next.js projects, NextAuth offers a Spotify login mechanism that simplifies this process.
Alternatively, you could manually handle the necessary requests during the authentication process and add relevant data to the session information.
This topic goes beyond the scope of this guide, as it deals with general authorization and authentication flows for the Spotify API (and other APIs) rather than Postman-specific use cases. But the Spotify API documentation provides valuable resources if you’re interested in exploring more advanced testing with Postman. They also provide a how-to guide on retrieving a user’s profile data and displaying it in your frontend application.
Summary
In this guide, we covered the fundamentals of Postman: how to set up your first workspace with a collection, create an HTTP request, use variables to simplify the process for future requests, and add authorization logic to obtain an access token required for making requests. All of this was demonstrated using the Spotify API, which provides extensive documentation on accessing its endpoints.
From here, you might want to explore deeper by learning how to access Spotify API endpoints that require user-specific access information, combined with specific scopes, such as adding new songs to a Spotify playlist.