In Part 1 of this brief two-part series, we developed an application that turns images into audio descriptions using vision-language and text-to-speech models. We combined an image-to-text that analyses and understands images, generating description, with a text-to-speech model to create an audio description, helping people with sight challenges. We also discussed how to choose the right model to fit your needs.
Now, we are taking things a step further. Instead of just providing audio descriptions, we are building that can have interactive conversations about images or videos. This is known as Conversational AI — a technology that lets users talk to systems much like chatbots, virtual assistants, or agents.
While the first iteration of the app was great, the output still lacked some details. For example, if you upload an image of a dog, the description might be something like “a dog sitting on a rock in front of a pool,” and the app might produce something close but miss additional details such as the dog’s breed, the time of the day, or location.
The aim here is simply to build a more advanced version of the previously built app so that it not only describes images but also provides more in-depth information and engages users in meaningful conversations about them.
We’ll use LLaVA, a model that combines understanding images and conversational capabilities. After building our tool, we’ll explore multimodal models that can handle images, videos, text, audio, and more, all at once to give you even more options and easiness for your applications.
Visual Instruction Tuning and LLaVA
We are going to look at visual instruction tuning and the multimodal capabilities of LLaVA. We’ll first explore how visual instruction tuning can enhance the large language models to understand and follow instructions that include visual information. After that, we’ll dive into LLaVA, which brings its own set of tools for image and video processing.
Visual Instruction Tuning
Visual instruction tuning is a technique that helps large language models (LLMs) understand and follow instructions based on visual inputs. This approach connects language and vision, enabling AI systems to understand and respond to human instructions that involve both text and images. For example, Visual IT enables a model to describe an image or answer questions about a scene in a photograph. This fine-tuning method makes the model more capable of handling these complex interactions effectively.
There’s a new training approach called LLaVAR that has been developed, and you can think of it as a tool for handling tasks related to PDFs, invoices, and text-heavy images. It’s pretty exciting, but we won’t dive into that since it is outside the scope of the app we’re making.
Examples of Visual Instruction Tuning Datasets
To build good models, you need good data — rubbish in, rubbish out. So, here are two datasets that you might want to use to train or evaluate your multimodal models. Of course, you can always add your own datasets to the two I’m going to mention.
Vision-CAIR
- Instruction datasets: English;
- Multi-task: Datasets containing multiple tasks;
- Mixed dataset: Contains both human and machine-generated data.
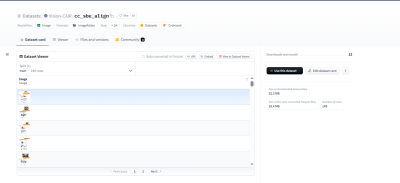
Vision-CAIR provides a high-quality, well-aligned image-text dataset created using conversations between two bots. This dataset was initially introduced in a paper titled “MiniGPT-4: Enhancing Vision-Language Understanding with Advanced Large Language Models,” and it provides more detailed image descriptions and can be used with predefined instruction templates for image-instruction-answer fine-tuning.
LLaVA Visual Instruct 150K
- Instruction datasets: English;
- Multi-task: Datasets containing multiple tasks;
- Mixed dataset: Contains both human and machine-generated data.
LLaVA Visual Instruct 150K is a set of GPT-generated multimodal instruction-following data. It is built for visual instruction tuning and aims to achieve GPT-4 level vision and language capabilities.
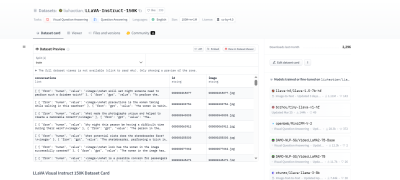
There are more multimodal datasets out there, but these two should help you get started if you want to fine-tune your model.
Let’s Take a Closer Look At LLaVA
LLaVA (which stands for Large Language and Vision Assistant) is a groundbreaking multimodal model developed by researchers from the University of Wisconsin, Microsoft Research, and Columbia University. The researchers aimed to create a powerful, open-source model that could compete with the best in the field, just like GPT-4, Claude 3, or Gemini, to name a few. For developers like you and me, its open nature is a huge benefit, allowing for easy fine-tuning and integration.
One of LLaVA’s standout features is its ability to understand and respond to complex visual information, even with unfamiliar images and instructions. This is exactly what we need for our tool, as it goes beyond simple image descriptions to engage in meaningful conversations about the content.
Architecture
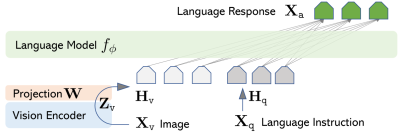
LLaVA’s strength lies in its smart use of existing models. Instead of starting from scratch, the researchers used two key models:
- CLIP VIT-L/14
This is an advanced version of the CLIP (Contrastive Language–Image Pre-training) model developed by OpenAI. CLIP learns visual concepts from natural language descriptions. It can handle any visual classification task by simply being given the names of the visual categories, similar to the “zero-shot” capabilities of GPT-2 and GPT-3. - Vicuna
This is an open-source chatbot trained by fine-tuning LLaMA on 70,000 user-shared conversations collected from ShareGPT. Training Vicuna-13B costs around $300, and it performs exceptionally well, even when compared to other models like Alpaca.
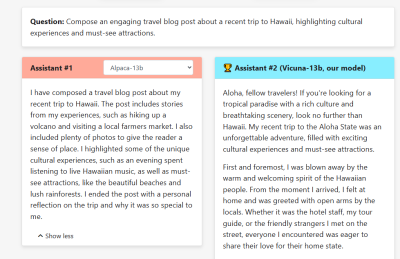
These components make LLaVA highly effective by combining state-of-the-art visual and language understanding capabilities into a single powerful model, perfectly suited for applications requiring both visual and conversational AI.
Training
LLaVA’s training process involves two important stages, which together enhance its ability to understand user instructions, interpret visual and language content, and provide accurate responses. Let’s detail what happens in these two stages:
- Pre-training for Feature Alignment
LLaVA ensures that its visual and language features are aligned. The goal here is to update the projection matrix, which acts as a bridge between the CLIP visual encoder and the Vicuna language model. This is done using a subset of the CC3M dataset, allowing the model to map input images and text to the same space. This step ensures that the language model can effectively understand the context from both visual and textual inputs. - End-to-End Fine-Tuning
The entire model undergoes fine-tuning. While the visual encoder’s weights remain fixed, the projection layer and the language model are adjusted.
The second stage is tailored to specific application scenarios:
- Instructions-Based Fine-Tuning
For general applications, the model is fine-tuned on a dataset designed for following instructions that involve both visual and textual inputs, making the model versatile for everyday tasks. - Scientific reasoning
For more specialized applications, particularly in science, the model is fine-tuned on data that requires complex reasoning, helping the model excel at answering detailed scientific questions.
Now that we’re keen on what LLaVA is and the role it plays in our applications, let’s turn our attention to the next component we need for our work, Whisper.
Using Whisper For Text-To-Speech
In this chapter, we’ll check out Whisper, a great model for turning text into speech. Whisper is accurate and easy to use, making it perfect for adding natural-sounding voice responses to our app. We’ve used Whisper in a different article, but here, we’re going to use a new version — large v3. This updated version of the model offers even better performance and speed.
Whisper large-v3
Whisper was developed by OpenAI, which is the same folks behind ChatGPT. Whisper is a pre-trained model for automatic speech recognition (ASR) and speech translation. The original Whisper was trained on 680,000 hours of labeled data.
Now, what’s different with Whisper large-v3 compared to other models? In my experience, it comes down to the following:
- Better inputs
Whisper large-v3 uses 128 Mel frequency bins instead of 80. Think of Mel frequency bins as a way to break down audio into manageable chunks for the model to process. More bins mean finer detail, which helps the model better understand the audio. - More training
This specific Whisper version was trained on 1 million hours of weakly labeled audio and 4 million hours of pseudo-labeled audio that was collected from Whisper large-v2. From there, the model was trained for 2.0 epochs over this mix.
Whisper models come in different sizes, from tiny to large. Here’s a table comparing the differences and similarities:
| Size | Parameters | English-only | Multilingual |
|---|---|---|---|
| tiny | 39 M | ✅ | ✅ |
| base | 74 M | ✅ | ✅ |
| small | 244 M | ✅ | ✅ |
| medium | 769 M | ✅ | ✅ |
| large | 1550 M | ❌ | ✅ |
| large-v2 | 1550 M | ❌ | ✅ |
| large-v3 | 1550 M | ❌ | ✅ |
Integrating LLaVA With Our App
Alright, so we’re going with LLaVA for image inputs, and this time, we’re adding video inputs, too. This means the app can handle both images and videos, making it more versatile.
We’re also keeping the speech feature so you can hear the assistant’s replies, which makes the interaction even more engaging. How cool is that?
For this, we’ll use Whisper. We’ll stick with the Gradio framework for the app’s visual layout and user interface. You can, of course, always swap in other models or frameworks — the main goal is to get a working prototype.
Installing and Importing the Libraries
We will start by installing and importing all the required libraries. This includes the transformers libraries for loading the LLaVA and Whisper models, bitsandbytes for quantization, gtts, and moviepy to help in processing video files, including frame extraction.
#python
!pip install -q -U transformers==4.37.2
!pip install -q bitsandbytes==0.41.3 accelerate==0.25.0
!pip install -q git+https://github.com/openai/whisper.git
!pip install -q gradio
!pip install -q gTTS
!pip install -q moviepy
With these installed, we now need to import these libraries into our environment so we can use them. We’ll use colab for that:
#python
import torch
from transformers import BitsAndBytesConfig, pipeline
import whisper
import gradio as gr
from gtts import gTTS
from PIL import Image
import re
import os
import datetime
import locale
import numpy as np
import nltk
import moviepy.editor as mp

nltk.download('punkt')
from nltk import sent_tokenize

# Set up locale
os.environ["LANG"] = "en_US.UTF-8"
os.environ["LC_ALL"] = "en_US.UTF-8"
locale.setlocale(locale.LC_ALL, 'en_US.UTF-8')
Configuring Quantization and Loading the Models
Now, let’s set up a 4-bit quantization to make the LLaVA model more efficient in terms of performance and memory usage.
#python

# Configuration for quantization
quantization_config = BitsAndBytesConfig(
  load_in_4bit=True,
  bnb_4bit_compute_dtype=torch.float16
)

# Load the image-to-text model
model_id = "llava-hf/llava-1.5-7b-hf"
pipe = pipeline("image-to-text",
  model=model_id,
  model_kwargs={"quantization_config": quantization_config})

# Load the whisper model
DEVICE = "cuda" if torch.cuda.is_available() else "cpu"
model = whisper.load_model("large-v3", device=DEVICE)
In this code, we’ve configured the quantization to four bits, which reduces memory usage and improves performance. Then, we load the LLaVA model with these settings. Finally, we load the whisper model, selecting the device based on GPU availability for better performance.
Note: We’re using llava-v1.5-7b as the model. Please feel free to explore other versions of the model. For Whisper, we’re loading the “large” size, but you can also switch to another size like “medium” or “small” for your experiments.
To get our assistant up and running, we need to implement five essential functions:
- Handling conversations,
- Converting images to text,
- Converting videos to text,
- Transcribing audio,
- Converting text to speech.
Once these are in place, we will create another function to tie all this together seamlessly. The following sections provide the code that defines each function.
Conversation History
We’ll start by setting up the conversation history and a function to log it:
#python

# Initialize conversation history
conversation_history = []

def writehistory(text):
  """Write history to a log file."""
  tstamp = datetime.datetime.now().strftime("%Y%m%d_%H%M%S")
  logfile = f'{tstamp}_log.txt'
  with open(logfile, 'a', encoding='utf-8') as f:
    f.write(text + '\n')
Image to Text
Next, we’ll create a function to convert images to text using LLaVA and iterative prompts.
#python
def img2txt(input_text, input_image):
  """Convert image to text using iterative prompts."""
  try:
    image = Image.open(input_image)

    if isinstance(input_text, tuple):
      input_text = input_text[0]  # Take the first element if it's a tuple

      writehistory(f"Input text: {input_text}")
      prompt = "USER: <image>\n" + input_text + "\nASSISTANT:"
      while True:
        outputs = pipe(image, prompt=prompt, generate_kwargs={"max_new_tokens": 200})

          if outputs and outputs[0]["generated_text"]:
            match = re.search(r'ASSISTANT:\s*(.*)', outputs[0]["generated_text"])
            reply = match.group(1) if match else "No response found."
            conversation_history.append(("User", input_text))
            conversation_history.append(("Assistant", reply))
            prompt = "USER: " + reply + "\nASSISTANT:"
            return reply  # Only return the first response for now
          else:
            return "No response generated."
  except Exception as e:
    return str(e)
Video to Text
We’ll now create a function to convert videos to text by extracting frames and analyzing them.
#python
def vid2txt(input_text, input_video):
  """Convert video to text by extracting frames and analyzing."""
  try:
    video = mp.VideoFileClip(input_video)
    frame = video.get_frame(1)  # Get a frame from the video at the 1-second mark
    image_path = "temp_frame.jpg"
    mp.ImageClip(frame).save_frame(image_path)
    return img2txt(input_text, image_path)
  except Exception as e:
    return str(e)
Audio Transcription
Let’s add a function to transcribe audio to text using Whisper.
#python
def transcribe(audio_path):
  """Transcribe audio to text using Whisper model."""
  if not audio_path:
    return ''

  audio = whisper.load_audio(audio_path)
  audio = whisper.pad_or_trim(audio)
  mel = whisper.log_mel_spectrogram(audio).to(model.device)
  options = whisper.DecodingOptions()
  result = whisper.decode(model, mel, options)
  return result.text
Text to Speech
Lastly, we create a function to convert text responses into speech.
#python
def text_to_speech(text, file_path):
  """Convert text to speech and save to file."""
  language="en"
  audioobj = gTTS(text=text, lang=language, slow=False)
  audioobj.save(file_path)
  return file_path
With all the necessary functions in place, we can create the main function that ties everything together:
#python

def chatbot_interface(audio_path, image_path, video_path, user_message):
  """Process user inputs and generate chatbot response."""
  global conversation_history

  # Handle audio input
  if audio_path:
    speech_to_text_output = transcribe(audio_path)
  else:
    speech_to_text_output = ""

  # Determine the input message
  input_message = user_message if user_message else speech_to_text_output

  # Ensure input_message is a string
  if isinstance(input_message, tuple):
    input_message = input_message[0]

  # Handle image or video input
  if image_path:
    chatgpt_output = img2txt(input_message, image_path)
  elif video_path:
      chatgpt_output = vid2txt(input_message, video_path)
  else:
    chatgpt_output = "No image or video provided."

  # Add to conversation history
  conversation_history.append(("User", input_message))
  conversation_history.append(("Assistant", chatgpt_output))

  # Generate audio response
  processed_audio_path = text_to_speech(chatgpt_output, "Temp3.mp3")

  return conversation_history, processed_audio_path
Using Gradio For The Interface
The final piece for us is to create the layout and user interface for the app. Again, we’re using Gradio to build that out for quick prototyping purposes.
#python

# Define Gradio interface
iface = gr.Interface(
  fn=chatbot_interface,
  inputs=[
    gr.Audio(type="filepath", label="Record your message"),
    gr.Image(type="filepath", label="Upload an image"),
    gr.Video(label="Upload a video"),
    gr.Textbox(lines=2, placeholder="Type your message here...", label="User message (if no audio)")
  ],
  outputs=[
    gr.Chatbot(label="Conversation"),
    gr.Audio(label="Assistant's Voice Reply")
  ],
  title="Interactive Visual and Voice Assistant",
  description="Upload an image or video, record or type your question, and get detailed responses."
)

# Launch the Gradio app
iface.launch(debug=True)
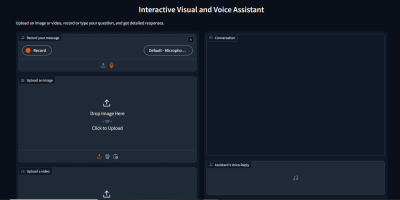
Here, we want to let users record or upload their audio prompts, type their questions if they prefer, upload videos, and, of course, have a conversation block.
Here’s a preview of how the app will look and work:
Looking Beyond LLaVA
LLaVA is a great model, but there are even greater ones that don’t require a separate ASR model to build a similar app. These are called multimodal or “any-to-any” models. They are designed to process and integrate information from multiple modalities, such as text, images, audio, and video. Instead of just combining vision and text, these models can do it all: image-to-text, video-to-text, text-to-speech, speech-to-text, text-to-video, and image-to-audio, just to name a few. It makes everything simpler and less of a hassle.
Examples of Multimodal Models that Handle Images, Text, Audio, and More
Now that we know what multimodal models are, let’s check out some cool examples. You may want to integrate these into your next personal project.
CoDi
So, the first on our list is CoDi or Composable Diffusion. This model is pretty versatile, not sticking to any one type of input or output. It can take in text, images, audio, and video and turn them into different forms of media. Imagine it as a sort of AI that’s not tied down by specific tasks but can handle a mix of data types seamlessly.
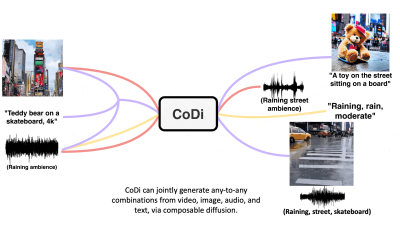
CoDi was developed by researchers from the University of North Carolina and Microsoft Azure. It uses something called Composable Diffusion to sync different types of data, like aligning audio perfectly with the video, and it can generate outputs that weren’t even in the original training data, making it super flexible and innovative.
ImageBind
Now, let’s talk about ImageBind, a model from Meta. This model is like a multitasking genius, capable of binding together data from six different modalities all at once: images, video, audio, text, depth, and even thermal data.
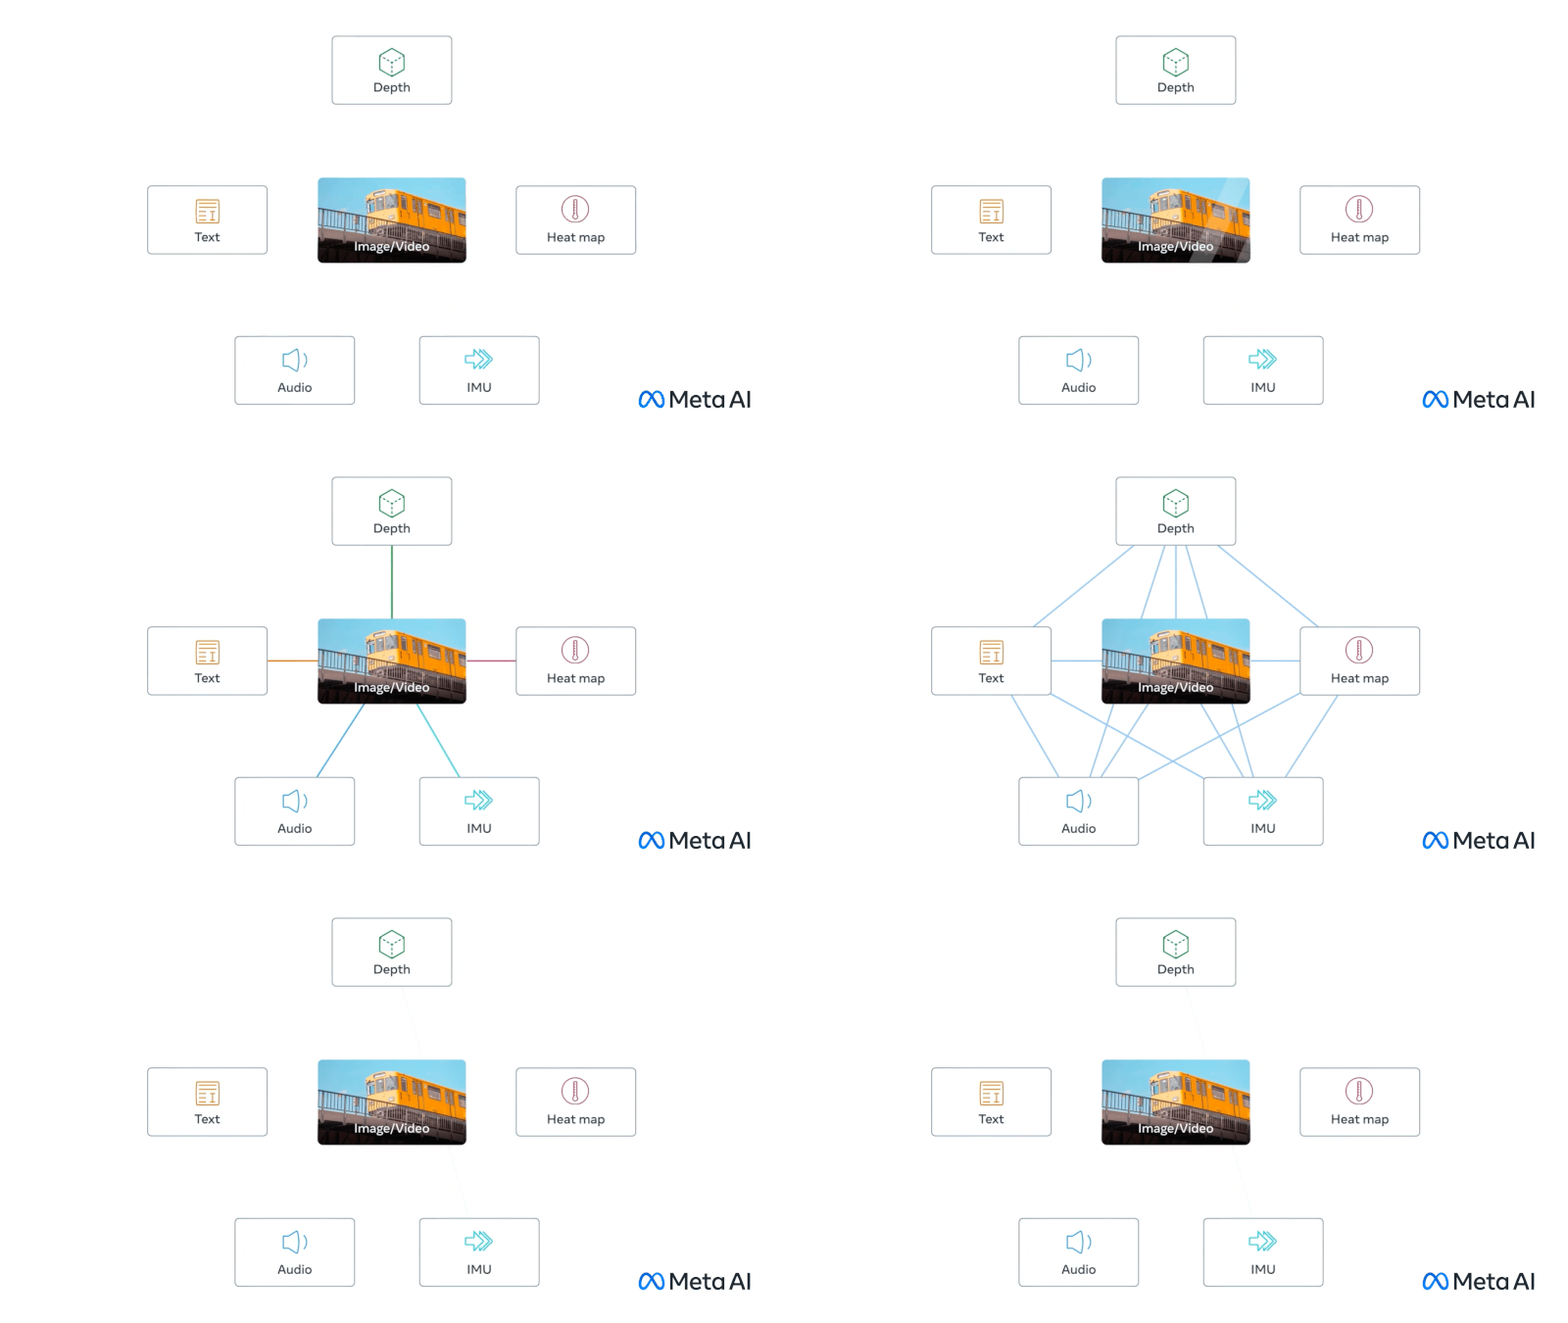
ImageBind doesn’t need explicit supervision to understand how these data types relate. It’s great for creating systems that use multiple types of data to enhance our understanding or create immersive experiences. For example, it could combine 3D sensor data with IMU data to design virtual worlds or enhance memory searches across different media types.
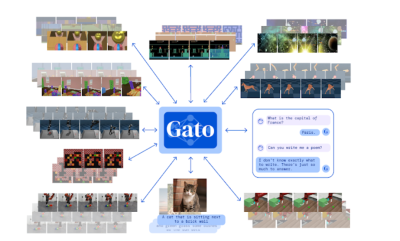
Gato
Gato is another fascinating model. It’s built to be a generalist agent that can handle a wide range of tasks using the same network. Whether it’s playing games, chatting, captioning images, or controlling a robot arm, Gato can do it all.
The key thing about Gato is its ability to switch between different types of tasks and outputs using the same model.
GPT-4o
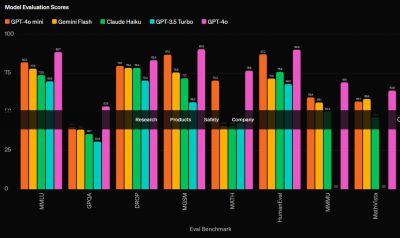
The next on our list is GPT-4o; GPT-4o is a groundbreaking multimodal large language model (MLLM) developed by OpenAI. It can handle any mix of text, audio, image, and video inputs and give you text, audio, and image outputs. It’s super quick, responding to audio inputs in just 232ms to 320ms, almost like a real conversation.
There’s a smaller version of the model called GPT-4o Mini. Small models are becoming a trend, and this one shows that even small models can perform really well. Check out this evaluation to see how the small model stacks up against other large models.
Conclusion
We covered a lot in this article, from setting up LLaVA for handling both images and videos to incorporating Whisper large-v3 for top-notch speech recognition. We also explored the versatility of multimodal models like CoDi or GPT-4o, showcasing their potential to handle various data types and tasks. These models can make your app more robust and capable of handling a range of inputs and outputs seamlessly.
Which model are you planning to use for your next app? Let me know in the comments!
(gg, yk)

